crwdns2933423:0crwdne2933423:0

Microsoft Surface Laptop 7 (13.8-inch) Screen Replacement

crwdns2942213:0crwdne2942213:0

  1. Microsoft Surface Laptop 7 (13.8-inch) Screen Replacement, Prepare your laptop for disassembly: crwdns2935265:01crwdnd2935265:01crwdnd2935265:03crwdne2935265:0 Microsoft Surface Laptop 7 (13.8-inch) Screen Replacement, Prepare your laptop for disassembly: crwdns2935265:01crwdnd2935265:02crwdnd2935265:03crwdne2935265:0 Microsoft Surface Laptop 7 (13.8-inch) Screen Replacement, Prepare your laptop for disassembly: crwdns2935265:01crwdnd2935265:03crwdnd2935265:03crwdne2935265:0
    • Before starting this repair, allow your laptop's battery to drain below 25%. A charged battery may catch fire if damaged.

    • Unplug all cables and fully shut down your laptop.

  2. Microsoft Surface Laptop 7 (13.8-inch) Screen Replacement, Flip your laptop over: crwdns2935265:02crwdnd2935265:01crwdnd2935265:03crwdne2935265:0 Microsoft Surface Laptop 7 (13.8-inch) Screen Replacement, Flip your laptop over: crwdns2935265:02crwdnd2935265:02crwdnd2935265:03crwdne2935265:0 Microsoft Surface Laptop 7 (13.8-inch) Screen Replacement, Flip your laptop over: crwdns2935265:02crwdnd2935265:03crwdnd2935265:03crwdne2935265:0
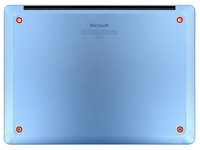
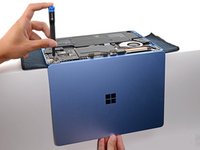
    • Close your laptop and lay it down so the rubber feet are facing up.

  3. Microsoft Surface Laptop 7 (13.8-inch) Screen Replacement, Remove the feet: crwdns2935265:03crwdnd2935265:01crwdnd2935265:03crwdne2935265:0 Microsoft Surface Laptop 7 (13.8-inch) Screen Replacement, Remove the feet: crwdns2935265:03crwdnd2935265:02crwdnd2935265:03crwdne2935265:0 Microsoft Surface Laptop 7 (13.8-inch) Screen Replacement, Remove the feet: crwdns2935265:03crwdnd2935265:03crwdnd2935265:03crwdne2935265:0
    • Gently slide one arm of your angled tweezers into the recess near the upper right edge of one of the feet.

    • You can also use the point of a spudger. However, you're more likely to damage the foot, if you're reusing it.

    • Use your tweezers to pry up and remove the foot.

    • The feet may eject very quickly—be careful not to lose them.

    • Repeat the process to remove the remaining feet.

    • To install a foot, align the pegs on the bottom with their cutouts in the frame and press the foot into place.

  4. Microsoft Surface Laptop 7 (13.8-inch) Screen Replacement, Remove the lower case screws: crwdns2935265:04crwdnd2935265:01crwdnd2935265:02crwdne2935265:0 Microsoft Surface Laptop 7 (13.8-inch) Screen Replacement, Remove the lower case screws: crwdns2935265:04crwdnd2935265:02crwdnd2935265:02crwdne2935265:0
    crwdns2935267:0crwdne2935267:0
    FixMat
    $36.95
    • Throughout this repair, keep track of each screw and make sure it goes back exactly where it came from.

    • While the Surface Laptop 7 uses Torx Plus screws, standard Torx bits work. Make sure to apply constant, downward force to prevent stripping.

    • Use a Torx Plus 5IP screwdriver to remove the four 4.5 mm‑long screws (with washers) securing the lower case.

  5. Microsoft Surface Laptop 7 (13.8-inch) Screen Replacement, Detach the lower case: crwdns2935265:05crwdnd2935265:01crwdnd2935265:03crwdne2935265:0 Microsoft Surface Laptop 7 (13.8-inch) Screen Replacement, Detach the lower case: crwdns2935265:05crwdnd2935265:02crwdnd2935265:03crwdne2935265:0 Microsoft Surface Laptop 7 (13.8-inch) Screen Replacement, Detach the lower case: crwdns2935265:05crwdnd2935265:03crwdnd2935265:03crwdne2935265:0
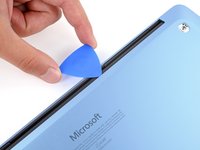
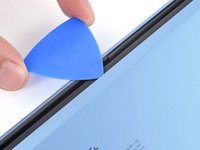
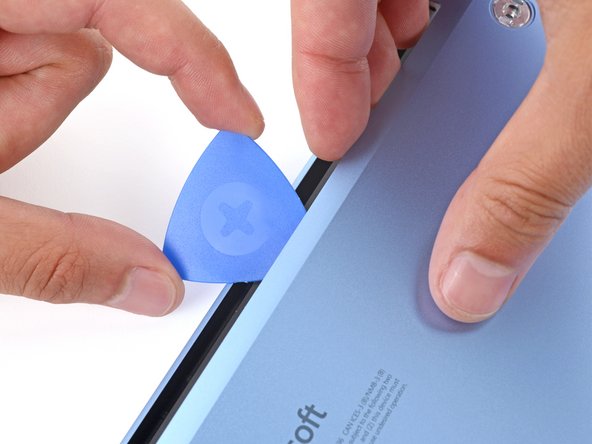
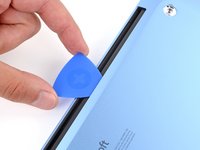
    • Insert the tip of an opening pick under the top edge of the lower case, about an inch (2.5 cm) to the left or right of the Microsoft logo.

    • Don't insert the pick near the outer edges or you'll damage the antenna bar.

  6. Microsoft Surface Laptop 7 (13.8-inch) Screen Replacement: crwdns2935265:06crwdnd2935265:01crwdnd2935265:03crwdne2935265:0 Microsoft Surface Laptop 7 (13.8-inch) Screen Replacement: crwdns2935265:06crwdnd2935265:02crwdnd2935265:03crwdne2935265:0 Microsoft Surface Laptop 7 (13.8-inch) Screen Replacement: crwdns2935265:06crwdnd2935265:03crwdnd2935265:03crwdne2935265:0
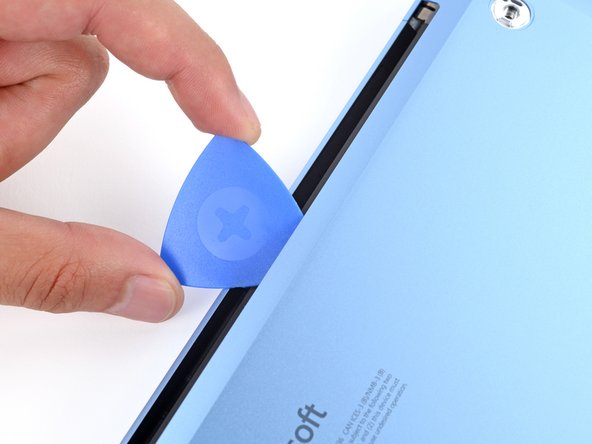
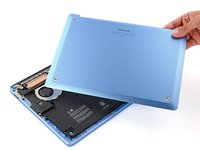
    • Twist the pick to lift the lower case enough that you can grip it with your hand.

  7. Microsoft Surface Laptop 7 (13.8-inch) Screen Replacement, Remove the lower case: crwdns2935265:07crwdnd2935265:01crwdnd2935265:03crwdne2935265:0 Microsoft Surface Laptop 7 (13.8-inch) Screen Replacement, Remove the lower case: crwdns2935265:07crwdnd2935265:02crwdnd2935265:03crwdne2935265:0 Microsoft Surface Laptop 7 (13.8-inch) Screen Replacement, Remove the lower case: crwdns2935265:07crwdnd2935265:03crwdnd2935265:03crwdne2935265:0
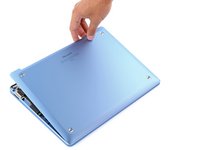
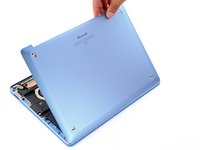
    • Lift the lower case and remove it.

  8. Microsoft Surface Laptop 7 (13.8-inch) Screen Replacement, Disconnect the battery: crwdns2935265:08crwdnd2935265:01crwdnd2935265:03crwdne2935265:0 Microsoft Surface Laptop 7 (13.8-inch) Screen Replacement, Disconnect the battery: crwdns2935265:08crwdnd2935265:02crwdnd2935265:03crwdne2935265:0 Microsoft Surface Laptop 7 (13.8-inch) Screen Replacement, Disconnect the battery: crwdns2935265:08crwdnd2935265:03crwdnd2935265:03crwdne2935265:0
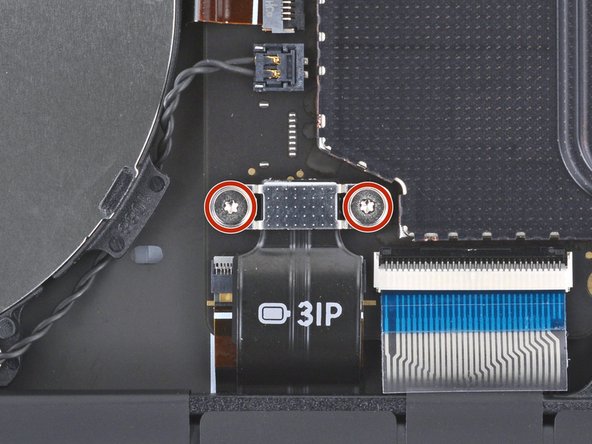
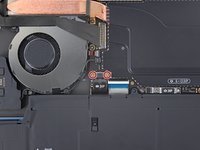
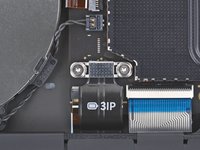
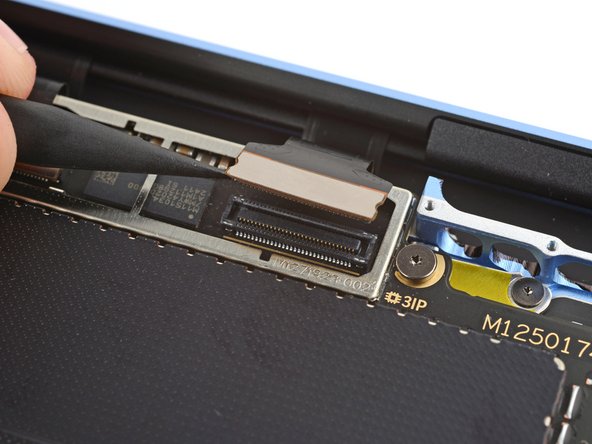
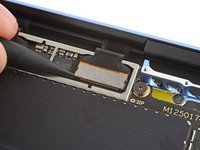
    • Use a Torx Plus 3IP screwdriver to remove the two 2.3 mm‑long screws securing the battery connector cover.

  9. Microsoft Surface Laptop 7 (13.8-inch) Screen Replacement: crwdns2935265:09crwdnd2935265:01crwdnd2935265:02crwdne2935265:0 Microsoft Surface Laptop 7 (13.8-inch) Screen Replacement: crwdns2935265:09crwdnd2935265:02crwdnd2935265:02crwdne2935265:0
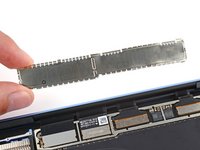
    • Use tweezers or your fingers to remove the battery connector cover.

  10. Microsoft Surface Laptop 7 (13.8-inch) Screen Replacement: crwdns2935265:010crwdnd2935265:01crwdnd2935265:02crwdne2935265:0 Microsoft Surface Laptop 7 (13.8-inch) Screen Replacement: crwdns2935265:010crwdnd2935265:02crwdnd2935265:02crwdne2935265:0
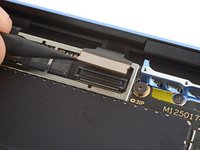
    • Insert the flat end of a spudger under the top edge of the battery press connector and pry up to disconnect it.

    • To reconnect a press connector, align it over the socket and gently press down on one side until it clicks into place, then press down on the other side. It may take a few tries to align the connector—don't try to force it into place.

  11. Microsoft Surface Laptop 7 (13.8-inch) Screen Replacement, Remove the audio jack cover: crwdns2935265:011crwdnd2935265:01crwdnd2935265:02crwdne2935265:0 Microsoft Surface Laptop 7 (13.8-inch) Screen Replacement, Remove the audio jack cover: crwdns2935265:011crwdnd2935265:02crwdnd2935265:02crwdne2935265:0
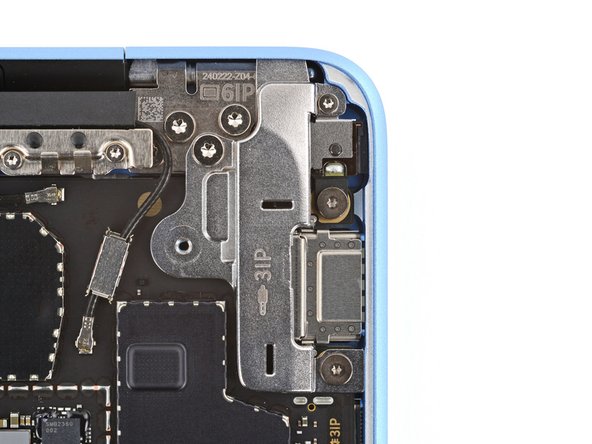
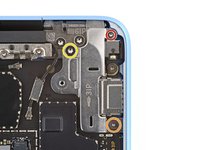
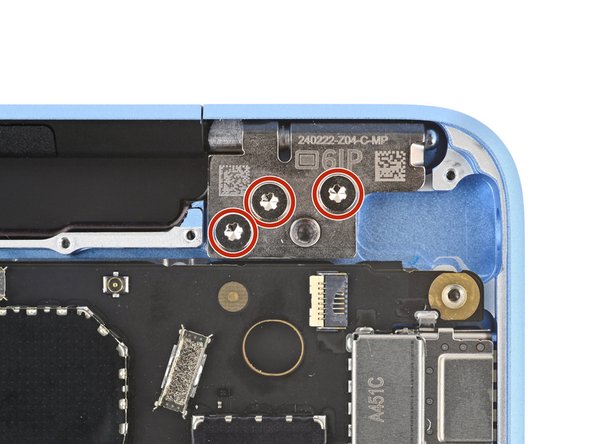
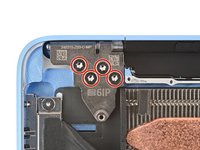
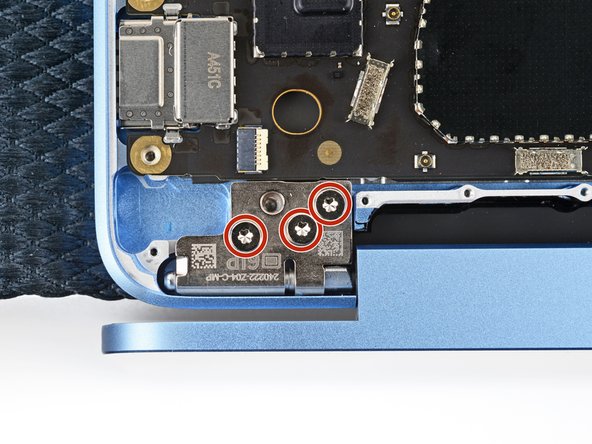
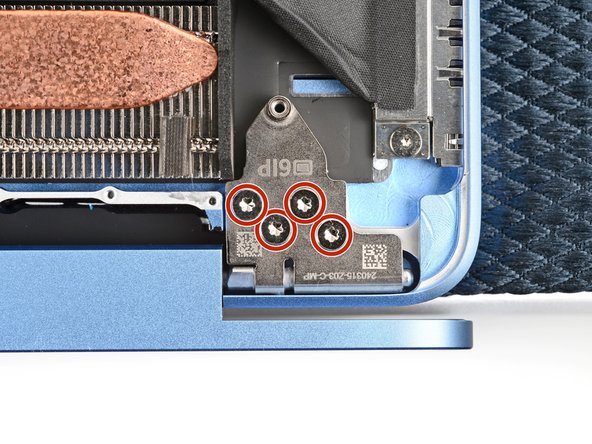
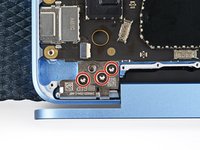
    • Use a Torx Plus 3IP screwdriver to remove the two screws from the right edge of the audio jack cover:

    • One 3 mm‑long screw in the top right corner

    • One 4.7 mm‑long screw in the bottom right corner

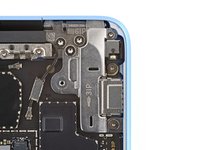
    • Use a Torx Plus 6IP screwdriver to remove the remaining 6.3 mm‑long screw in the top left corner.

  12. Microsoft Surface Laptop 7 (13.8-inch) Screen Replacement: crwdns2935265:012crwdnd2935265:01crwdnd2935265:02crwdne2935265:0 Microsoft Surface Laptop 7 (13.8-inch) Screen Replacement: crwdns2935265:012crwdnd2935265:02crwdnd2935265:02crwdne2935265:0
    • Remove the audio jack cover.

  13. Microsoft Surface Laptop 7 (13.8-inch) Screen Replacement, Disconnect the audio jack: crwdns2935265:013crwdnd2935265:01crwdnd2935265:03crwdne2935265:0 Microsoft Surface Laptop 7 (13.8-inch) Screen Replacement, Disconnect the audio jack: crwdns2935265:013crwdnd2935265:02crwdnd2935265:03crwdne2935265:0 Microsoft Surface Laptop 7 (13.8-inch) Screen Replacement, Disconnect the audio jack: crwdns2935265:013crwdnd2935265:03crwdnd2935265:03crwdne2935265:0
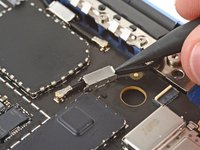
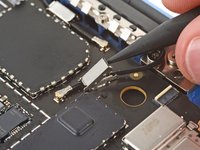
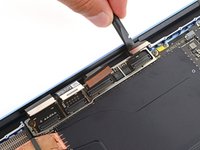
    • Use a spudger to lift the hinged locking flap on the audio jack ZIF connector.

    • Use tweezers to grip the audio jack cable's pull tab and slide the cable out of its socket.

  14. Microsoft Surface Laptop 7 (13.8-inch) Screen Replacement, Remove the audio jack: crwdns2935265:014crwdnd2935265:01crwdnd2935265:03crwdne2935265:0 Microsoft Surface Laptop 7 (13.8-inch) Screen Replacement, Remove the audio jack: crwdns2935265:014crwdnd2935265:02crwdnd2935265:03crwdne2935265:0 Microsoft Surface Laptop 7 (13.8-inch) Screen Replacement, Remove the audio jack: crwdns2935265:014crwdnd2935265:03crwdnd2935265:03crwdne2935265:0
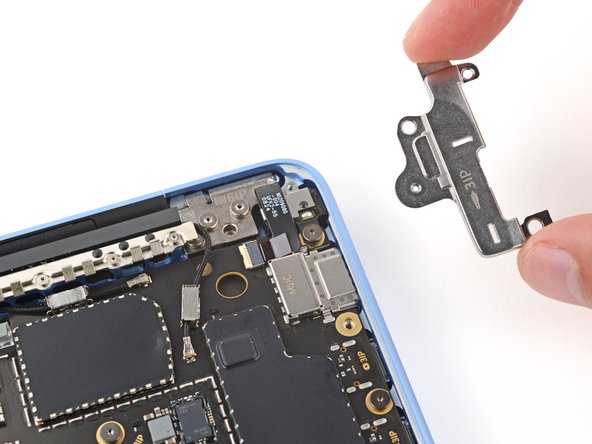
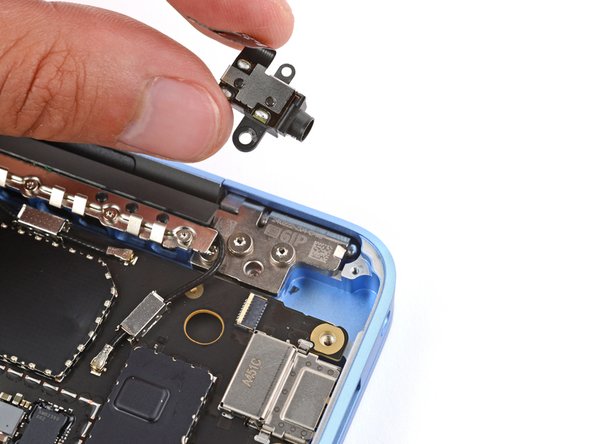
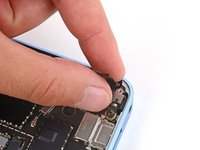
    • Slide the audio jack out of its recess and remove it.

    • During reassembly, insert the audio jack into its recess and push the jack into its cutout on the frame. Make sure the port is fully in its cutout—the outer edge should be flush with the frame.

  15. Microsoft Surface Laptop 7 (13.8-inch) Screen Replacement, Disconnect the antenna cables: crwdns2935265:015crwdnd2935265:01crwdnd2935265:03crwdne2935265:0 Microsoft Surface Laptop 7 (13.8-inch) Screen Replacement, Disconnect the antenna cables: crwdns2935265:015crwdnd2935265:02crwdnd2935265:03crwdne2935265:0 Microsoft Surface Laptop 7 (13.8-inch) Screen Replacement, Disconnect the antenna cables: crwdns2935265:015crwdnd2935265:03crwdnd2935265:03crwdne2935265:0
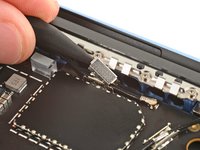
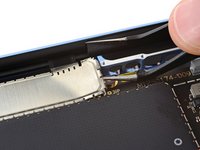
    • Use the point of a spudger to pry up and remove the two antenna cable covers from the top right corner of the motherboard.

    • The covers can eject unexpectedly—be careful not to lose them.

  16. Microsoft Surface Laptop 7 (13.8-inch) Screen Replacement: crwdns2935265:016crwdnd2935265:01crwdnd2935265:03crwdne2935265:0 Microsoft Surface Laptop 7 (13.8-inch) Screen Replacement: crwdns2935265:016crwdnd2935265:02crwdnd2935265:03crwdne2935265:0 Microsoft Surface Laptop 7 (13.8-inch) Screen Replacement: crwdns2935265:016crwdnd2935265:03crwdnd2935265:03crwdne2935265:0
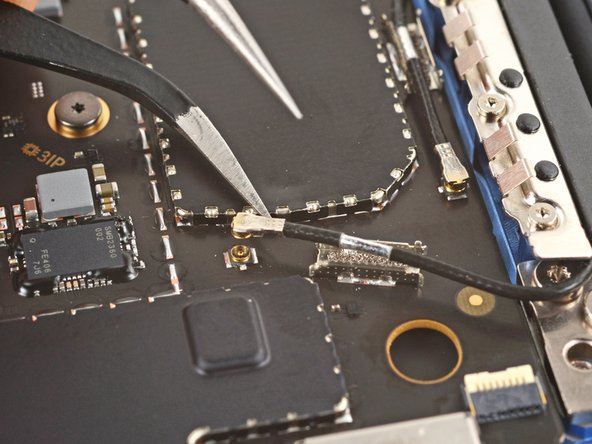
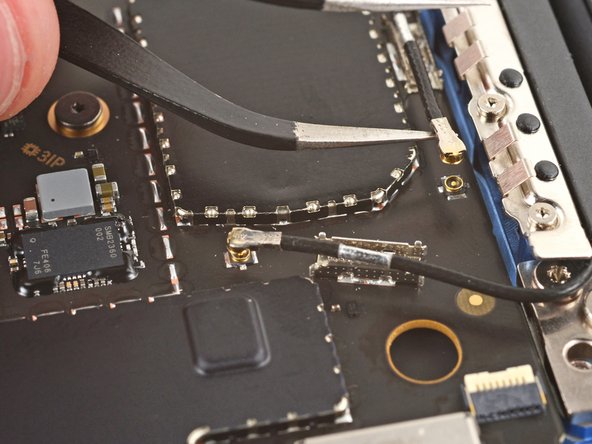
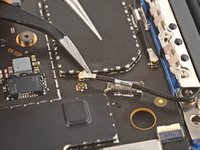
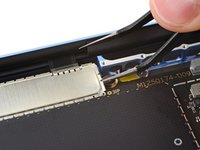
    • Slide one arm of a pair of angled tweezers under the metal neck of one of the antenna cable coaxial connectors and lift straight up to disconnect it.

    • Lift only under the metal section of the connector, and not under the cable itself.

    • Repeat the process to disconnect the other antenna cable.

    • To reconnect the cables, use tweezers to hold the connector in place over its socket and gently press down with your finger or a spudger—the connector should "snap" into place. If you're having trouble, reposition the head and try again. Don't try to force the connector into place.

  17. Microsoft Surface Laptop 7 (13.8-inch) Screen Replacement, Remove the antenna bar: crwdns2935265:017crwdnd2935265:01crwdnd2935265:03crwdne2935265:0 Microsoft Surface Laptop 7 (13.8-inch) Screen Replacement, Remove the antenna bar: crwdns2935265:017crwdnd2935265:02crwdnd2935265:03crwdne2935265:0 Microsoft Surface Laptop 7 (13.8-inch) Screen Replacement, Remove the antenna bar: crwdns2935265:017crwdnd2935265:03crwdnd2935265:03crwdne2935265:0
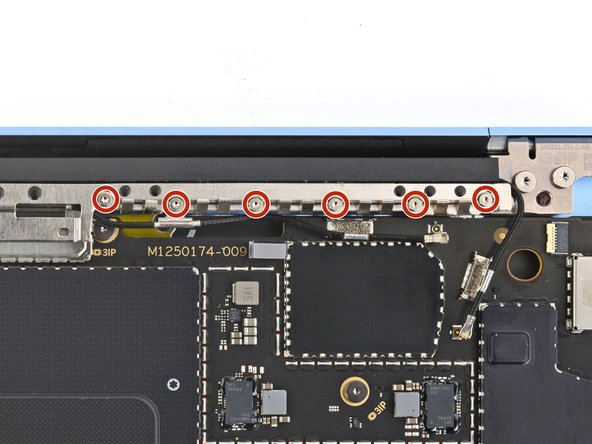
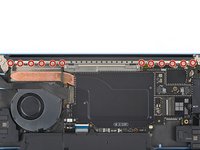
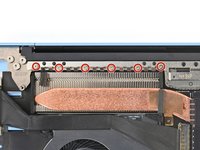
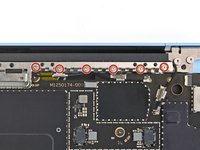
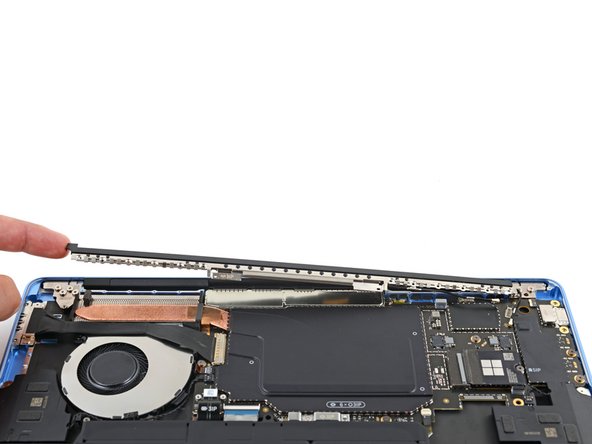
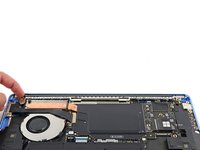
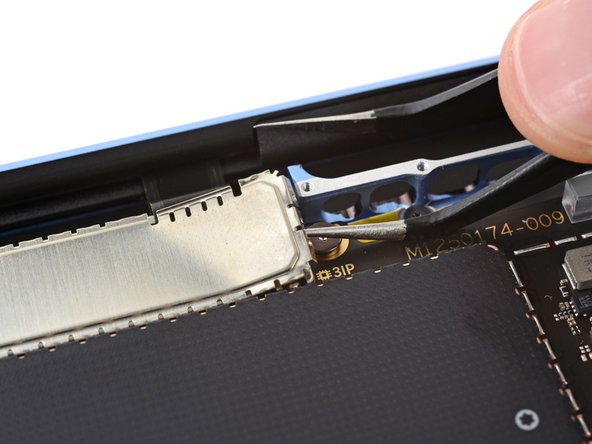
    • Use a Torx Plus 3IP screwdriver to remove the twelve 2.4 mm‑long screws securing the antenna bar.

  18. Microsoft Surface Laptop 7 (13.8-inch) Screen Replacement: crwdns2935265:018crwdnd2935265:01crwdnd2935265:03crwdne2935265:0 Microsoft Surface Laptop 7 (13.8-inch) Screen Replacement: crwdns2935265:018crwdnd2935265:02crwdnd2935265:03crwdne2935265:0 Microsoft Surface Laptop 7 (13.8-inch) Screen Replacement: crwdns2935265:018crwdnd2935265:03crwdnd2935265:03crwdne2935265:0
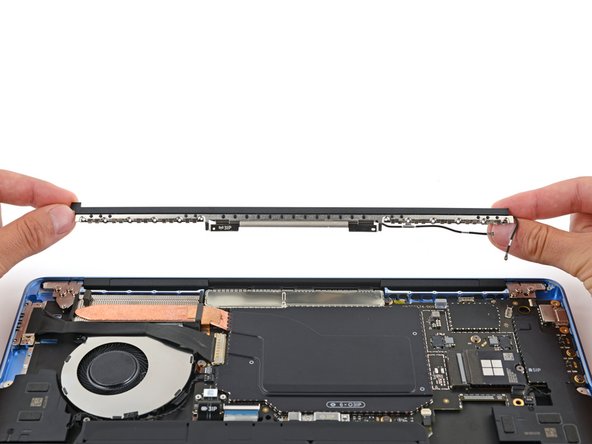
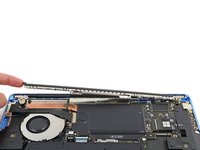
    • Use your fingers to lift and remove the antenna bar.

  19. Microsoft Surface Laptop 7 (13.8-inch) Screen Replacement, Remove the display cable shield: crwdns2935265:019crwdnd2935265:01crwdnd2935265:02crwdne2935265:0 Microsoft Surface Laptop 7 (13.8-inch) Screen Replacement, Remove the display cable shield: crwdns2935265:019crwdnd2935265:02crwdnd2935265:02crwdne2935265:0
    • When removing the display cable shield in the next few steps, try to deform the shield as little as possible. You'll reuse it during reassembly.

    • Don't insert your tool anywhere along the top edge of the shield, or you may damage the display cables.

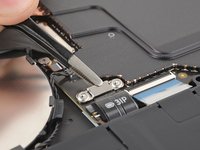
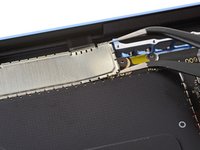
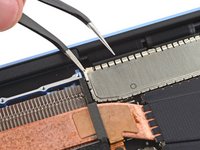
    • Slide an arm of a pair of angled tweezers into one of the gaps on the right edge of the display cable shield.

    • Gently pry the shield up to begin unclipping it.

  20. Microsoft Surface Laptop 7 (13.8-inch) Screen Replacement: crwdns2935265:020crwdnd2935265:01crwdnd2935265:03crwdne2935265:0 Microsoft Surface Laptop 7 (13.8-inch) Screen Replacement: crwdns2935265:020crwdnd2935265:02crwdnd2935265:03crwdne2935265:0 Microsoft Surface Laptop 7 (13.8-inch) Screen Replacement: crwdns2935265:020crwdnd2935265:03crwdnd2935265:03crwdne2935265:0
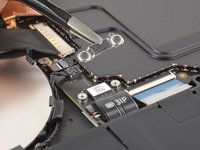
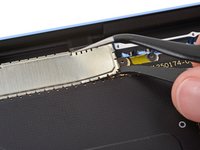
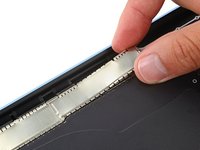
    • Slide an arm of your tweezers under the bottom edge of the display cable shield, closest to the right edge.

    • Twist your tweezers and pry up to further unclip the shield.

  21. Microsoft Surface Laptop 7 (13.8-inch) Screen Replacement: crwdns2935265:021crwdnd2935265:01crwdnd2935265:02crwdne2935265:0 Microsoft Surface Laptop 7 (13.8-inch) Screen Replacement: crwdns2935265:021crwdnd2935265:02crwdnd2935265:02crwdne2935265:0
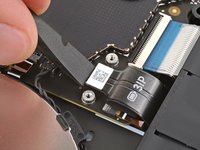
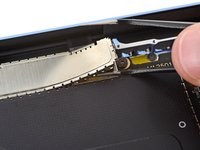
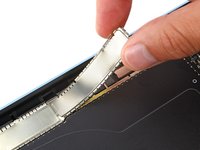
    • Use the same process to unclip the left side of the shield.

  22. Microsoft Surface Laptop 7 (13.8-inch) Screen Replacement: crwdns2935265:022crwdnd2935265:01crwdnd2935265:03crwdne2935265:0 Microsoft Surface Laptop 7 (13.8-inch) Screen Replacement: crwdns2935265:022crwdnd2935265:02crwdnd2935265:03crwdne2935265:0 Microsoft Surface Laptop 7 (13.8-inch) Screen Replacement: crwdns2935265:022crwdnd2935265:03crwdnd2935265:03crwdne2935265:0
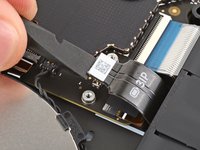
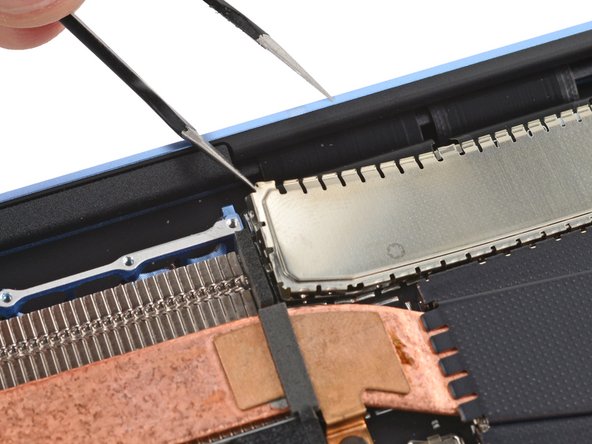
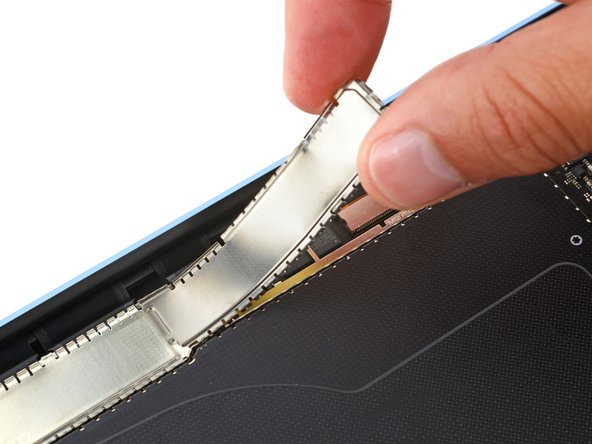
    • Use your fingers to gently lift and unclip the right side of the shield.

    • Grip the left side of the shield with your fingers and fully remove it.

    • If the shield feels stuck, use your tweezers to unclip the area that's stuck.

  23. Microsoft Surface Laptop 7 (13.8-inch) Screen Replacement, Disconnect the display cables: crwdns2935265:023crwdnd2935265:01crwdnd2935265:02crwdne2935265:0 Microsoft Surface Laptop 7 (13.8-inch) Screen Replacement, Disconnect the display cables: crwdns2935265:023crwdnd2935265:02crwdnd2935265:02crwdne2935265:0
    • The metal housing around the display cables makes it hard to disconnect them. Insert your tool under the bottom corner on the side that has the most room to work.

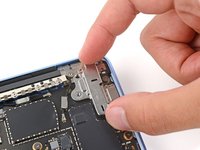
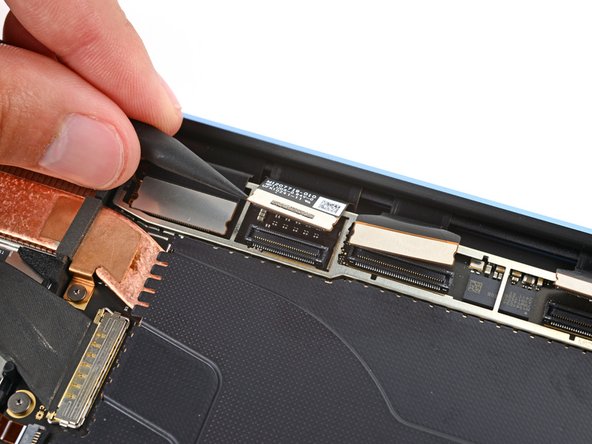
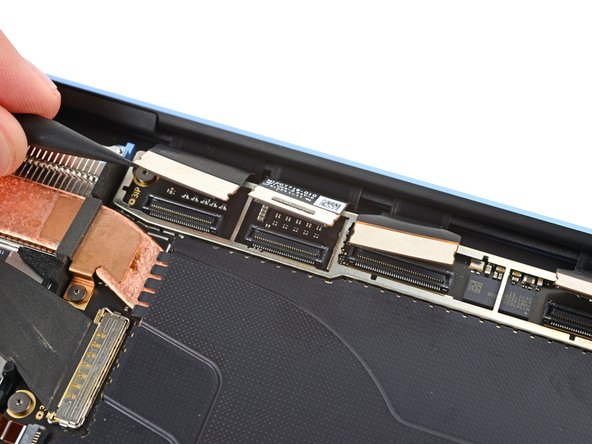
    • Insert the point of a spudger under the bottom left corner of the rightmost display cable press‑connector and pry up to disconnect it.

  24. Microsoft Surface Laptop 7 (13.8-inch) Screen Replacement: crwdns2935265:024crwdnd2935265:01crwdnd2935265:03crwdne2935265:0 Microsoft Surface Laptop 7 (13.8-inch) Screen Replacement: crwdns2935265:024crwdnd2935265:02crwdnd2935265:03crwdne2935265:0 Microsoft Surface Laptop 7 (13.8-inch) Screen Replacement: crwdns2935265:024crwdnd2935265:03crwdnd2935265:03crwdne2935265:0
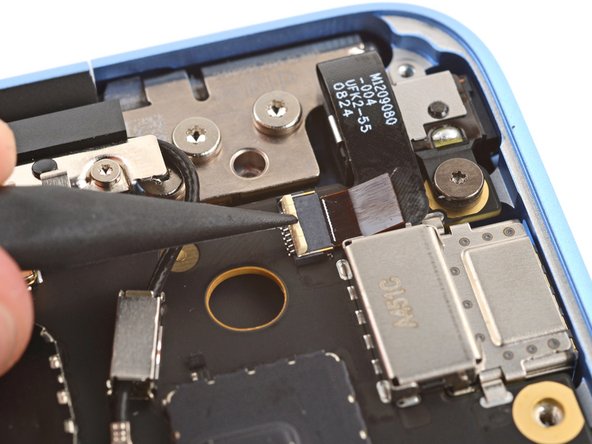
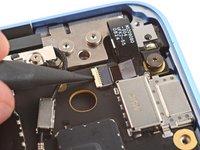
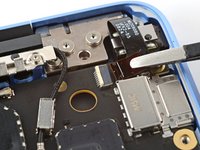
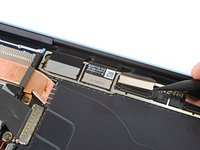
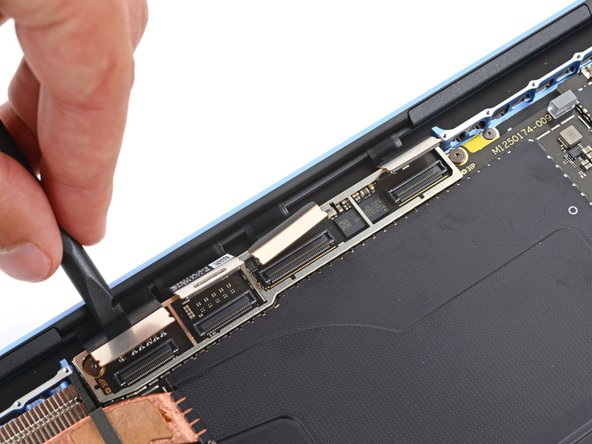
    • Use the point of a spudger to disconnect the three remaining display cable press‑connectors.

  25. Microsoft Surface Laptop 7 (13.8-inch) Screen Replacement, Reassembly information: crwdns2935265:025crwdnd2935265:01crwdnd2935265:03crwdne2935265:0 Microsoft Surface Laptop 7 (13.8-inch) Screen Replacement, Reassembly information: crwdns2935265:025crwdnd2935265:02crwdnd2935265:03crwdne2935265:0 Microsoft Surface Laptop 7 (13.8-inch) Screen Replacement, Reassembly information: crwdns2935265:025crwdnd2935265:03crwdnd2935265:03crwdne2935265:0
    • During reassembly, use the flat end of a spudger to gently push all four display cables under the motherboard.

  26. Microsoft Surface Laptop 7 (13.8-inch) Screen Replacement, Loosen the hinge screws: crwdns2935265:026crwdnd2935265:01crwdnd2935265:02crwdne2935265:0 Microsoft Surface Laptop 7 (13.8-inch) Screen Replacement, Loosen the hinge screws: crwdns2935265:026crwdnd2935265:02crwdnd2935265:02crwdne2935265:0
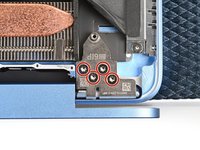
    • Use a Torx Plus 6IP screwdriver to loosen (not remove) the seven hinge screws.

  27. Microsoft Surface Laptop 7 (13.8-inch) Screen Replacement: crwdns2935265:027crwdnd2935265:01crwdnd2935265:02crwdne2935265:0 Microsoft Surface Laptop 7 (13.8-inch) Screen Replacement: crwdns2935265:027crwdnd2935265:02crwdnd2935265:02crwdne2935265:0
    • Open your laptop 90 degrees and gently place it keyboard side down on a table, so the screen hangs over the edge.

    • Optionally, you can place a soft cloth under your keyboard to protect it.

  28. Microsoft Surface Laptop 7 (13.8-inch) Screen Replacement, Remove the hinge screws: crwdns2935265:028crwdnd2935265:01crwdnd2935265:03crwdne2935265:0 Microsoft Surface Laptop 7 (13.8-inch) Screen Replacement, Remove the hinge screws: crwdns2935265:028crwdnd2935265:02crwdnd2935265:03crwdne2935265:0 Microsoft Surface Laptop 7 (13.8-inch) Screen Replacement, Remove the hinge screws: crwdns2935265:028crwdnd2935265:03crwdnd2935265:03crwdne2935265:0
    • Keep a firm grip on your laptop, as it can easily fall off the table.

    • Support the screen with one hand and use your free hand to remove the seven 6.3 mm‑long Torx Plus 6IP screws securing the hinges.

  29. Microsoft Surface Laptop 7 (13.8-inch) Screen Replacement, Remove the screen: crwdns2935265:029crwdnd2935265:01crwdnd2935265:03crwdne2935265:0 Microsoft Surface Laptop 7 (13.8-inch) Screen Replacement, Remove the screen: crwdns2935265:029crwdnd2935265:02crwdnd2935265:03crwdne2935265:0 Microsoft Surface Laptop 7 (13.8-inch) Screen Replacement, Remove the screen: crwdns2935265:029crwdnd2935265:03crwdnd2935265:03crwdne2935265:0
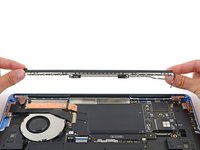
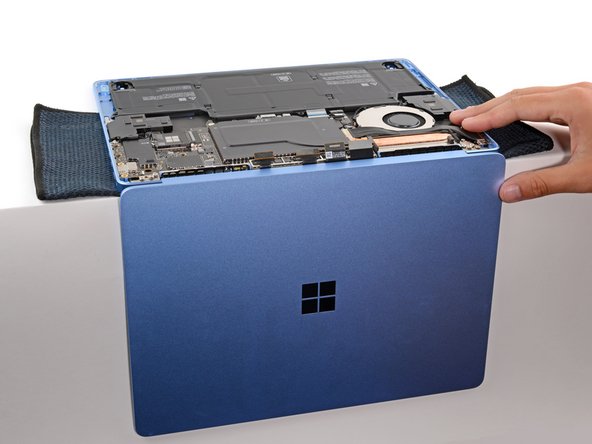
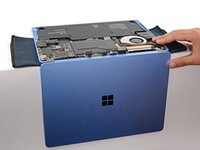
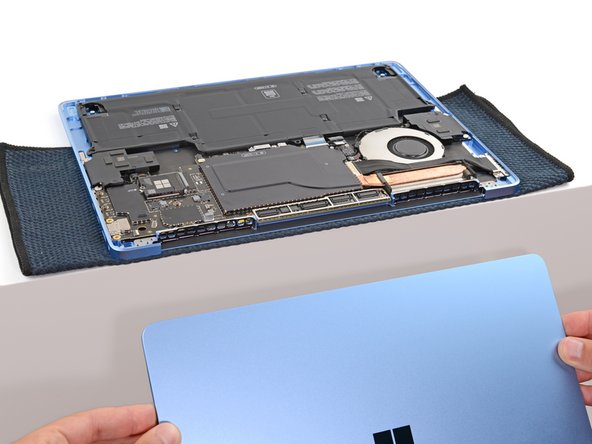
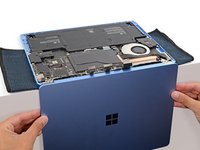
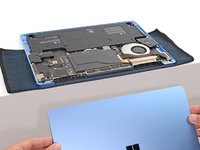
    • Hold the screen with both hands and lift the hinges out of their recesses to remove the screen.

    • During reassembly:

    • Make sure the screen hinges are open 90 degrees and guide them into their recesses in the frame.

    • Install and partially tighten the seven hinge screws.

    • Close your laptop and make sure the screen is properly aligned. If it clicks or snaps, readjust the alignment.

    • Fully tighten the hinge screws.

crwdns2915888:0crwdne2915888:0

To reassemble your device, follow these instructions in reverse order.

Take your e-waste to an R2 or e-Stewards certified recycler.

Repair didn’t go as planned? Try some basic troubleshooting, or ask our Answers community for help.

Spencer Day

crwdns2935283:009/14/22crwdne2935283:0

99,296 crwdns2915208:0crwdne2915208:0

crwdns2935297:0694crwdne2935297:0

crwdns2915084:0crwdne2915084:0

iFixit crwdns2935289:0iFixitcrwdne2935289:0

Staff

crwdns2931471:0121crwdne2931471:0

crwdns2935297:019,716crwdne2935297:0

crwdns2947412:00crwdne2947412:0

crwdns2917038:0crwdne2917038:0

crwdns2936625:0crwdne2936625:0:

crwdns2936751:024crwdne2936751:0 13

crwdns2936753:07crwdne2936753:0 33

crwdns2936753:030crwdne2936753:0 134

crwdns2942667:0crwdne2942667:0 755