crwdns2933423:0crwdne2933423:0
crwdns2947577:0crwdnd2947577:0crwdne2947577:0

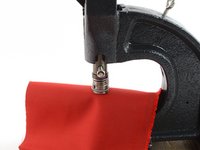
Metal Snap Installation Using a Hand Press

crwdns2942213:0crwdne2942213:0

    1. Metal Snap Installation Using a Hand Press, Metal snap types: crwdns2935265:01crwdnd2935265:01crwdnd2935265:02crwdne2935265:0 Metal Snap Installation Using a Hand Press, Metal snap types: crwdns2935265:01crwdnd2935265:02crwdnd2935265:02crwdne2935265:0
      • There are two main styles of metal snaps on Patagonia gear:

      • Flat Spring Snap - This style is commonly found on clothing because it snaps and unsnaps smoothly.

      • Durable Socket Snap - This style is commonly found on packs and luggage because it has thicker metal that can withstand heavy use.

      • Each piece of the snap has its own corresponding snap die. Make sure you use the correct size and style of snap.

      crwdns2952109:0crwdne2952109:0

      crwdns2917038:0crwdne2917038:0

    2. Metal Snap Installation Using a Hand Press, Gather the pieces for a metal snap base: crwdns2935265:02crwdnd2935265:01crwdnd2935265:02crwdne2935265:0 Metal Snap Installation Using a Hand Press, Gather the pieces for a metal snap base: crwdns2935265:02crwdnd2935265:02crwdnd2935265:02crwdne2935265:0
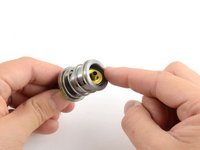
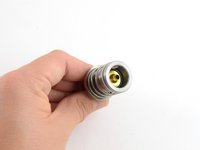
      • This tutorial will demonstrate with the Durable Socket Snap, but the same actions can be applied to the Flat Spring Snap.

      • Gather the stud and post pieces and their corresponding dies.

      • The stud and post are compressed together with the press to create the base of the snap.

      crwdns2952109:0crwdne2952109:0

      crwdns2917038:0crwdne2917038:0

    3. Metal Snap Installation Using a Hand Press, Insert the post into the post die: crwdns2935265:03crwdnd2935265:01crwdnd2935265:03crwdne2935265:0 Metal Snap Installation Using a Hand Press, Insert the post into the post die: crwdns2935265:03crwdnd2935265:02crwdnd2935265:03crwdne2935265:0 Metal Snap Installation Using a Hand Press, Insert the post into the post die: crwdns2935265:03crwdnd2935265:03crwdnd2935265:03crwdne2935265:0
      • Insert the post piece into the post die so the flat part of the post sits inside the die with the shaft pointed out.

      crwdns2952109:0crwdne2952109:0

      crwdns2917038:0crwdne2917038:0

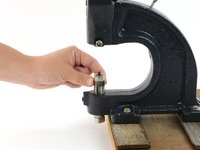
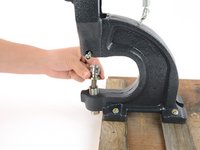
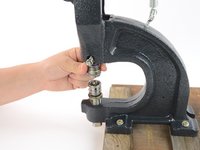
    4. Metal Snap Installation Using a Hand Press, Insert the post die into the hand press: crwdns2935265:04crwdnd2935265:01crwdnd2935265:02crwdne2935265:0 Metal Snap Installation Using a Hand Press, Insert the post die into the hand press: crwdns2935265:04crwdnd2935265:02crwdnd2935265:02crwdne2935265:0
      • Insert the post die into the lower fitting of the hand press.

      crwdns2952109:0crwdne2952109:0

      crwdns2917038:0crwdne2917038:0

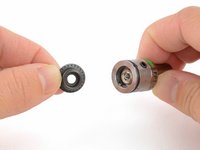
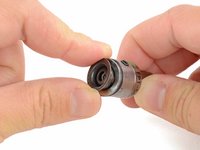
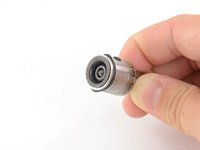
    5. Metal Snap Installation Using a Hand Press, Insert the stud into the stud die: crwdns2935265:05crwdnd2935265:01crwdnd2935265:03crwdne2935265:0 Metal Snap Installation Using a Hand Press, Insert the stud into the stud die: crwdns2935265:05crwdnd2935265:02crwdnd2935265:03crwdne2935265:0 Metal Snap Installation Using a Hand Press, Insert the stud into the stud die: crwdns2935265:05crwdnd2935265:03crwdnd2935265:03crwdne2935265:0
      • Insert the stud piece into the stud die until it snaps into place.

      crwdns2952109:0crwdne2952109:0

      crwdns2917038:0crwdne2917038:0

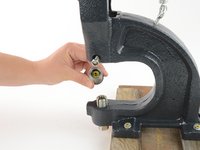
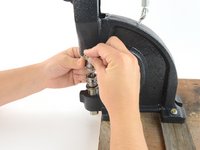
    6. Metal Snap Installation Using a Hand Press, Insert the stud die into the hand press: crwdns2935265:06crwdnd2935265:01crwdnd2935265:03crwdne2935265:0 Metal Snap Installation Using a Hand Press, Insert the stud die into the hand press: crwdns2935265:06crwdnd2935265:02crwdnd2935265:03crwdne2935265:0 Metal Snap Installation Using a Hand Press, Insert the stud die into the hand press: crwdns2935265:06crwdnd2935265:03crwdnd2935265:03crwdne2935265:0
      • Using your fingers, a screwdriver, or a hex key, as needed, unscrew the tightening mechanism on the side of the press near the die fitting.

      • Insert the die upward and hold it in place.

      • Tighten the tightening mechanism.

      crwdns2952109:0crwdne2952109:0

      crwdns2917038:0crwdne2917038:0

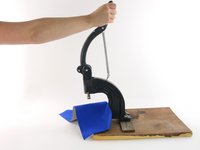
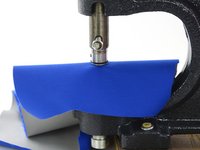
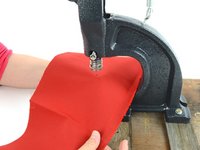
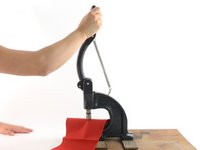
    7. Metal Snap Installation Using a Hand Press, Install the snap base: crwdns2935265:07crwdnd2935265:01crwdnd2935265:03crwdne2935265:0 Metal Snap Installation Using a Hand Press, Install the snap base: crwdns2935265:07crwdnd2935265:02crwdnd2935265:03crwdne2935265:0 Metal Snap Installation Using a Hand Press, Install the snap base: crwdns2935265:07crwdnd2935265:03crwdnd2935265:03crwdne2935265:0
      • Lay the item to be repaired into the hand press so that the hole from the original snap rests directly above the shaft of the post.

      • If the fabric around the old snap is torn or damaged beyond a small hole, apply a patch to reinforce the area before replacing the snap.

      • Make sure no extra fabric is caught inside the press and that the orientation of the item is correct.

      • Hold the fabric in place with one hand, then use your other hand to pull down the handle of the press.

      • This requires a lot of pressure to make sure the snap replacement is successful - so pull hard!

      crwdns2952109:0crwdne2952109:0

      crwdns2917038:0crwdne2917038:0

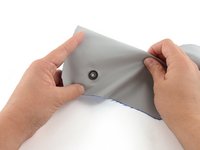
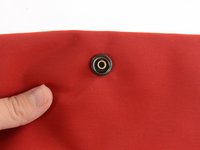
    8. Metal Snap Installation Using a Hand Press, Quality control: crwdns2935265:08crwdnd2935265:01crwdnd2935265:02crwdne2935265:0 Metal Snap Installation Using a Hand Press, Quality control: crwdns2935265:08crwdnd2935265:02crwdnd2935265:02crwdne2935265:0
      • Release the handle of the hand press and remove the fabric.

      • Inspect both sides of the snap to make sure:

      • It is not cracked, crushed, or misshapen.

      • It's laying flat and flush up against the fabric.

      • It doesn't spin in place.

      • It fastens together securely with the head of the snap.

      • If the snap isn't set all the way, reinsert the snap into the hand press, aligning it as it was before, and pull the handle again.

      crwdns2952109:0crwdne2952109:0

      crwdns2917038:0crwdne2917038:0

    9. Metal Snap Installation Using a Hand Press, Gather the pieces for a metal snap head: crwdns2935265:09crwdnd2935265:01crwdnd2935265:02crwdne2935265:0 Metal Snap Installation Using a Hand Press, Gather the pieces for a metal snap head: crwdns2935265:09crwdnd2935265:02crwdnd2935265:02crwdne2935265:0
      • This tutorial will demonstrate with the Durable Socket Snap, but the same actions can be applied to the Flat Spring Snap.

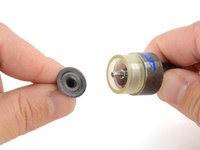
      • Gather the socket and cap pieces and their corresponding dies.

      • The socket and cap are compressed together with the press to create the head of the snap.

      crwdns2952109:0crwdne2952109:0

      crwdns2917038:0crwdne2917038:0

    10. Metal Snap Installation Using a Hand Press, Insert the cap into the cap die: crwdns2935265:010crwdnd2935265:01crwdnd2935265:03crwdne2935265:0 Metal Snap Installation Using a Hand Press, Insert the cap into the cap die: crwdns2935265:010crwdnd2935265:02crwdnd2935265:03crwdne2935265:0 Metal Snap Installation Using a Hand Press, Insert the cap into the cap die: crwdns2935265:010crwdnd2935265:03crwdnd2935265:03crwdne2935265:0
      • Insert the cap piece into the cap die so it sits inside the die with the shaft facing out.

      crwdns2952109:0crwdne2952109:0

      crwdns2917038:0crwdne2917038:0

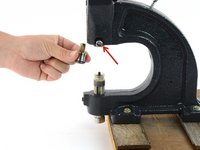
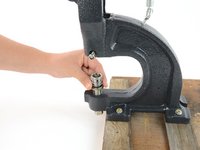
    11. Metal Snap Installation Using a Hand Press, Insert the cap die into the hand press: crwdns2935265:011crwdnd2935265:01crwdnd2935265:03crwdne2935265:0 Metal Snap Installation Using a Hand Press, Insert the cap die into the hand press: crwdns2935265:011crwdnd2935265:02crwdnd2935265:03crwdne2935265:0 Metal Snap Installation Using a Hand Press, Insert the cap die into the hand press: crwdns2935265:011crwdnd2935265:03crwdnd2935265:03crwdne2935265:0
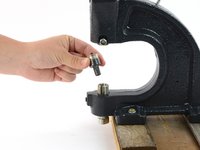
      • Insert the cap die into the lower fitting of the hand press.

      crwdns2952109:0crwdne2952109:0

      crwdns2917038:0crwdne2917038:0

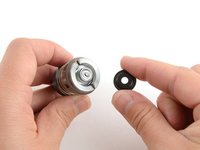
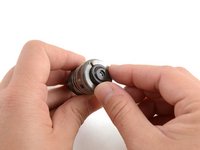
    12. Metal Snap Installation Using a Hand Press, Insert the socket into the socket die: crwdns2935265:012crwdnd2935265:01crwdnd2935265:02crwdne2935265:0 Metal Snap Installation Using a Hand Press, Insert the socket into the socket die: crwdns2935265:012crwdnd2935265:02crwdnd2935265:02crwdne2935265:0
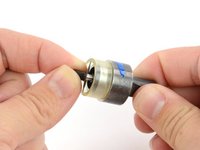
      • Insert the socket piece into the socket die until it snaps into place.

      crwdns2952109:0crwdne2952109:0

      crwdns2917038:0crwdne2917038:0

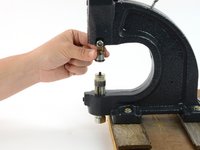
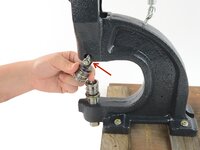
    13. Metal Snap Installation Using a Hand Press, Insert the socket die into the hand press: crwdns2935265:013crwdnd2935265:01crwdnd2935265:03crwdne2935265:0 Metal Snap Installation Using a Hand Press, Insert the socket die into the hand press: crwdns2935265:013crwdnd2935265:02crwdnd2935265:03crwdne2935265:0 Metal Snap Installation Using a Hand Press, Insert the socket die into the hand press: crwdns2935265:013crwdnd2935265:03crwdnd2935265:03crwdne2935265:0
      • Using your fingers, a screwdriver, or a hex key, as needed, unscrew the tightening mechanism on the side of the press near the die fitting.

      • Insert the die upward and hold it in place.

      • Tighten the tightening mechanism.

      crwdns2952109:0crwdne2952109:0

      crwdns2917038:0crwdne2917038:0

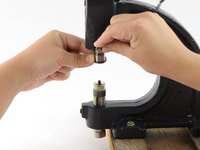
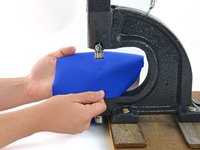
    14. Metal Snap Installation Using a Hand Press, Install the snap head: crwdns2935265:014crwdnd2935265:01crwdnd2935265:03crwdne2935265:0 Metal Snap Installation Using a Hand Press, Install the snap head: crwdns2935265:014crwdnd2935265:02crwdnd2935265:03crwdne2935265:0 Metal Snap Installation Using a Hand Press, Install the snap head: crwdns2935265:014crwdnd2935265:03crwdnd2935265:03crwdne2935265:0
      • Lay the item to be repaired into the hand press so that the hole from the original snap rests directly above the shaft of the post.

      • If the fabric around the old snap is torn or damaged beyond a small hole, apply a patch to reinforce the area before replacing the snap.

      • Make sure no extra fabric is caught inside the press and that the orientation of the item is correct.

      • Hold the fabric in place with one hand, then use your other hand to pull down the handle of the press.

      • This requires a lot of pressure to make sure the snap replacement is successful - so pull hard!
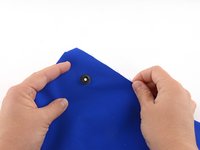
      crwdns2952109:0crwdne2952109:0

      crwdns2917038:0crwdne2917038:0

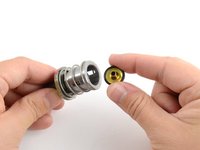
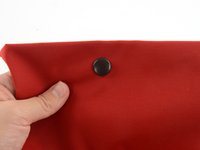
    15. Metal Snap Installation Using a Hand Press, Quality control: crwdns2935265:015crwdnd2935265:01crwdnd2935265:02crwdne2935265:0 Metal Snap Installation Using a Hand Press, Quality control: crwdns2935265:015crwdnd2935265:02crwdnd2935265:02crwdne2935265:0
      • Release the handle of the hand press and remove the fabric.

      • Inspect both sides of the snap to make sure:

      • It is not cracked, crushed, or misshapen.

      • It's laying flat and flush up against the fabric.

      • It doesn't spin in place.

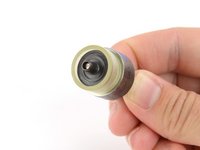
      • It fastens together securely with the base of the snap.

      • If the snap isn't set all the way, reinsert the snap into the hand press, aligning it as it was before, and pull the handle again.

      crwdns2952109:0crwdne2952109:0

      crwdns2917038:0crwdne2917038:0

    16. Metal Snap Installation Using a Hand Press, Examples: crwdns2935265:016crwdnd2935265:01crwdnd2935265:02crwdne2935265:0 Metal Snap Installation Using a Hand Press, Examples: crwdns2935265:016crwdnd2935265:02crwdnd2935265:02crwdne2935265:0
      • The rain jacket in the first photo has flat spring metal snaps along the center front zipper placket.

      • The duffel bag in the second photo has durable socket metal snaps at the handle grip.

      crwdns2952109:0crwdne2952109:0

      crwdns2917038:0crwdne2917038:0

crwdns2935217:0crwdne2935217:0

crwdns2935221:0crwdne2935221:0

crwdns2935229:03crwdne2935229:0

Brittany McCrigler

crwdns2935283:003/05/12crwdne2935283:0

91,032 crwdns2915208:0crwdne2915208:0

crwdns2935297:0142crwdne2935297:0

crwdns2947412:00crwdne2947412:0

crwdns2917038:0crwdne2917038:0

crwdns2936625:0crwdne2936625:0:

crwdns2936751:024crwdne2936751:0 2

crwdns2936753:07crwdne2936753:0 56

crwdns2936753:030crwdne2936753:0 283

crwdns2942667:0crwdne2942667:0 25,578