crwdns2915892:0crwdne2915892:0
Use this guide to replace a broken display assembly.
crwdns2942213:0crwdne2942213:0
-
-
Remove the following ten screws:
-
Three 14.4 mm Phillips #00 screws
-
Three 3.5 mm Phillips #00 screws
-
Four 3.5 mm shouldered Phillips #00 screws
-
-
-
Use your fingers to pry the lower case away from the body of the MacBook near the vent.
-
Remove the lower case.
-
-
-
Use the edge of a spudger to pry the battery connector upwards from its socket on the logic board.
-
-
-
Bend the battery cable slightly away from its socket on the logic board so it does not accidentally connect itself while you work.
-
-
-
Use the flat end of a spudger to pry the AirPort/Bluetooth ribbon cable connector up from its socket on the logic board.
-
-
-
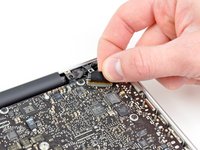
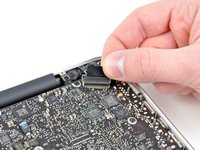
Carefully pull the camera cable out of its socket on the logic board.
-
-
-
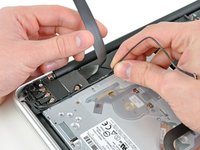
Carefully move the AirPort/Bluetooth ribbon cable out of the way as you peel the camera cable off the adhesive securing it to the subwoofer and the AirPort/Bluetooth bracket.
-
De-route the camera cable out from under the retaining finger molded into the AirPort/Bluetooth bracket.
-
-
-
-
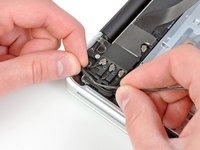
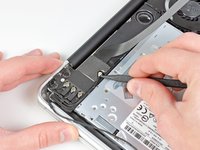
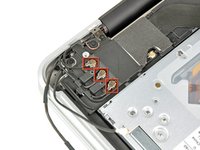
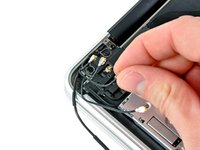
Use the tip of a spudger to pry the antenna connector closest to the logic board up from its socket on the AirPort/Bluetooth board.
-
De-route the antenna cable from under the finger molded into the AirPort/Bluetooth bracket.
-
-
-
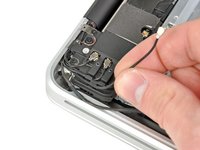
Using the method described in the last step, disconnect the remaining three antenna connectors.
-
De-route their cables from the slots cut in the AirPort/Bluetooth bracket.
-
-
-
Remove the following five screws:
-
Two 10.3 mm Phillips screws
-
Two 3.1 mm Phillips screws
-
One 5 mm Phillips screw
-
-
-
Pull the AirPort/Bluetooth assembly and the Subwoofer upward near the center of the side of the optical drive until they clear each other.
-
-
-
Remove the AirPort/Bluetooth assembly, minding the fragile antenna contact near the corner of the upper case.
-
-
-
Remove two of the three 6 mm T8 Torx screws securing the right side of the display to the upper case.
-
-
-
Grab the plastic pull tab secured to the display data cable lock and rotate it toward the DC-In side of the computer.
-
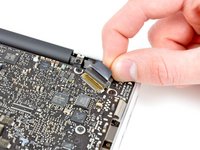
Pull the display data cable straight out of its socket on the logic board.
-
-
-
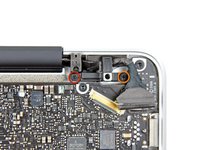
Remove the following two screws:
-
One 8.6 mm Phillips screw
-
One 5.5 mm Phillips screw
-
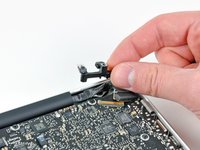
Remove the display data cable retainer from the upper case.
-
-
-
Remove the piece of foam tape covering the display screws near the MagSafe DC-In board.
-
-
-
Remove two of the three 6 mm T8 Torx screws securing the left side of the display to the upper case.
-
-
-
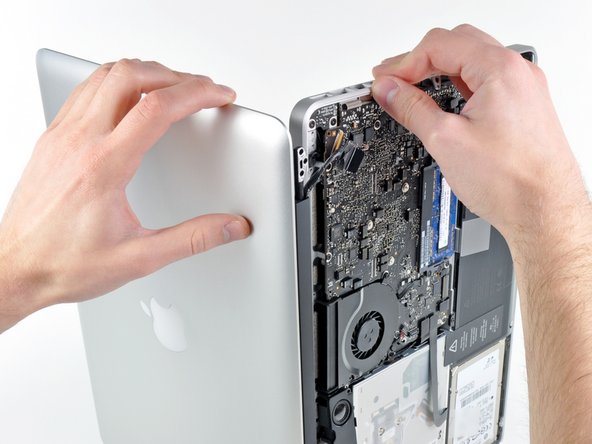
Open your MacBook Pro so the display is perpendicular to the upper case.
-
Place your opened MacBook Pro on a table as pictured.
-
While holding the display and upper case together with your left hand, remove the remaining T8 Torx screw from the lower display bracket.
-
-
-
Remove the last remaining T8 Torx screw securing the display to the upper case.
-
-
-
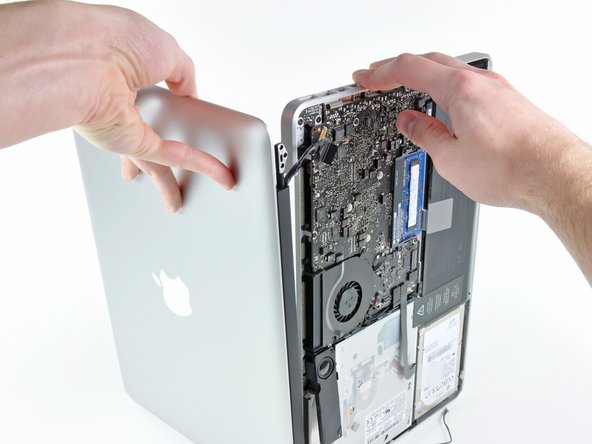
Grab the upper case with your right hand and rotate it slightly toward the top of the display so the upper display bracket clears the edge of the upper case.
-
Rotate the display slightly away from the upper case.
-
Lift the display up and away from the upper case, minding any brackets or cables that may get caught.
-
To reassemble your device, follow these instructions in reverse order.
crwdns2935221:0crwdne2935221:0
crwdns2935229:0148crwdne2935229:0
crwdns2947412:017crwdne2947412:0
Note that the 2011 version differs from previous models at the connectors on the antenna end opposite to the display cable. Do not attempt to buy a complete display from prior models.
Although this guide a difficulty rating I wasn't sure how long it would take a fairly adept novice to complete the R&R of the display. I took my time and did the tear down in 1 hour. I separated the fasteners by placing each section on a loop of tape above the work. The replacement of the new display took me about 2 hours. As the guide says it was just the tear down in reverse. Things that added to the replacement were getting the first 2 screws aligned and in place; re-routing the antenna and camera cables and making sure the camera cable socket connector was in correctly. The good news is it worked on the first power-up. Great guide.
Can I use a 2011 Display with a 2009 (mid) MacBook pro?
Unfortunately no, they are not interchangeable.
Does the display come with the back cover included. I don't know the correct name for the part. I just mean the silver cover with the apple thingy in it.


