crwdns2915892:0crwdne2915892:0
Use this guide to safely remove the glued-in battery from your MacBook Pro with the help of an iFixit kit with adhesive remover. The adhesive remover will dissolve the adhesive securing the battery, allowing you to remove it with ease.
iFixit adhesive remover is flammable. Perform this procedure in a well-ventilated area. Do not smoke or work near an open flame during this procedure.
To minimize risk of damage, turn on your MacBook and allow the battery to fully discharge before starting this procedure. A charged lithium-ion battery can create a dangerous and uncontrollable fire if accidentally punctured. If your battery is swollen, take extra precautions.
Note: The solvent used to dissolve the battery adhesive can damage certain plastics. Follow all instructions and take care where you apply the adhesive remover.
crwdns2942213:0crwdne2942213:0
-
-
Power on your Mac and launch Terminal.
-
Copy and paste the following command (or type it exactly) into Terminal:
-
sudo nvram AutoBoot=%00
-
Press [return]. If prompted, enter your administrator password and press [return] again. Note: Your return key may also be labeled ⏎ or "enter."
-
sudo nvram AutoBoot=%03
-
-
crwdns2935267:0crwdne2935267:0Magnetic Project Mat$19.95
-
Use a P5 Pentalobe driver to remove the six screws securing the lower case:
-
Two 6.2 mm screws
-
Two 5.3 mm screws
-
Two 3.4 mm screws
-
-
-
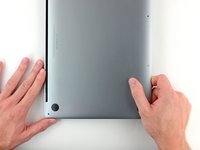
Apply a suction handle to the lower case near the front-center area of the MacBook Pro.
-
Lift the suction handle to create a slight separation between the lower case and the chassis.
-
-
-
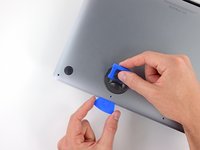
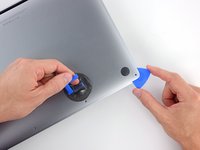
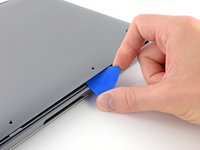
Insert one corner of an opening pick into the space between the lower case and the chassis.
-
Slide the opening pick around the nearest corner and halfway up the side of the case.
-
-
-
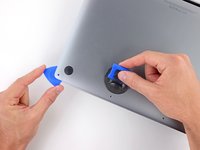
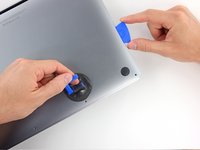
Repeat the previous step on the opposite side, sliding your opening pick under the lower case and up the side to pop the second clip free.
-
-
-
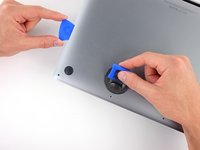
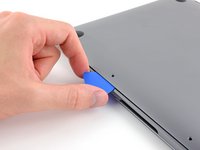
Insert your opening pick once again under the front edge of the lower case, near one of the two centermost screw holes.
-
Give the pick a firm twist to pop free the third clip securing the lower case to the chassis.
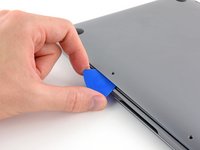
-
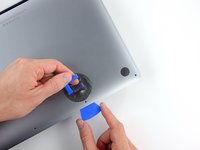
Repeat this procedure near the other of the two centermost screw holes, popping the fourth clip free.
-
-
-
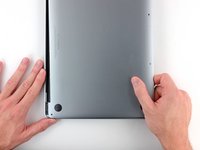
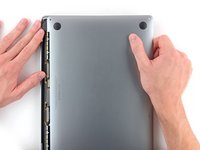
Pull the lower case firmly towards the front of the MacBook (away from the hinge area) to separate the last of the clips securing the lower case.
-
-
-
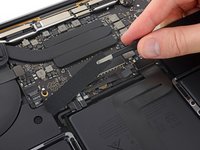
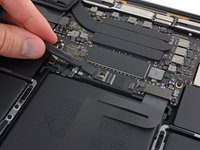
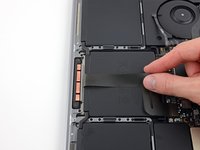
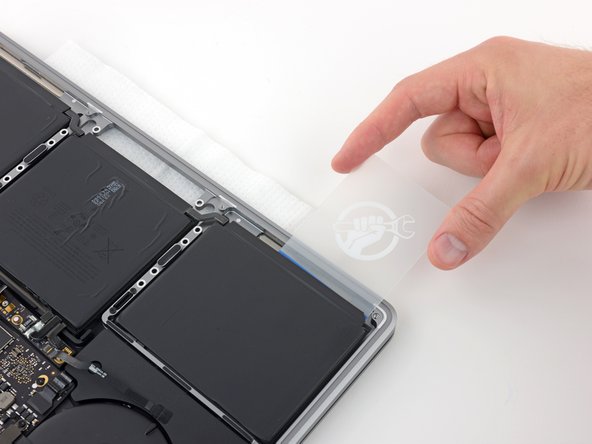
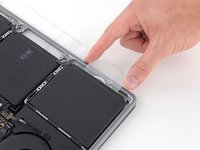
Carefully peel up the large piece of tape covering the battery connector, on the edge of the logic board nearest the battery.
-
Remove the tape.
-
-
-
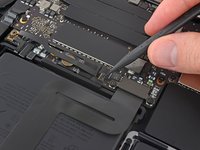
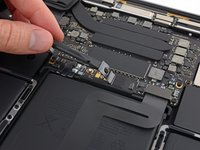
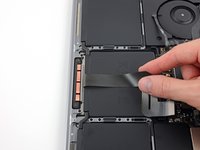
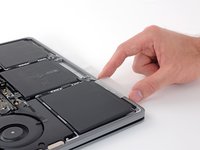
Gently peel back the small piece of tape covering the battery board data cable connector.
-
-
-
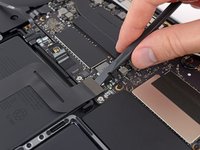
Use the tip of a spudger to flip up the small black locking tab securing the cable in its connector.
-
-
-
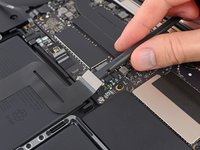
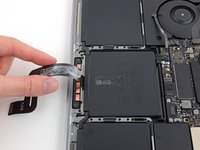
Disconnect the battery board data cable by sliding it out from its socket.
-
Slide parallel to the logic board, in the direction of the cable.
-
-
-
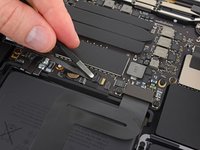
Fold the battery board data cable back and out of the way.
-
-
-
-
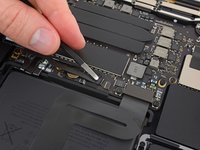
Use a T5 Torx driver to remove the 3.7 mm pancake screw securing the battery power connector.
-
-
-
Use a spudger to gently lift the battery power connector, disconnecting the battery.
-
Lift the connector high enough so that it stays separated from its socket. If it accidentally makes contact during the course of your repair, it could damage your MacBook Pro.
-
-
-
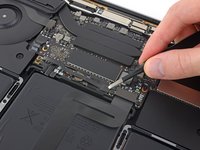
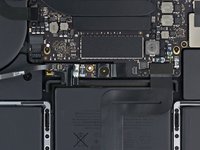
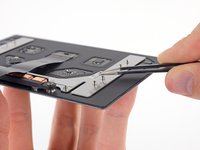
Use a T5 Torx driver to remove the two 2.1 mm screws securing the trackpad cable connector bracket.
-
-
-
Remove the trackpad cable connector bracket.
-
-
-
Use a spudger to disconnect the trackpad ribbon cable by gently prying its connector straight up from the logic board.
-
-
-
Prepare an iOpener and lay it on top of the trackpad ribbon cable for about a minute, in order to soften the adhesive securing the trackpad ribbon cable to the top of the battery.
-
If you don't have an iOpener, use a hair dryer to warm up the cable instead. The cable should be warm, but not too hot to touch. Be careful not to overheat the battery.
-
-
-
Carefully peel the trackpad ribbon cable up off the battery, and push it out of the way.
-
-
-
Use a T5 Torx driver to remove the ten screws securing the trackpad assembly:
-
Two 4.3 mm screws
-
Eight 5.8 mm screws
-
-
-
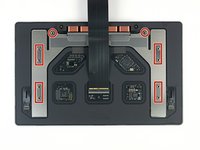
Remove the trackpad assembly.
-
Be sure not to lose the six small washers (two circular and four rectangular) resting on the underside of the trackpad.
-
-
crwdns2935267:0crwdne2935267:0Tweezers$4.99
-
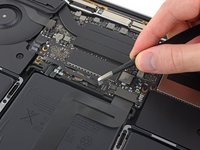
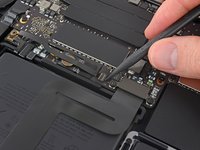
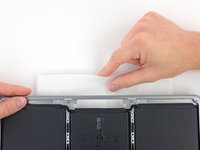
Use a T5 Torx driver to remove the two 3.1 mm screws securing the battery board.
-
-
-
Insert the flat edge of a spudger under the battery board on the side nearest the logic board.
-
Lift the battery board to an angle of about 45 degrees. If necessary, lift the battery power connector out of the way to give the battery board extra clearance.
-
-
-
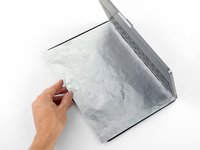
To protect your display, place a sheet of aluminum foil between the display and keyboard and leave it there while you work.
-
Additionally, layer an absorbent towel directly underneath the trackpad area to soak up any excess adhesive remover.
-
-
-
Now that your MacBook Pro is fully prepped, it's time to prep yourself.
-
Wear eye protection when handling and applying the adhesive remover. (Eye protection is included in your kit.)
-
Do not wear contact lenses without eye protection.
-
Protective gloves are also included in your kit. If you are concerned about possible skin irritation, put your gloves on now.
-
-
-
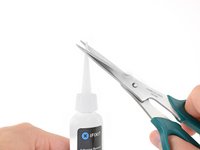
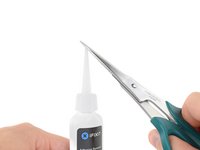
Pull off the black rubber stopper from your bottle of adhesive remover.
-
Use scissors to cut off the sealed tip of the applicator.
-
-
-
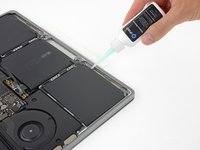
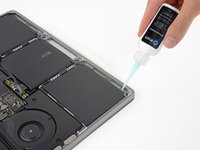
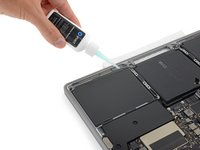
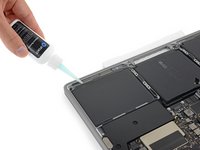
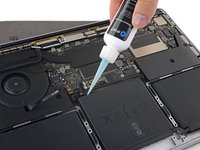
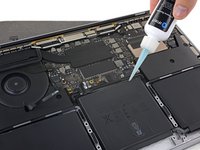
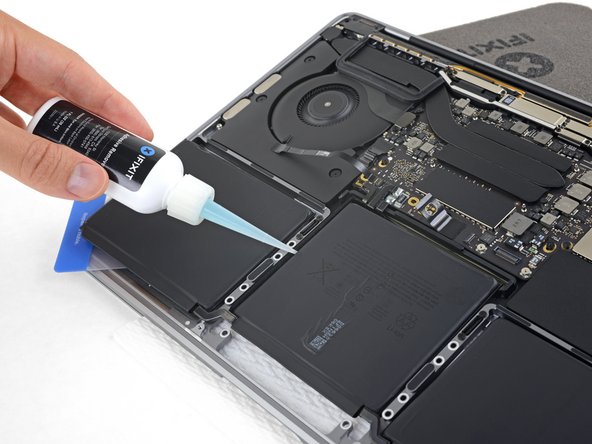
Apply a few drops of adhesive remover underneath the front edge of the battery cell that lies nearest the fan.
-
-
-
Tip the front edge of your MacBook Pro up at a slight angle so that the liquid adhesive remover flows underneath the battery cell.
-
Wait 2-3 minutes before you proceed to the next step, in order to give the adhesive remover time to work.
-
-
crwdns2935267:0crwdne2935267:0Plastic Cards$2.99
-
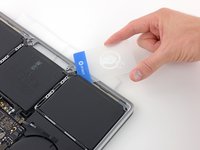
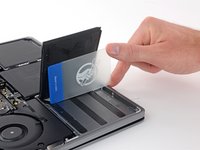
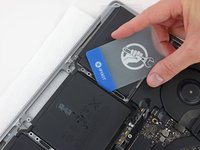
After 2-3 minutes have passed, slide a plastic card under the edge of the battery cell where you applied the adhesive remover.
-
-
-
Gently work the card deeper under the battery cell to break up the adhesive securing it in place.
-
-
-
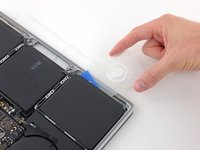
Twist the card to raise the battery cell until it fully separates from the aluminum case.
-
-
-
Leave the plastic card temporarily in place underneath the battery cell.
-
-
-
Repeat the previous six steps to separate the other outer battery cell, on the opposite side.
-
-
-
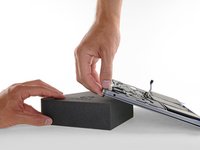
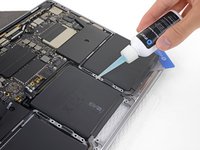
To separate the center battery cell, first raise the back edge of the MacBook Pro and prop it up on a foam block or book, so that the adhesive remover will flow away from the logic board.
-
Apply a few drops of adhesive remover along the back edge of the battery cell.
-
-
-
To compensate, apply a few more drops of adhesive remover along each side of the center battery cell.
-
Wait 2-3 minutes before proceeding to the next step.
-
-
-
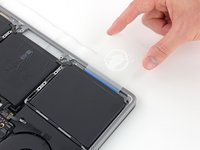
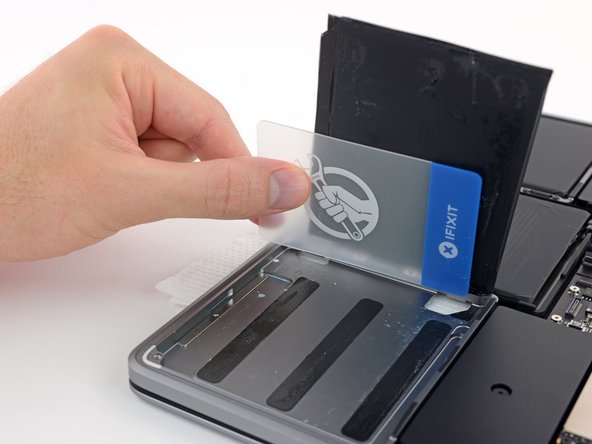
Slide a plastic card under one of the side edges of the center battery cell.
-
It may help to gently twist the card to open up a slight gap between the battery cell and the MacBook Pro's case.
-
-
-
Use the card to lift the battery cell until it fully separates from the aluminum case.
-
-
-
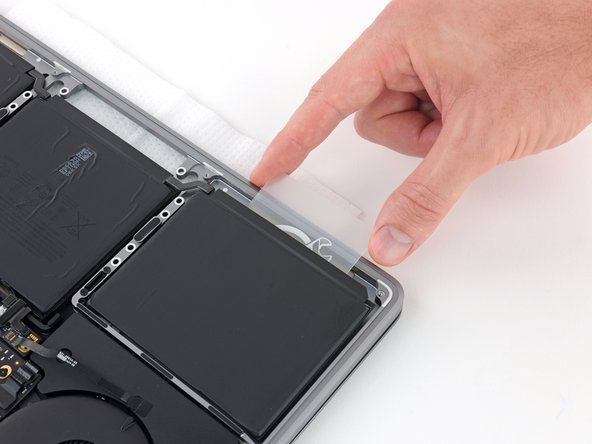
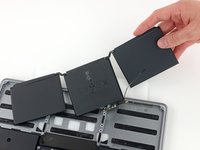
Lift and remove the battery.
-
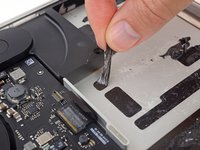
With a little luck, you can slowly pull out each strip of adhesive with your fingers.
-
Otherwise, soak each strip of adhesive with a bit of adhesive remover for 2-3 minutes, and then scrape it out with a plastic tool. This can take quite a bit of work, so be patient.
-
Mop up any remaining adhesive remover and give your MacBook Pro a few minutes to air dry.
-
Calibrate your newly installed battery: charge it to 100%, and keep charging it for at least 2 more hours. Unplug and use it normally to drain the battery. When you see the low battery warning, save your work, and keep your laptop on until it goes to sleep due to low battery. Wait at least 5 hours, then charge your laptop uninterrupted to 100%.
-


Compare your new replacement part to the original part—you may need to transfer remaining components or remove adhesive backings from the new part before installing.
To reassemble your device, follow the above steps in reverse order.
For optimal performance, calibrate your newly installed battery: Charge it to 100% and keep charging it for at least 2 more hours. Then use your device until it shuts off due to low battery. Finally, charge it uninterrupted back to 100%.
Take your e-waste to an R2 or e-Stewards certified recycler.
Repair didn’t go as planned? Check out our Answers community for troubleshooting help.
crwdns2935221:0crwdne2935221:0
crwdns2935229:091crwdne2935229:0


crwdns2947412:031crwdne2947412:0
Does the replacement battery comes with the same strong adhesive as the original battery?
I ordered my battery for the 2017 version of the Macbook Pro with function keys from ebay and it didn’t came with a adhesive strip. I am sure you can use your own adhesive strips or double sided tape, as long as you mind the gabs on the aluminum frame,
Serj Nko -
Thanks for the great guide! Can you copy the guide to the Macbook Pro 2017 thread, as it’s exactly the same procedure for the function key version? It might be obvious for some “Pros” but I realized it after some trial and error odyssey.
Hi Jeff,
Thank you for this great work to beat Apple greediness. I followed the exact steps and everything went well, but my battery is not charging nor the status is shown on the bar! I tried restarting and resetting and even restoring and it did not work would that be something you can help me with?
If the old battery still works, try putting it back in, and see if that clears up the problem. If it does, the new battery is defective.