crwdns2915892:0crwdne2915892:0
Use this guide to remove or replace the left speaker in an Early 2020 MacBook Air.
crwdns2942213:0crwdne2942213:0
-
crwdns2935267:0crwdne2935267:0Magnetic Project Mat$19.95
-
If your MacBook is running Big Sur v11.1 or later, disabling Auto Boot may not work. You can proceed normally, but make sure to disconnect the battery as soon as you're inside.
-
Use a P5 driver to remove the following screws:
-
Two 7.9 mm screws
-
Two 7.1 mm screws
-
Six 2.6 mm screws
-
-
-
Wedge your fingers between the display and the lower case and pull upward to pop the lower case off the Air.
-
Remove the lower case.
-
Set it in place and press firmly to engage the two hidden clips underneath. You should feel and hear them snap into place.
-
-
-
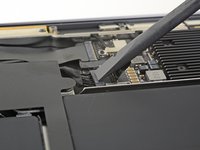
Peel back the tape covering the battery connector enough to reveal the connector underneath.
-
-
-
-
Use a spudger to slide the battery connector parallel to the logic board and out of its socket on the logic board.
-
-
-
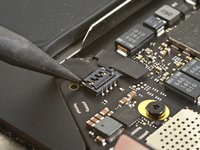
Slide the pointed end of a spudger underneath the left speaker cable and pry straight up to disconnect it from the logic board.
-
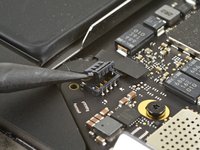
With the connector disconnected, slide the flat end of a spudger under the cable to separate the adhesive securing the cable to the logic board.
-
-
-
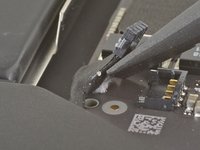
Use a T3 Torx driver to remove the 4.2 mm screw securing the left speaker to the case.
-
-
crwdns2935267:0crwdne2935267:0Tweezers$4.99
-
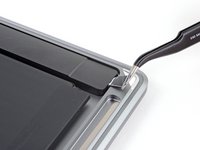
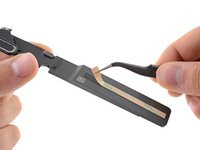
Use a pair of tweezers to peel back the black pull tab on the speaker's stretch-release adhesive until you can grip it with your fingers.
-
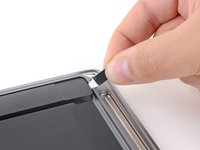
Grab the adhesive strip's pull tab and slowly pull the adhesive strip out from underneath the speaker.
-
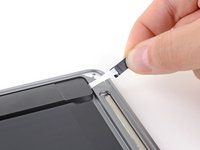
Pull the adhesive strip until it's freed from under the speaker.
-
Apply heat to the speaker to soften the adhesive underneath.
-
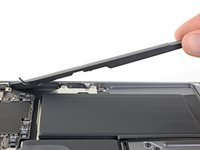
Carefully slide a spudger or opening pick underneath the speaker to separate the adhesive.
-
-
crwdns2935267:0crwdne2935267:0Tesa 61395 Tape$5.99
-
Remove the left speaker.
-


Compare your new replacement part to the original part—you may need to transfer remaining components or remove adhesive backings from the new part before installing.
To reassemble your device, follow the above steps in reverse order.
Take your e-waste to an R2 or e-Stewards certified recycler.
Repair didn’t go as planned? Check out our Answers community for troubleshooting help.
crwdns2935221:0crwdne2935221:0
crwdns2935227:0crwdne2935227:0


crwdns2947410:01crwdne2947410:0
What can be done in a case where the pins, specifically the connectors on the board, were damaged, but the speaker is fully functional? Is there any alternative to repair it?