crwdns2915892:0crwdne2915892:0
If your DVR is running louder than usual or overheating, a worn-out fan could be the main issue on why those things are happening. This guide will walk you through the process of safely replacing the fan to not cause any long term damage to the rest of your device. Whether you're looking for an easier way to save money on replacements, or like doing DIY projects this step-by-step guide will help you complete the task with tools that you may have at home and technical experience.
crwdns2942213:0crwdne2942213:0
-
-
Before beginning, disconnect the DVR from power and unplug all peripheries.
-
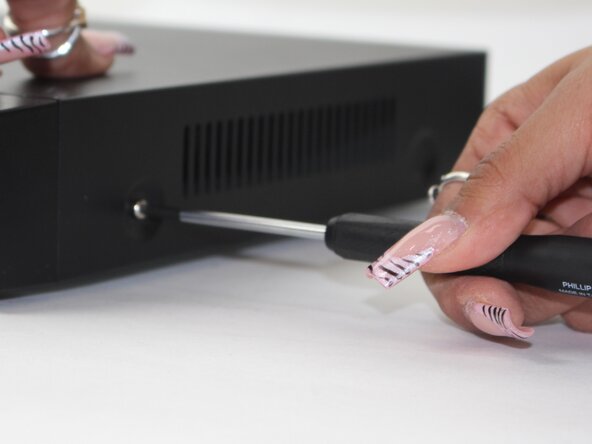
Remove each of the two 1 cm screws on the right and left sides of the DVR with a Phillips screwdriver.
-
-
-
Remove the four 1 cm Phillips screws on the rear panel.
-
-
-
-
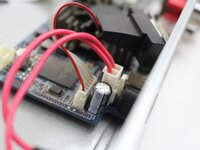
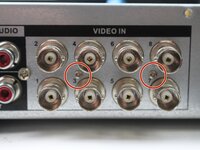
Unplug the red and white power chord from the socket
-
Also unplugging the backpanel power source
-
-
-
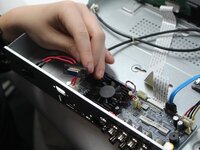
Remove two of the 1cm screws
-
removing the back panel where the fan is located
-
-
-
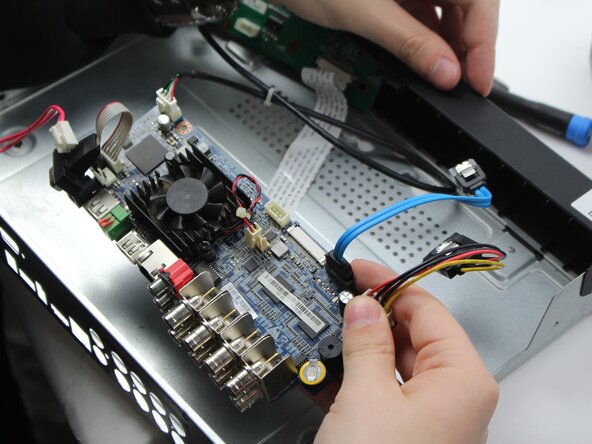
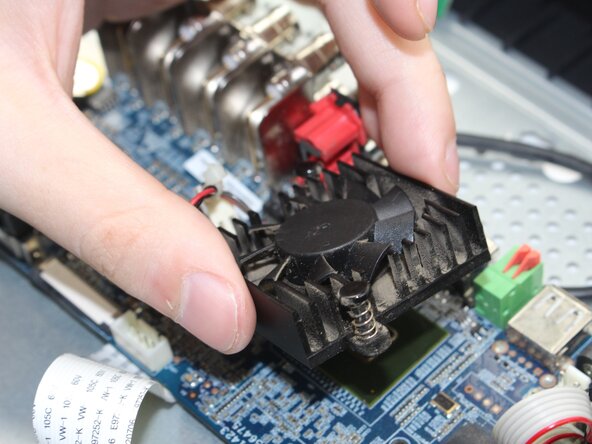
turn the panel around and locate these two black stud connecting the fan and the panel together
-
Once you are able to get those lose using the Pliers the fan should pop out, making it easier to switch out the fan and check it for issues.
-


To reassemble your device, follow the above steps in reverse order.
Take your e-waste to an R2 or e-Stewards certified recycler.
Repair didn’t go as planned? Try some basic troubleshooting or ask our Answers community for help.
To reassemble your device, follow the above steps in reverse order.
Take your e-waste to an R2 or e-Stewards certified recycler.
Repair didn’t go as planned? Try some basic troubleshooting or ask our Answers community for help.
crwdns2915084:0crwdne2915084:0

Sam Houston State, Team 17-1, Thornton Spring 2025 crwdns2935289:0Sam Houston State, Team 17-1, Thornton Spring 2025crwdne2935289:0
SHSU-THORNTON-S25S17G1
crwdns2931471:03crwdne2931471:0
crwdns2935297:05crwdne2935297:0