crwdns2933423:0crwdne2933423:0

Logitech Slim Folio Battery Replacement

crwdns2942213:0crwdne2942213:0

  1. Logitech Slim Folio Battery Replacement, Open the case: crwdns2935265:01crwdnd2935265:01crwdnd2935265:03crwdne2935265:0 Logitech Slim Folio Battery Replacement, Open the case: crwdns2935265:01crwdnd2935265:02crwdnd2935265:03crwdne2935265:0 Logitech Slim Folio Battery Replacement, Open the case: crwdns2935265:01crwdnd2935265:03crwdnd2935265:03crwdne2935265:0
    • Open your case and lay it out flat.

  2. Logitech Slim Folio Battery Replacement, Pull the iPad away from the case: crwdns2935265:02crwdnd2935265:01crwdnd2935265:03crwdne2935265:0 Logitech Slim Folio Battery Replacement, Pull the iPad away from the case: crwdns2935265:02crwdnd2935265:02crwdnd2935265:03crwdne2935265:0 Logitech Slim Folio Battery Replacement, Pull the iPad away from the case: crwdns2935265:02crwdnd2935265:03crwdnd2935265:03crwdne2935265:0
    • Grip the two case corners closest to the keyboard with your thumbs and pull them down, away from the iPad.

    • Remove the iPad from the case.

  3. Logitech Slim Folio Battery Replacement, Locate the battery tray: crwdns2935265:03crwdnd2935265:01crwdnd2935265:02crwdne2935265:0 Logitech Slim Folio Battery Replacement, Locate the battery tray: crwdns2935265:03crwdnd2935265:02crwdnd2935265:02crwdne2935265:0
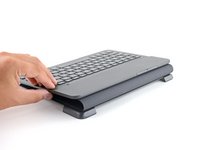
    • Fold the case in half, so the keyboard is facing up.

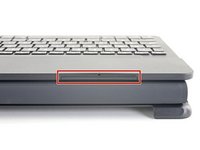
    • Locate the battery tray.

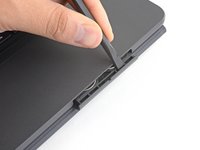
  4. Logitech Slim Folio Battery Replacement, Open the battery tray: crwdns2935265:04crwdnd2935265:01crwdnd2935265:03crwdne2935265:0 Logitech Slim Folio Battery Replacement, Open the battery tray: crwdns2935265:04crwdnd2935265:02crwdnd2935265:03crwdne2935265:0 Logitech Slim Folio Battery Replacement, Open the battery tray: crwdns2935265:04crwdnd2935265:03crwdnd2935265:03crwdne2935265:0
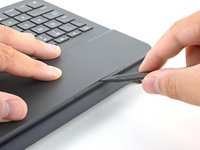
    • Insert the pointed end of a spudger into the access hole on the battery tray.

    • Push the spudger in, down, and pull the spudger towards you.

    • The battery tray should "click" open.

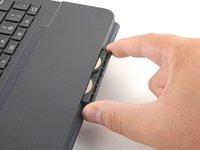
  5. Logitech Slim Folio Battery Replacement, Remove the battery tray: crwdns2935265:05crwdnd2935265:01crwdnd2935265:02crwdne2935265:0 Logitech Slim Folio Battery Replacement, Remove the battery tray: crwdns2935265:05crwdnd2935265:02crwdnd2935265:02crwdne2935265:0
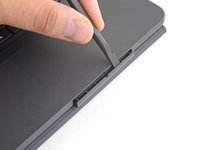
    • Insert the flat edge of the spudger into the top of the battery tray.

    • Push the battery tray out, away from the case, until you can grip it with your fingers.

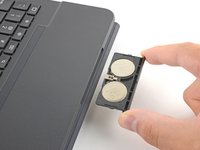
  6. Logitech Slim Folio Battery Replacement: crwdns2935265:06crwdnd2935265:01crwdnd2935265:02crwdne2935265:0 Logitech Slim Folio Battery Replacement: crwdns2935265:06crwdnd2935265:02crwdnd2935265:02crwdne2935265:0
    • Remove the battery tray.

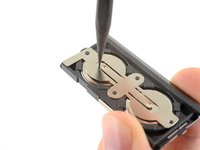
  7. Logitech Slim Folio Battery Replacement, Remove the batteries: crwdns2935265:07crwdnd2935265:01crwdnd2935265:03crwdne2935265:0 Logitech Slim Folio Battery Replacement, Remove the batteries: crwdns2935265:07crwdnd2935265:02crwdnd2935265:03crwdne2935265:0 Logitech Slim Folio Battery Replacement, Remove the batteries: crwdns2935265:07crwdnd2935265:03crwdnd2935265:03crwdne2935265:0
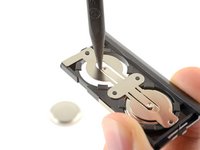
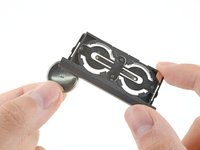
    • Flip the battery tray over.

    • Use the pointed end of the spudger to push both batteries out of the tray.

    • Remove the batteries.

  8. Logitech Slim Folio Battery Replacement, Reinstallation tip: crwdns2935265:08crwdnd2935265:01crwdnd2935265:03crwdne2935265:0 Logitech Slim Folio Battery Replacement, Reinstallation tip: crwdns2935265:08crwdnd2935265:02crwdnd2935265:03crwdne2935265:0 Logitech Slim Folio Battery Replacement, Reinstallation tip: crwdns2935265:08crwdnd2935265:03crwdnd2935265:03crwdne2935265:0
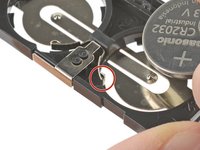
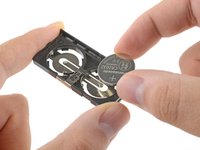
    • To install new batteries:

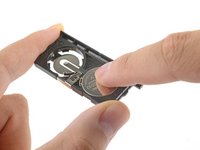
    • Press one edge of a CR2032 coin cell battery against the contact arm, its text and "+" sign facing up.

    • Press to fully seat the battery.

    • Repeat for the second battery.

crwdns2915888:0crwdne2915888:0

To reassemble your device, follow the above steps in reverse order.

Take your e-waste to an R2 or e-Stewards certified recycler.

Repair didn’t go as planned? Check out our Answers community for troubleshooting help.

crwdns2935229:033crwdne2935229:0

Carsten Frauenheim

crwdns2935283:003/10/20crwdne2935283:0

113,672 crwdns2915208:0crwdne2915208:0

crwdns2935297:0338crwdne2935297:0

crwdns2915084:0crwdne2915084:0

iFixit crwdns2935289:0iFixitcrwdne2935289:0

Staff

crwdns2931471:0135crwdne2931471:0

crwdns2935297:016,816crwdne2935297:0

crwdns2944067:012crwdne2944067:0

Excellent instructions. So easy - you made me a hero!

edspecial - crwdns2934203:0crwdne2934203:0

So easy to do. I’m up and running again!

Susan Hallett - crwdns2934203:0crwdne2934203:0

when you put the battery tray back in, you have to push it kind of hard to get it to go all the way in. I didn’t have a spudger but was able to use an ice pick (gently) and then a small flat screw driver.

pdmd - crwdns2934203:0crwdne2934203:0

What if you don’t have a spider? Is there anything else that you can use to open the battery tray?

Kathy Pecsko - crwdns2934203:0crwdne2934203:0

You can use something pointy instead of a Spudger. For example: A pair of scissors ✂️. You can open them with the pointy blade. Thanks!

Cheryl Xu -

crwdns2917038:0crwdne2917038:0

crwdns2936625:0crwdne2936625:0:

crwdns2936751:024crwdne2936751:0 227

crwdns2936753:07crwdne2936753:0 1,716

crwdns2936753:030crwdne2936753:0 7,508

crwdns2942667:0crwdne2942667:0 200,832