crwdns2915892:0crwdne2915892:0
If your Logitech G X56 HOTAS Throttle is failing to respond to inputs, not lighting up, or showing no signs of power when connected, the issue may lie with the internal logic and power board. This component manages both electrical power distribution and signal processing within the throttle. Over time, it can fail due to electrical surges, wear, or internal damage. This guide will walk you through the steps required to safely disassemble the device and replace the logic and power board, restoring functionality and extending the life of your throttle.
crwdns2942213:0crwdne2942213:0
-
-
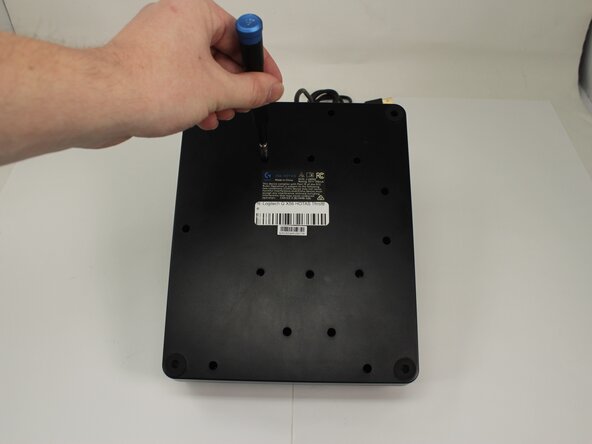
Place the throttle upside down with the bottom panel facing up.
-
-
-
Remove the fifteen 13.6 mm Phillips #1 screws that secure the bottom panel to the base plate.
-
-
-
-
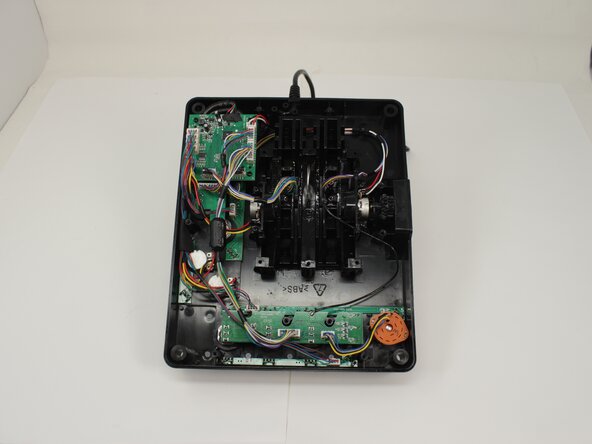
Remove the bottom panel by lifting straight up.
-
-
-
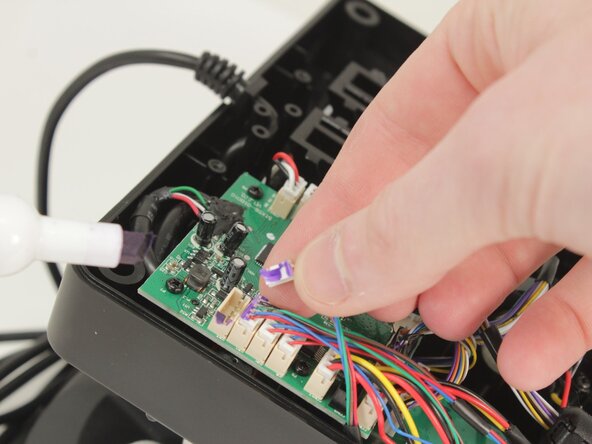
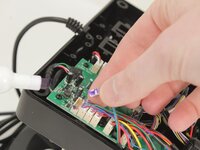
Disconnect all of the motherboard connectors by pulling them straight up and out of their sockets.
-
-
-
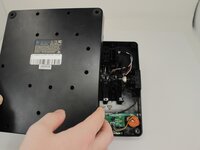
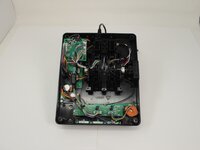
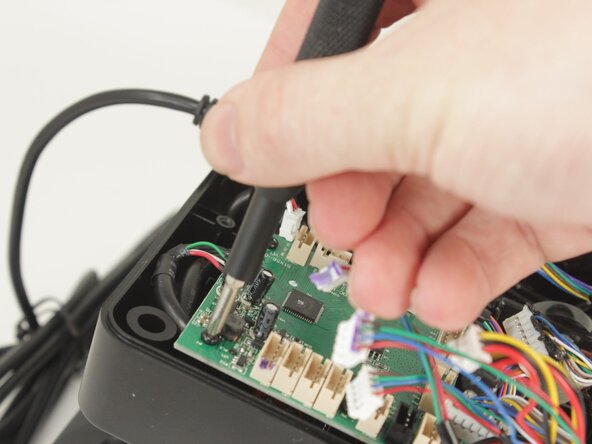
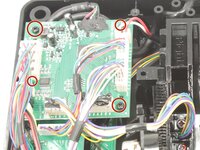
Remove the four 11.6 mm-long Phillips #0 screws that secure the motherboard.
-
-
-
Lift the motherboard from the base plate shell, carefully making sure to keep the USB power cable unstrained.
-


To reassemble your device, follow the above steps in reverse order.
Take your e-waste to an R2 or e-Stewards certified recycler.
Repair didn’t go as planned? Try some basic troubleshooting or ask our Answers community for help.
To reassemble your device, follow the above steps in reverse order.
Take your e-waste to an R2 or e-Stewards certified recycler.
Repair didn’t go as planned? Try some basic troubleshooting or ask our Answers community for help.
crwdns2935221:0crwdne2935221:0
crwdns2935227:0crwdne2935227:0

crwdns2915084:0crwdne2915084:0

University of Memphis, Team 3-5, Sneed Spring 2025 crwdns2935289:0University of Memphis, Team 3-5, Sneed Spring 2025crwdne2935289:0
UM-SNEED-S25S3G5
crwdns2931471:04crwdne2931471:0
crwdns2935297:07crwdne2935297:0