crwdns2915892:0crwdne2915892:0
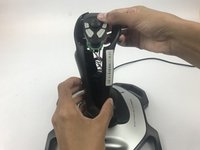
After extended use certain parts may require cleaning or replacement. This guide will assist you in safely disassembling the base portion of the joystick. This will require to have to handle already disassembled.
crwdns2942213:0crwdne2942213:0
-
-
Remove these three Phillips #1 screws:
-
Two 10mm screws.
-
One 7mm screw.
-
-
-
Using your fingers, lower the rubber boot to reveal two screws underneath the joystick.
-
Remove the two 10mm Phillips #1 screws.
-
-
-
-
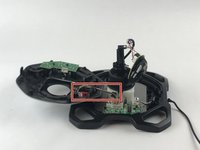
Pull apart the joystick chassis by hand.
-
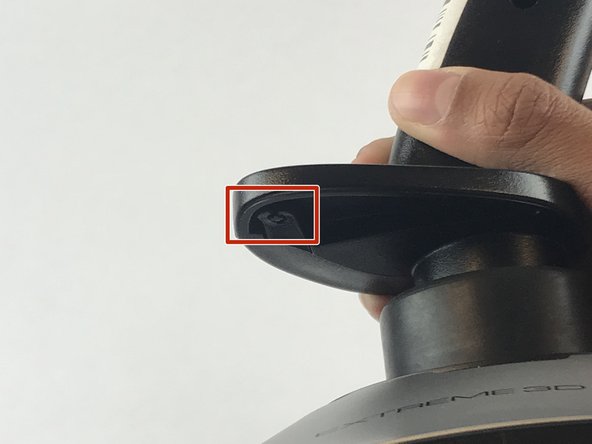
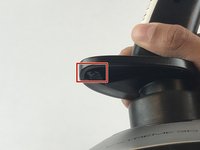
Release this clip located underneath the hand rest
-
-
-
Remove the eight 10mm Phillips #1 screws from the bottom.
There is a 9th screw that you need to remove near the cable
I need a wiring diagram for the Logitech 3D Pro, I'm changing the Pots.
-
-
-
Flip the joystick upright.
-
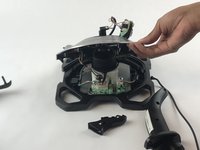
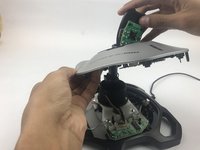
Lift up the sliver base cover and feed the loose circuit board through.
-


To reassemble your device, follow these instructions in reverse order.
To reassemble your device, follow these instructions in reverse order.
crwdns2935221:0crwdne2935221:0
crwdns2935229:03crwdne2935229:0
crwdns2915084:0crwdne2915084:0

USF Tampa, Team S7-G1, Passmore Spring 2018 crwdns2935289:0USF Tampa, Team S7-G1, Passmore Spring 2018crwdne2935289:0
USFT-PASSMORE-S18S7G1
crwdns2931471:04crwdne2931471:0
crwdns2935297:07crwdne2935297:0
crwdns2947410:01crwdne2947410:0
And you didn’t even finish the repair. Thanks for nothing. :(