crwdns2915892:0crwdne2915892:0
Replacing the SSD in your Lenovo Yoga C640-13IML can improve system performance, speed up boot times, and increase overall storage capacity. This guide will walk you through replacing the internal M.2 2242 PCIe NVMe SSD step-by-step.
- Caution: Replacing internal components carries a risk of static damage. Always power off the laptop, unplug it from any power source, and disconnect the battery before handling internal parts. Use an anti-static wrist strap if available.
- Note: If your laptop is experiencing slow performance, frequent crashes, or isn’t turning on, a faulty SSD may be the cause. Upgrading to a new SSD can resolve these issues and extend your device’s lifespan.
- Reminder: Keep track of all screws and cables you remove. Taking photos or labeling components can help make reassembly easier and prevent mistakes.
By following this guide carefully, you'll be able to safely upgrade your storage and give your Lenovo Yoga C640 new life.
crwdns2942213:0crwdne2942213:0
-
-
Use a Torx T4 screwdriver to remove the six 4.60 mm screws securing the bottom panel.
-
-
-
Insert a plastic spudger or opening pick into the seam between the bottom panel and the chassis.
-
Gently slide the tool along the edges to release the internal clips and lift the panel off.
-
-
-
-
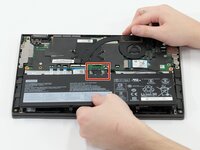
Remove the five 4.60 mm Phillips #0 screws securing the battery to the chassis.
-
-
-
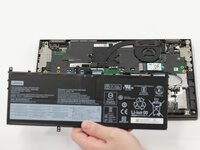
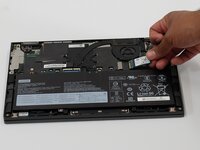
Use the flat end of a spudger to lift and unclip the outer edges of the connector. You may need to use your fingers to pull the connector completely out of its socket.
-
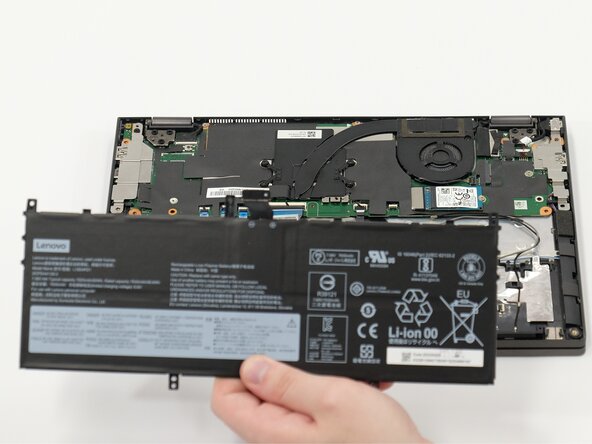
Lift the battery out of the laptop.
-
-
-
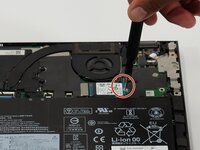
Use a Phillips #0 screwdriver to remove the 2.23 screw securing the SSD.
-
Gently slide the SSD out of the socket.
-


To reassemble your device, follow these instructions in reverse order. Take your e-waste to an R2 or e-Stewards certified recycler.

crwdns2935287:0crwdne2935287:0

Linn Benton Community College, Team 1-1, Karnes Spring 2025 crwdns2935289:0Linn Benton Community College, Team 1-1, Karnes Spring 2025crwdne2935289:0
LBCC-KARNES-S25S1G1
crwdns2931471:04crwdne2931471:0
crwdns2935297:05crwdne2935297:0