crwdns2915892:0crwdne2915892:0
To get to the battery in the Yoga Book X90F you will need to review the guide on how to remove the bottom screen/keyboard. Once the bottom screen is removed all you need is a pair of tweezers and a pick to wedge the battery out with. The battery can be diagnosed with the following troubleshooting page.
The battery provides power to the device, and a poor battery will not perform tasks on the computer well or for very long.
Prior to starting the replacement, please turn off the power on the device and disconnect any external power sources, such as the device charger.
Use caution when removing the battery as it may begin to bend and crack when prying off the board.
crwdns2942213:0crwdne2942213:0
-
-
Turn off and power down the device before beginning this process. A heat gun or hair dryer will be suitable to heat the adhesive that holds down the screen. Apply heat to the entire surface area of the bottom screen.
-
-
-
Once the adhesive has been heated up, take the iFixIt suction cup and lift in a corner. The screen should be separating from the adhesive here.
-
While the screen is lifted, insert the ifixit opening pick to help pry off the screen.
-
-
-
While the screen has been lifted, insert the plastic opening picks. Heat the adhesive and follow with the screen removal tool to ensure that you are not prying it apart with excessive force.
-
-
-
crwdns2935267:0crwdne2935267:0Tweezers$4.99
-
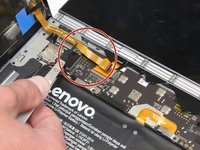
After the screen has been opened, disconnect the ribbon connecting the bottom screen to the motherboard by gently pulling the ribbon with tweezers.
-
If there are black coverings on the tabs as shown in the second image, carefully remove them using a pair of tweezers.
-
-
-
Separate and remove the bottom screen from the device.
-
-
-
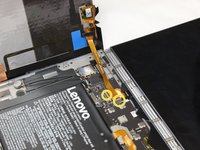
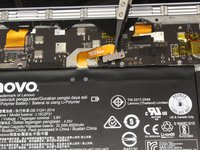
Using a JIS #0 screwdriver, remove the single 8 mm screw.
-
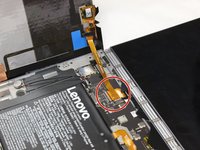
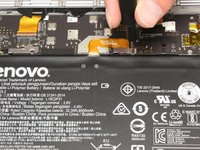
Disconnect the battery cable from the motherboard.
-
-
-
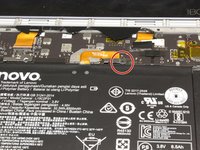
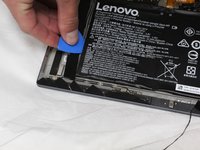
Use the opening pick to remove the two black strips on each side of the battery so the battery is cleared of any obstructions.
-
-
-
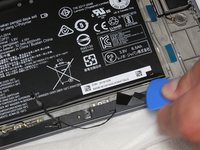
Wedge the opening pick underneath the battery and work your around the battery.
-
-
-
Once the adhesive begins to unstick from the battery, remove the battery from the device.
-


To reassemble your device, follow these instructions in reverse order.
For optimal performance, after completing this guide, calibrate your newly installed battery.
Take your e-waste to an R2 or e-Stewards certified recycler.
To reassemble your device, follow these instructions in reverse order.
For optimal performance, after completing this guide, calibrate your newly installed battery.
Take your e-waste to an R2 or e-Stewards certified recycler.
crwdns2935221:0crwdne2935221:0
crwdns2935229:02crwdne2935229:0

crwdns2915084:0crwdne2915084:0

Clemson, Team 5-2, Hunter Fall 2021 crwdns2935289:0Clemson, Team 5-2, Hunter Fall 2021crwdne2935289:0
CLEM-HUNTER-F21S5G2
crwdns2931471:05crwdne2931471:0
crwdns2935297:06crwdne2935297:0
crwdns2947412:07crwdne2947412:0
Make a plan to replace the keyboard/second screen after installing a replacement battery.
How to calibrate the battery?
I like how the screen is broken in the pictures from step 1 to step 2. :P
Thanks for the writeup! too bad the cost of replacement parts make this repair almost not worth the effort. =(
Excellent but i find nowhere an explanation of how to reassembly, mainly how to adhere the keyboard glass surface to the base chasis. I mean, is still usable the same original adhesive heated in the first step or a two sides adhesive frame has to be placed after removing the old adhesive (or just aplying a sort of glue -¿wich one?-). I’ not sure I’ve made it clear, I hope yes. Thanks in advance.