crwdns2915892:0crwdne2915892:0
If you are having troubles with your Lenovo's monitor screen or know that you have broken it, you may need to replace your LCD or screen.
crwdns2942213:0crwdne2942213:0
-
-
Flip your device so that the bottom panel is facing up.
-
Remove the eleven 5mm Torx T5 screws from the back panel.
-
-
-
Use a spudger to unclip clips on the front and near the USB ports on each side
-
Lift the back panel off
where can I buy the back panel?
The back panel is also held on by a few clips, but a spudger can come in handy here.
The clips on the sides are between the USB ports on the left side, and just in front of the USB port on the right.
-
-
-
Remove the two 3mm Phillips #1 screws holding the battery to the laptop chassis.
-
Disconnect the battery from the IO board by holding the connector by the sides and gently pulling the connector out.
The left screw is hidden below a tamper-evident sticker.
There is a plastic channel along the right edge of the battery that has wires running through it to a different board. It works best if the other connector next to the battery connector is unclipped and those wires are taken out of that channel.
-
-
-
Carefully remove the battery from the laptop.
Along the right edge of the battery, there is a channel with wires running to a connector next to the battery connector. It works better to disconnect that connector too and fold the battery to the right.
Re: the above “fold the battery to the right” comment: If all you’re doing is replacing the touchpad, the “fold over” method works as it keeps the wires in the channel. If you’re replacing the battery or whatever those wires connect to, obviously that won’t work.
-
-
-
-
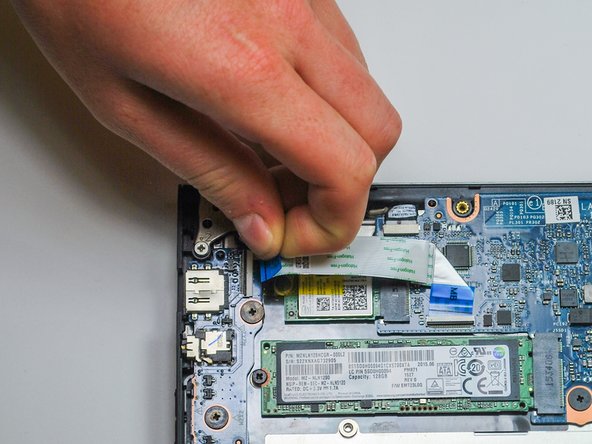
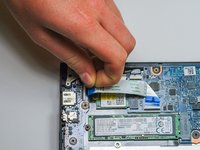
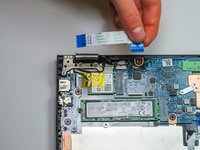
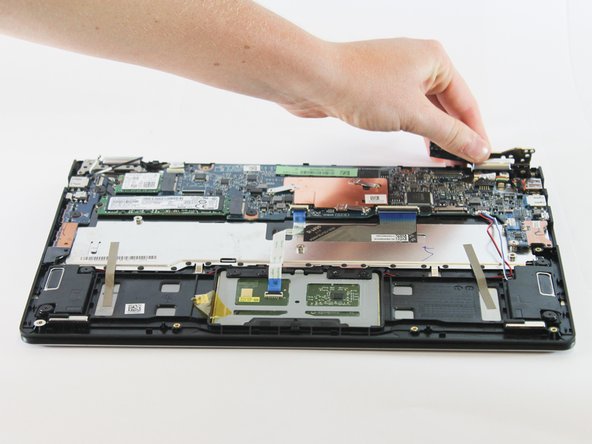
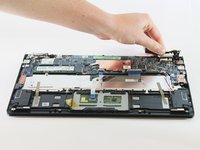
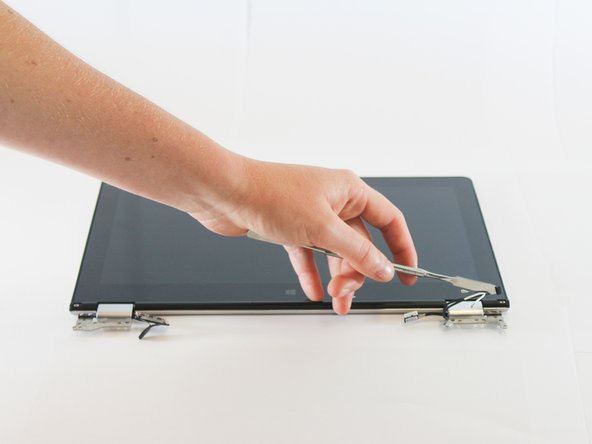
Disconnect the following cables attaching the LCD to the laptop:
-
Touchscreen cable
-
EDP cable
-
-
-
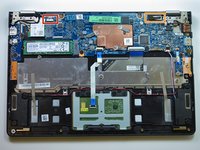
Place the laptop with the LCD facing down so that the hinges face opposite you.
-
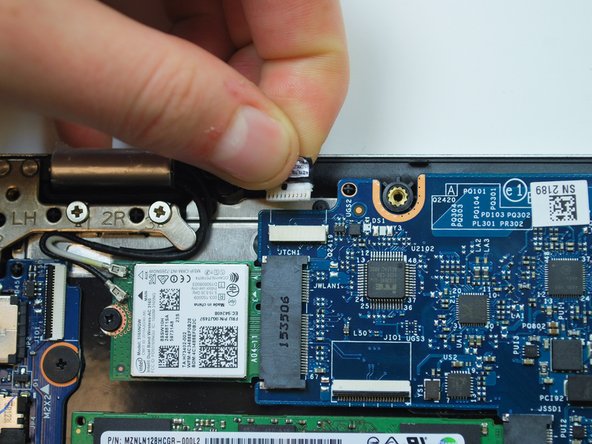
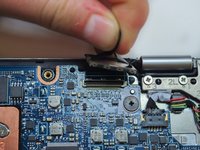
Disconnect both ends of the two blue ZIF (zero insertion force) connectors in the upper left corner by gently flipping the black tabs on the connector and pulling up and away from both ends of the connectors.
-
-
-
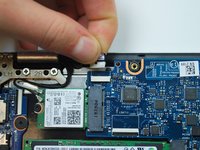
Unplug the black and white wireless LAN cables in the upper left corner by gently pulling upwards.
-
-
-
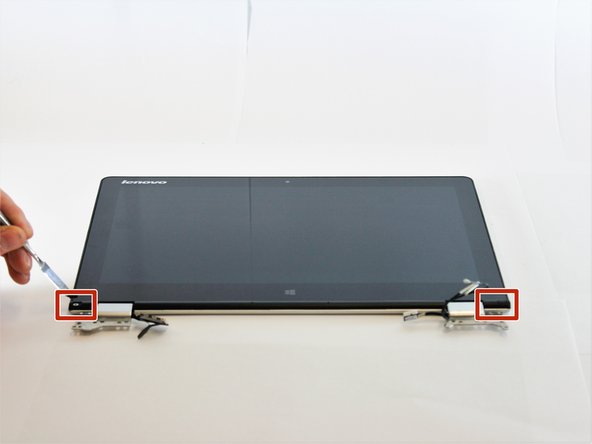
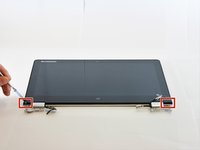
Remove the six 5mm Phillips #1 screws located in the top left and right corners to free the hinges.
-
Fully extend the hinges by prying upwards.
-
-
-
Remove the base from the LCD by lifting it upwards.
-
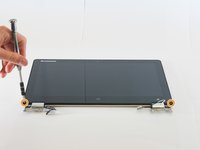
Flip the LCD so that the hinges face you and the screen faces upwards.
-
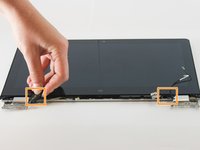
Remove the two LCD bezel screw pads located in the bottom left and right outer corners by pulling them up and out.
-
Remove the two 4.4 mm Phillips #1 screws located under the screw pads.
-
Pry the two side hinge covers with a plastic spudger and pull them up and away from the LCD.
-
-
-
Remove the LCD hinge cover by gently prying the pieces with a plastic spudger and lifting the hinge cover up and out.
-
-
-
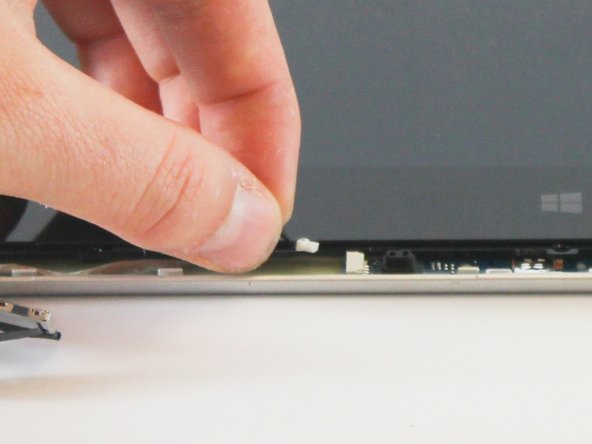
Disconnect the white MIC board connecter located near the center of the LCD bezel by pulling it out to the left.
-
Flip the hinges up and remove the hinge rubbers by pulling the wires out and away from the hinges.
-
-
-
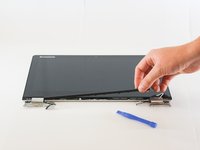
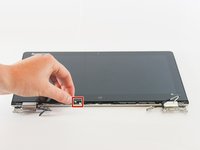
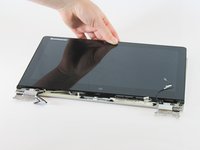
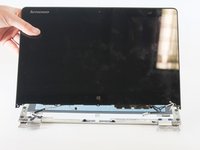
Remove the LCD by carefully pulling away from the hinges and upwards.
-


To reassemble your device, follow these instructions in reverse order.
To reassemble your device, follow these instructions in reverse order.
crwdns2935221:0crwdne2935221:0
crwdns2935229:07crwdne2935229:0
crwdns2915084:0crwdne2915084:0

Cal Poly, Team 15-6, Livingston Fall 2016 crwdns2935289:0Cal Poly, Team 15-6, Livingston Fall 2016crwdne2935289:0
CPSU-LIVINGSTON-F16S15G6
crwdns2931471:04crwdne2931471:0
crwdns2935297:07crwdne2935297:0
crwdns2947410:01crwdne2947410:0
Just what I needed to replace the adhesive tape on my screen. Thanks!
Your list of t7 screwdriver costed me to order a wrong one.
it should be T5 but the ad listed T7!!!!!
it is frustrating.
Remy Williams - crwdns2934203:0crwdne2934203:0
Mine had T5 as well.
alan - crwdns2934203:0crwdne2934203:0