crwdns2915892:0crwdne2915892:0
The trackpad is the component that controls the movement of the cursor on the screen with respect to the gestures made by your fingers. In this guide you will be instructed how to remove the trackpad of your laptop. Whether it's completely broken or just dirty from eating too many Cheetos, this guide has you covered.
crwdns2942213:0crwdne2942213:0
-
-
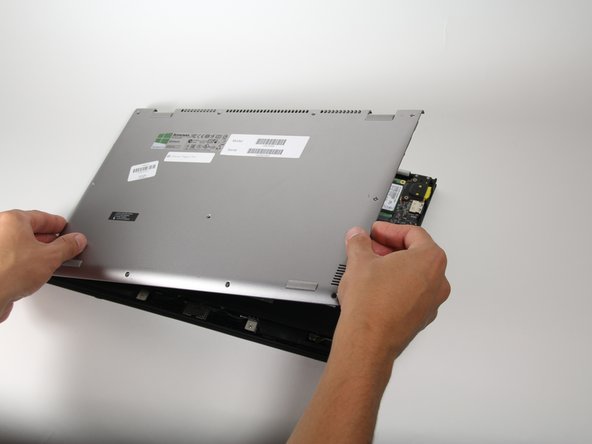
Using a Phillips #00 screwdriver, remove the eleven 1/4" screws from the back of the laptop.
-
-
-
Gently unclip and lift off the back cover.
My notes say that when I changed the SSD I had to use a Torque #5 for the eleven screws on the back … and that I had to use the correct torque settings for them when I replaced them.
I have the screwdrivers … anyone know where I find those torque settings for the back-cover (11) screws?
found them!
torque specifications: 1.85 +/- 0.15 kgf*cm
citation: Lenovo Yoga 2 Pro, 13 inch Display, Hardware Maintenance Manual
… conversion to “English” units … 1 lbf in == 1.15 kgf cm
so the above specification is equivalent to: 1.61 lbf in +/- 0.13 lbf in
-
-
-
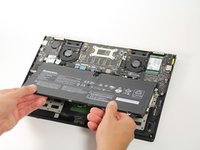
Using a Phillips #00 Screwdriver, remove the five 5/16" screws surrounding the battery.
-
-
-
crwdns2935267:0crwdne2935267:0Tweezers$4.99
-
Using either tweezers or your fingers, disconnect the black battery cable by pinching either side of the connector and pulling towards the battery.
-
-
-
Remove the battery from the computer.
This is exactly how you replace the battery. Would like to know how the author got the Yoga 2 Pro to recognize the battery as I’ve done the replacement per this write up and it went smooth, but the system doesn’t recognize the battery. Lenovo’s website is of no value and I can’t find an answer that works.
With my ifixit tool kit…the big black box, I can open, repair and close any pc, desktop or laptop. The fix went smooth, but nada on how to have the system recognize the new battery.
-
-
-
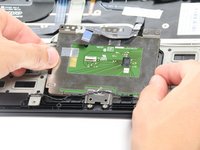
Using a Phillips #00 screwdriver, remove the eight 1/8" screws surrounding the trackpad.
-
-
crwdns2935267:0crwdne2935267:0Tweezers$4.99
-
Using a sharp tool such as tweezers, lift up the black cover that is on top of the ribbon cable.
-
-
-
With tweezers, gently slide the ribbon cable out from under the connector.
-
-
-
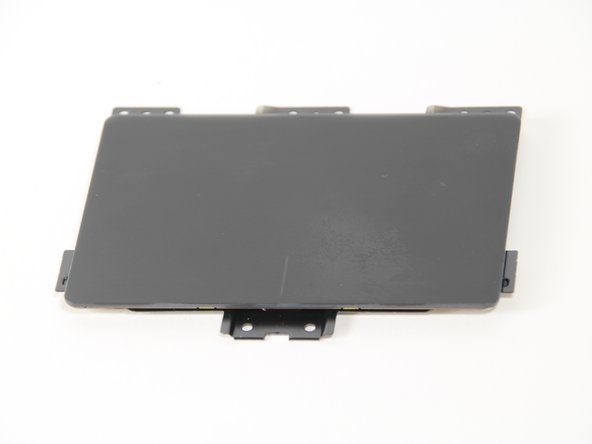
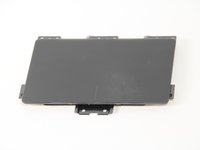
Lift the trackpad out of the computer.
-


To reassemble your device, follow these instructions in reverse order.
To reassemble your device, follow these instructions in reverse order.
crwdns2935221:0crwdne2935221:0
crwdns2935229:06crwdne2935229:0

crwdns2915084:0crwdne2915084:0

Cal Poly, Team 12-14, Maness Fall 2015 crwdns2935289:0Cal Poly, Team 12-14, Maness Fall 2015crwdne2935289:0
CPSU-MANESS-F15S12G14
crwdns2931471:05crwdne2931471:0
crwdns2935297:013crwdne2935297:0
crwdns2947412:03crwdne2947412:0
Where can I buy this trackpad? Mine is done.
Same here. Where can I buy the part? I cannot even find a part number.
I got a lot of different options on ebay but cannot rely on them. I think we could order it from IBM FRU parts but only by email or phone at:
https://www-304.ibm.com/shop/americas/co...
FRU: 73040855
Will try tomorrow
Eleven #5 Torque screws…..
jo diamond - crwdns2934203:0crwdne2934203:0