crwdns2915892:0crwdne2915892:0
The random access memory (RAM) module is an essential component to a functioning and working laptop. The RAM is a component that stores short-term memory and is completely different from other memory modules or storage devices in a laptop, such as a SSD or a hard drive. Some boot-up procedures and programs may be stored on the RAM when a device is turned on.
If you find that your device is slower than usual or if it isn’t properly booting, it may be time to replace the RAM. Follow these instructions to replace the RAM in your Lenovo ThinkPad T450.
crwdns2942213:0crwdne2942213:0
-
-
Using your hands, slide the two locking tabs away from each other to release the battery.
-
Slide the battery up and out of the device.
-
-
-
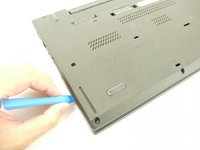
Using the JIS #00 screwdriver, unscrew seven screws from the back cover.
-
Use the JIS #00 screwdriver to remove the single 2.8 mm screw from the back cover.
-
-
-
-
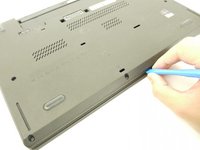
Insert a plastic opening tool into the edges of the laptop and work your way around the edges to pry off the back cover from the device.
-
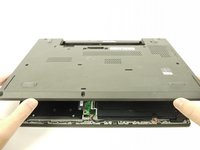
Remove the back cover from the device.
-
-
-
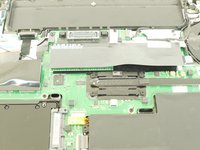
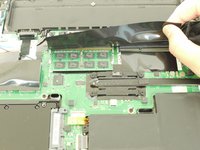
Lift up the black piece of tape and remove it to uncover the RAM sticks underneath.
-
-
-
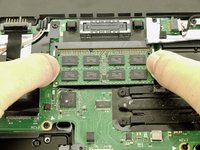
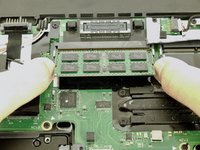
Using your fingers, push the two clips securing the RAM away from each other to release the RAM.
-
Remove the RAM stick from the device.
-


To reassemble your device, follow these instructions in reverse order.
Take your e-waste to an R2 or e-Stewards certified recycler.
crwdns2935221:0crwdne2935221:0
crwdns2935229:03crwdne2935229:0
