crwdns2915892:0crwdne2915892:0
For the Lenovo ThinkPad Yoga 370 (Model Number: 20JH002AUS), if the battery is not charging the device, it could be faulty and this guide will show step by step instructions on how to replace the faulty battery.
Caution: When replacing the battery, make sure the replacement battery is the exact same type as before. Replacement of a wrong battery could cause it to ignite.
crwdns2942213:0crwdne2942213:0
-
-
Remove the stylus from the device and set it aside.
-
-
-
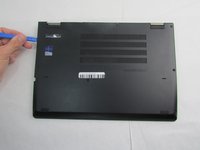
Using the Phillips #00 screwdriver unscrew the eight circled 4mm screws until you hear a click.
-
-
-
-
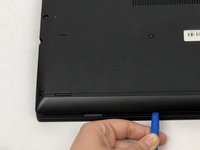
Using the plastic opening tool, work around the edges of the bottom cover to undo the plastic clips.
-
-
-
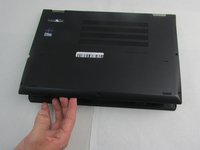
Gently remove the cover by placing your fingers around the edges.
-
-
-
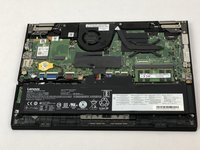
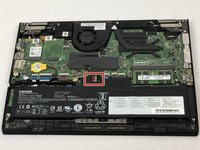
With your fingers, fold back the plastic cover highlighted.
-
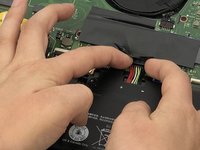
Using two fingers, gently remove the battery connectors.
-
-
-
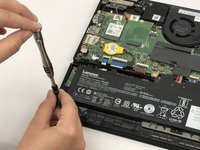
Using the Phillips #00 screwdriver, remove the two 4mm screws.
-
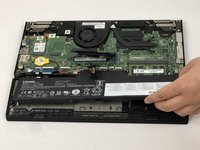
Remove the battery.
-


To reassemble your device, follow these instructions in reverse order.
Note: Due to the similarity of the devices, several of the pictures were used from the Lenovo ThinkPad Yoga 260 Battery Replacement Guide to show the specific components that were missing in the Yoga 370.
To reassemble your device, follow these instructions in reverse order.
Note: Due to the similarity of the devices, several of the pictures were used from the Lenovo ThinkPad Yoga 260 Battery Replacement Guide to show the specific components that were missing in the Yoga 370.
crwdns2935221:0crwdne2935221:0
crwdns2935227:0crwdne2935227:0

crwdns2915084:0crwdne2915084:0

Embry-Riddle Aeronautical University, Team S12-G6, Lamothe Fall 2019 crwdns2935289:0Embry-Riddle Aeronautical University, Team S12-G6, Lamothe Fall 2019crwdne2935289:0
ERAU-LAMOTHE-F19S12G6
crwdns2931471:03crwdne2931471:0
crwdns2935297:05crwdne2935297:0
crwdns2947410:01crwdne2947410:0
There’s a procedure you must do before removing any of the screws- disable the battery!