crwdns2915892:0crwdne2915892:0
This guide will show you how to remove key parts to access the SSD. The SSD provides the laptop with external storage for performance.
SSDs have a limited lifespan, and over time, the factory-installed SSD in a laptop will age and eventually run out of usable storage. You would have to change the SSD. Getting extra data/storage provides the laptop with better performance power and space to render applications. This process should only take a maximum of 20 minutes to complete.
crwdns2942213:0crwdne2942213:0
-
-
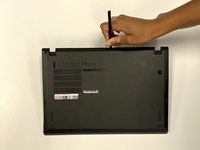
Close the device and flip it over to expose the back panel.
-
-
-
Use a Phillips #1 screwdriver to unscrew the five captive screws on the back panel until a small pop is heard.
-
-
-
-
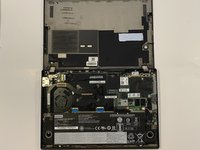
Gently wedge an opening tool or spudger under the back panel, and loosen the clips around the perimeter until the back panel comes off.
-
Remove the back cover.
-
-
-
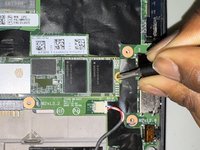
Use a Phillips #1 screwdriver to remove the 3.5 mm screw securing the SSD.
-
-
-
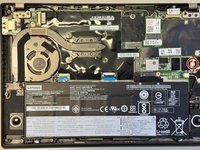
Grip the SSD on the sides with your thumb and pointer finger, pulling straight to the right side, removing it.
-


To reassemble your device, follow the above steps in reverse order.
Take your e-waste to an R2 or e-Stewards certified recycler.
Repair didn’t go as planned? Try some basic troubleshooting or ask our Answers community for help.

crwdns2935287:0crwdne2935287:0

University of North Texas, Team 3-7, Coppersmith Fall 2024 crwdns2935289:0University of North Texas, Team 3-7, Coppersmith Fall 2024crwdne2935289:0
UNT-COPPERSMITH-F24S3G7
crwdns2931471:04crwdne2931471:0
crwdns2935297:04crwdne2935297:0