crwdns2915892:0crwdne2915892:0
The process to replace the keyboard on the Lenovo X1 ThinkPad Yoga 2nd Generation is a relatively complicated task. Through the next steps, the guide will explain the process to fully remove the keyboard.
crwdns2942213:0crwdne2942213:0
-
-
Flip over the laptop to access the back cover.
-
-
-
Use a Phillips #0 screwdriver to remove the eight 8 mm screws.
More pricesely, screws need to be unscrewed, but not removed, since they stay attached to the back cover. Trying to remove them may damage the small gaskets around the screw shaft.
-
-
-
Remove the back cover.
-
-
crwdns2935267:0crwdne2935267:0Tweezers$3.99
-
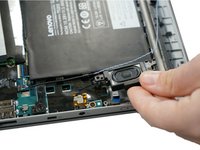
Follow the ribbon cable that runs from the left speaker to the motherboard.
-
Pull the black connector up and release the cable wire by hand.
-
-
-
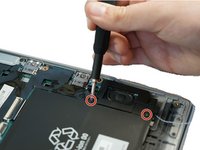
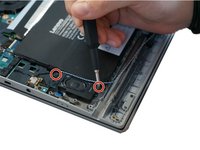
Remove two 6 mm Phillips #0 screws from each speaker.
-
-
-
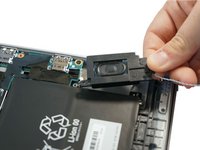
Use your fingers to remove the speakers from the device.
-
-
-
Use a spudger to pop the ribbon cable that runs from the upper-middle portion of the battery to the motherboard out of the motherboard.
-
-
-
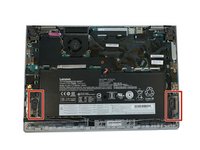
Use a Phillips #0 screwdriver to remove one 6 mm screw from the bottom-middle portion of the battery.
-
-
crwdns2935267:0crwdne2935267:0Tweezers$4.99
-
Lift up the small, metal tab using a spudger.
-
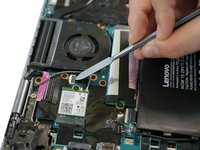
Gently lift the ribbon cable from its socket using nylon-tipped reverse tweezers.
-
-
-
Using the Phillips #0 screwdriver, unscrew the four 4 mm screws directly next to the fan.
-
-
-
-
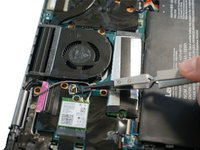
Loosen the four 5 mm screws in the metal extension attached to the fan.
-
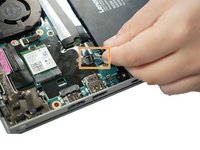
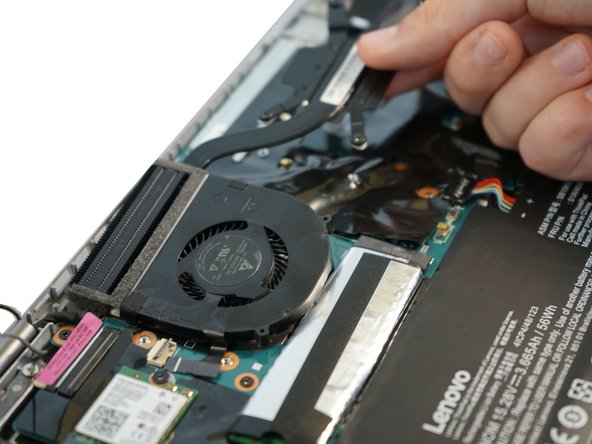
Remove the fan using your fingers.
-
-
-
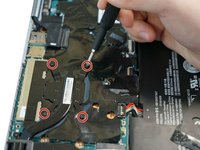
Using a Phillips #0 screwdriver, remove all 16 of the 6 mm screws connecting the motherboard to the computer.
-
-
-
Using the nylon spudger, disconnect the grey and black wires.
-
Using the nylon spudger, gently disconnect the pink tab from the motherboard.
-
-
-
Carefully remove the black tape with your fingers.
-
-
-
Lift the Black flap using a plastic spudger.
-
Pull out the ribbon cable with the black tab.
-
-
-
Remove the purple tab by gently pulling it out.
-
-
-
Remove the blue tab by gently pulling it out.
-
-
-
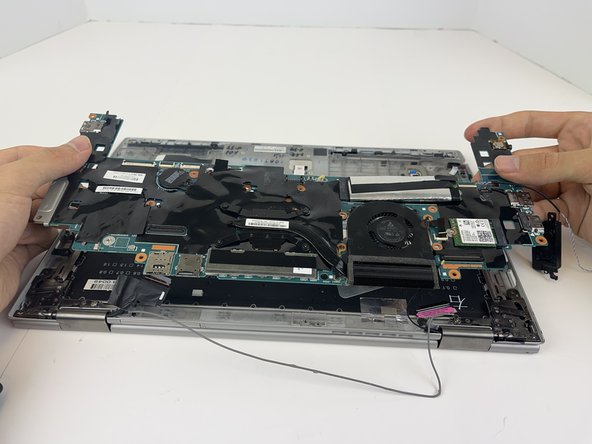
Gently lift up on the sides with your hands and remove the motherboard.
-
-
-
Lift the black flap with the plastic spudger.
-
Pull out the ribbon cable with the black tab.
-
-
-
Use the spudger to gently pry up the ribbon cable.
-
-
-
Use the spudger to disconnect the ribbon cable.
-
-
-
Use the Phillips #0 screwdriver to remove the three 2.8 mm screws holding down this metal plate.
-
Repeat the same process with the identical metal plate on the opposite side.
-
-
-
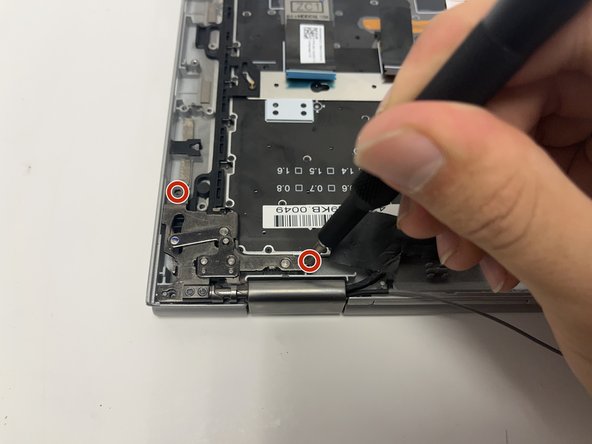
Use the Phillips #0 screwdriver to remove the two 5.4 mm screws connecting the hinge mount to the base.
-
Repeat on the opposite hinge mount.
-
-
-
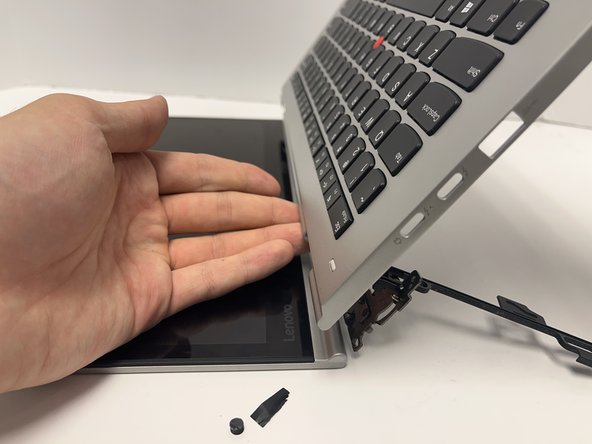
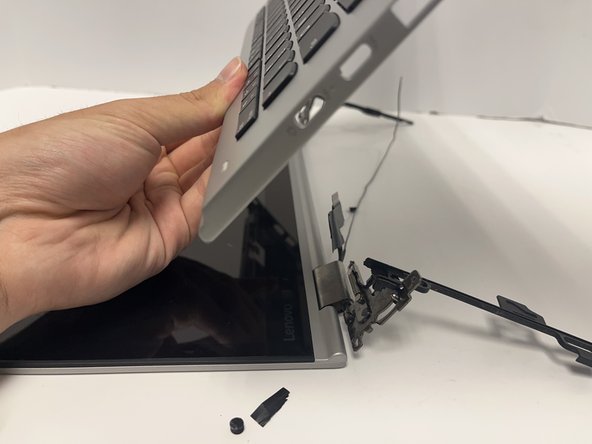
Open the laptop hinge by pulling the screen away from the keyboard.
-
Lift the keyboard up and off the hinge brackets.
-
-
-
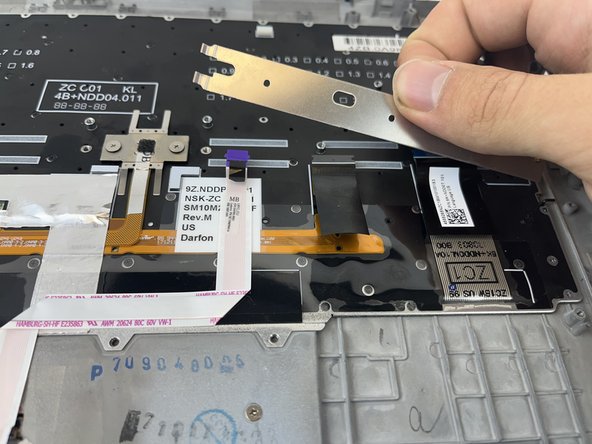
Use the Phillips #0 screwdriver to remove the two 3.2 mm screws securing the metal bar on the right side.
-
Repeat with the identical bar on the left.
-
-
-
Use the Phillips #0 screwdriver to remove the two 2.5 mm screws on the metal plate in the center of the keyboard.
-
-
-
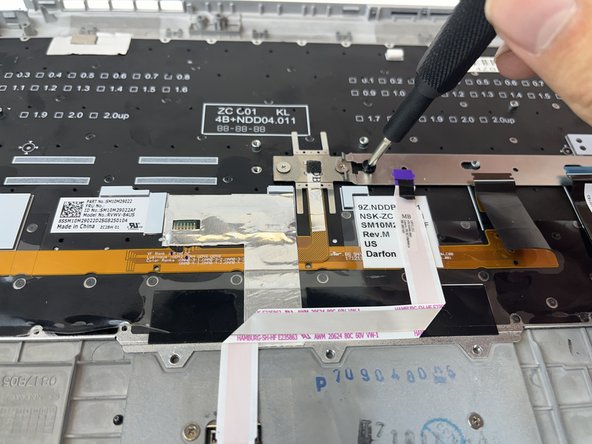
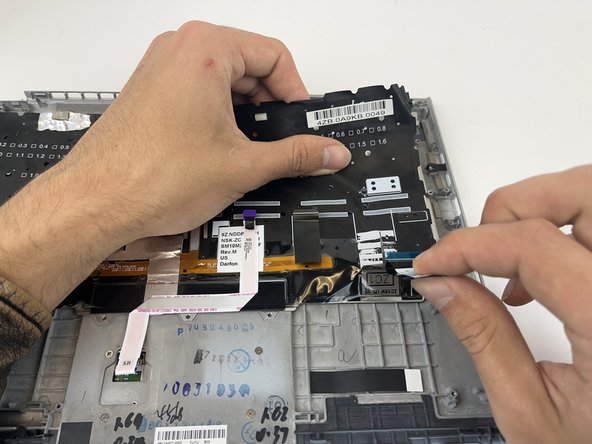
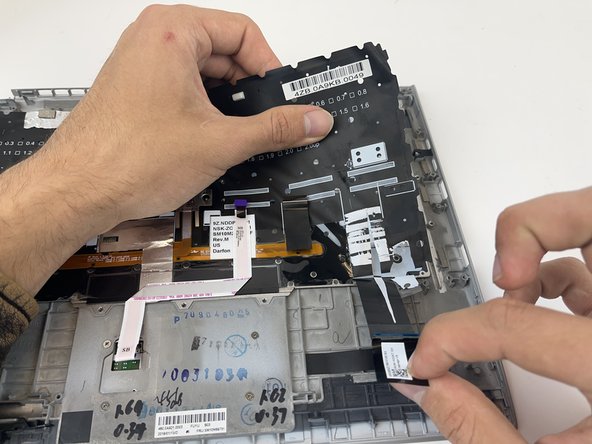
Carefully pull back on the black tab to remove the ribbon cable from the back of the keyboard.
-
-
-
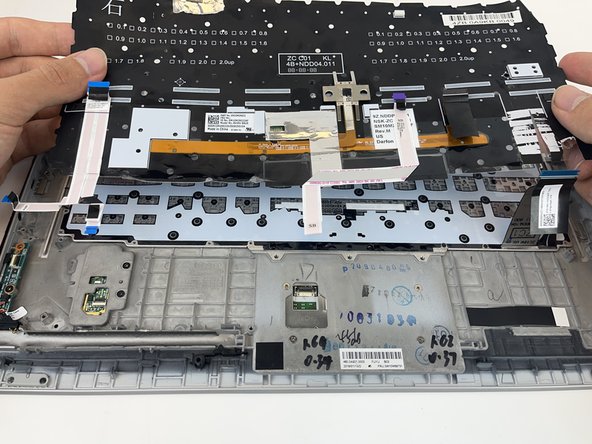
Use the plastic spudger to pry up the black plastic sheet on the back of the keyboard.
-
Gently pull the sticky edges of the plastic sheet with your hands and a spudger.
-
Lift and carefully remove the plastic sheet.
-
-
-
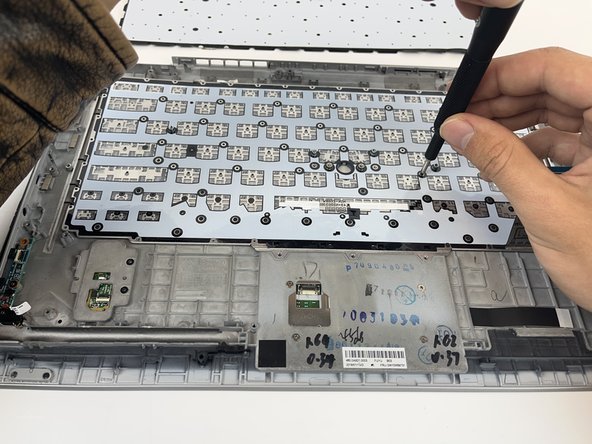
Remove all the 2 mm screws from the back of the keyboard using a Phillips #000 screwdriver.
-
-
-
Gently lift the keyboard out of the laptop.
-


To reassemble your device, follow these instructions in reverse order.
To reassemble your device, follow these instructions in reverse order.
crwdns2935221:0crwdne2935221:0
crwdns2935229:03crwdne2935229:0
crwdns2915084:0crwdne2915084:0

Embry-Riddle Aeronautical University, Team 2-1, Rauch Spring 2022 crwdns2935289:0Embry-Riddle Aeronautical University, Team 2-1, Rauch Spring 2022crwdne2935289:0
ERAU-RAUCH-S22S2G1
crwdns2931471:03crwdne2931471:0
crwdns2935297:03crwdne2935297:0