crwdns2915892:0crwdne2915892:0
Before using this guide, refer to the troubleshooting page to diagnose the problem and verify if it can be fixed without having to replace the device.
Another name for the display is the screen. You would want to replace your display if it cracks or glitches in a way that prevents you from carrying out your usual tasks. Replacing a worn out or malfunctioning display would help you use your laptop better, since it enables you to view the tasks you perform.
Lenovo offers four types of displays for its ThinkPad X1 Carbon 6th Gen and this replacement guide applies to all four. The four displays include: the 14 inch FHD (1920 x 1080) IPS anti-glare 300 nits, 14 inch FHD (1920 x 1080) IPS anti-glare multi-touch, 300 nits, 14 inch WQHD (2560 x 1440) IPS anti-glare 300 nits, and 14 inch HDR WQHD (2560 x 1440) IPS glossy with Dolby Vision 500 nits. The display resolutions are found in the parenthesis.
If you follow the guide closely, you should be able to replace your display without any complications. Be sure to power off your laptop prior to beginning your repair and unplug it from the power source.
crwdns2942213:0crwdne2942213:0
-
-
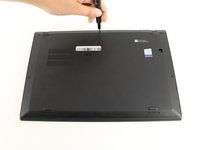
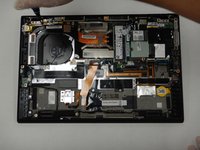
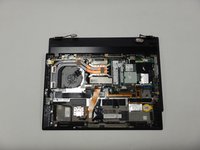
Use a Phillips #0 screwdriver to unscrew the five screws that secure the back cover to the laptop.
-
-
-
Use a Jimmy to lift the cover directly up off of the locating pins.
-
Remove the back cover.
I thank you for these instructions. They were quite helpful and I successfully replaced the fan. There is one thing however. Your instructions stated the following: "Be sure to pull on all of the cables at the same time."
I disagree. One should never pull the wires. I was able to nudge the one part of the connector loose from the other part that it fit into." I then put the new fan in and gently and carefully pushed the connecting parts together.
Otherwise, your instructions were clear and to the point. Thank you very much
The image shows prying the cover open at the bottom right. In fact, there are tabs securing the bottom edge to the frame. The cover needs to be pried open at the top edge. Once the top edge is released, the cover can be shifted slightly toward the top of the image to disengage the tabs at the bottom.
This error, along with the similar error about removing the battery in step 4, suggests that the instructions were written with the laptop in the opposite orientation than what is shown in the images.
I also don't believe that the iFixit Jimmy is necessary - in fact, it might scratch up the exterior paint of the X1 Carbon Gen 6. Instead, I find the triangular iFixit picks are more appropriate for the task: iFixit Opening Picks (Set of 6)
Also, at least for my unit, the lid comes off easily and I only use the plastic picks if there's any resistance and I don't want to risk breaking any of the clips.
-
-
-
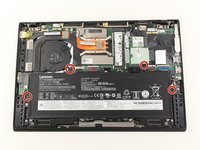
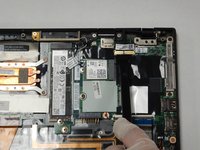
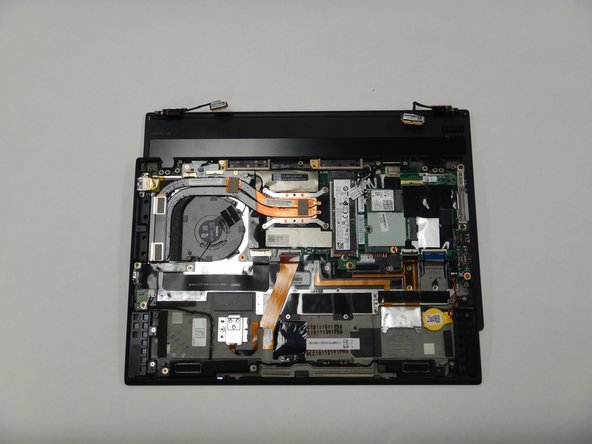
Use the Phillips #0 screwdriver to remove the four 5 mm screws that secure the battery to the laptop frame.
The screw holes do not align 100%. Dont tighten all the screws as you re-insert them, leave just a little bit of play so that you can push the battery slightly until all the screws fit nicely, then tighten them. A little bit of DIY wisdom helps here. :-)
-
-
-
-
Take out the battery by lifting it from the top edge of the laptop, and then pulling away from the motherboard.
Recommend changing the command language to lifting from the TOP edge, as the BOTTOM edge is secured.
Thank you, was wondering what I'm doing wrong
Agreed, the original description is misleading at best, wrong at worst!
You forgot to tell people to disconnect the battery from the motherboard before removing…
Agree with both comments above: lift from top left and top right of battery. This disconnects it and it lifts out and away.
In my 6th generation X1 Carbon there are two wires that are routed on the edge of the battery and have to be moved out of the way. These are antenna cables, be gentle with them, kinks and indents change their high frequency properties and may lead to problems with your WIFI.
Before removing laptop cover you can disable the battery in the bios before beginning work for extra safety. Battery will be re-enabled at next startup automatically.
How do I know the generation of my X1 Carbon?
Does this batter fit all generations?
The generation info of Lenovo ThinkPad X1 Carbon is marked on the back cover (i.e., 6th Generation), with shiny black color (ink ?), near the fan's openings.
The battery's original PN for 6th gen is ASM P/N SB10K97587 (FRU P/N 01AV430), marked visible on the battery (after removing the back cover).
The #0 Phillips screwdriver furnished with the kit was not well machined; it threatened to strip out the Phillips cross-grooves.
Fortunately, in my own toolbox I had a robust and well machined #0 screwdriver, and was able to remove the battery screws without stripping the grooves.
Otherwise, the kit was excellent.
Roger Mehle - 10/23/23
Hi @rogermehle, I'm very sorry to hear about the Phillips #0 screwdriver trouble. If you would like to reach out to our Customer Support team via help.ifixit.com, they will be able to assist you. Thank you for letting us know. We're happy your repair was a success overall : )
Yes top edge lift. Can't they change this?
-
-
-
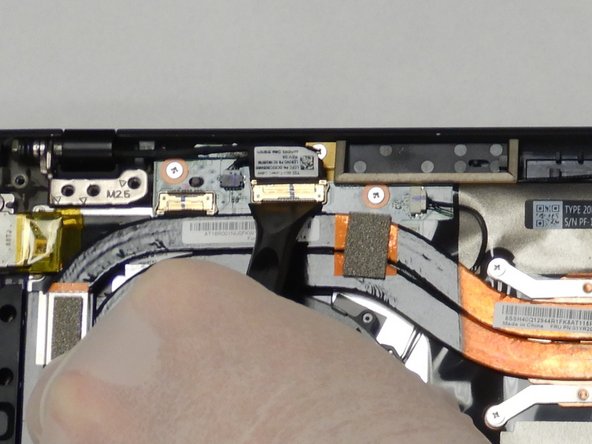
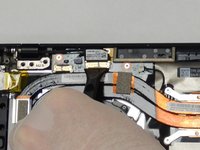
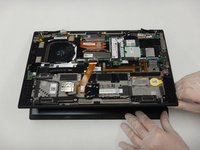
Disconnect the two display cables from the motherboard by lifting the press fit connectors off the board with a spudger.
For step 2, we recommend deleting DISCONNECT THE CABLES BY, to remove confusion.
-
-
-
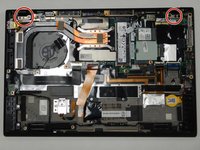
Using a Phillips #0 screwdriver, remove the six 5 mm screws connecting the display hinges to the device.
-
-
-
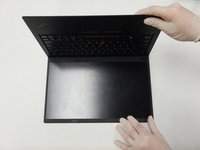
Open the device display to open the hinges.
-
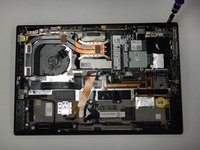
Pull the raised half towards yourself to remove the key board.
We recommend changing the word IT to THE KEYBOARD. This will avoid confusion for the guide user.
-


To reassemble your device, follow these instructions in reverse order.
To reassemble your device, follow these instructions in reverse order.
crwdns2935221:0crwdne2935221:0
crwdns2935229:04crwdne2935229:0
crwdns2915084:0crwdne2915084:0

The Citadel Military College of South Carolina, Team S1-G2, Eggleston Fall 2020 crwdns2935289:0The Citadel Military College of South Carolina, Team S1-G2, Eggleston Fall 2020crwdne2935289:0
CMCSC-EGGLESTON-F20S1G2
crwdns2931471:03crwdne2931471:0
crwdns2935297:06crwdne2935297:0
crwdns2947412:03crwdne2947412:0
This only explains how to remove the complete lid assembly. What about replacing the screen itself??
Yes, I agree this guide is not complete. There are 2 types of bezels and they stick onto the screen rather than being fastened or clipped. In order to actually replace the LCD part listed here the bezel will need to be peeled off and it needs to be replaced as well since the adhesive isn't designed to be reused. From what I recall (and this is to be taken with a grain of salt as I last did this exact replacement 2 years ago), once the lid assembly is removed from the hinges and bezel peeled off, the LCD just pops out.