crwdns2933423:0crwdne2933423:0

Lenovo ThinkPad T480s LCD Assembly Replacement

crwdns2942213:0crwdne2942213:0

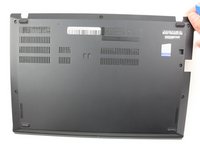
  1. Lenovo ThinkPad T480s LCD Assembly Replacement, Bottom Cover: crwdns2935265:01crwdnd2935265:01crwdnd2935265:02crwdne2935265:0 Lenovo ThinkPad T480s LCD Assembly Replacement, Bottom Cover: crwdns2935265:01crwdnd2935265:02crwdnd2935265:02crwdne2935265:0
    • Disable the battery, power down the device, and unplug the power adapter from your device before proceeding/beginning the guide.

    • Loosen the six captive screws with a Phillips #1 screwdriver.

  2. Lenovo ThinkPad T480s LCD Assembly Replacement: crwdns2935265:02crwdnd2935265:01crwdnd2935265:03crwdne2935265:0 Lenovo ThinkPad T480s LCD Assembly Replacement: crwdns2935265:02crwdnd2935265:02crwdnd2935265:03crwdne2935265:0 Lenovo ThinkPad T480s LCD Assembly Replacement: crwdns2935265:02crwdnd2935265:03crwdnd2935265:03crwdne2935265:0
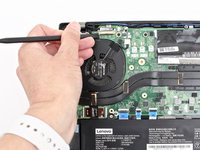
    • Remove the bottom cover with an opening tool.

    • Start from the top edge near the hinge and work your way along the edge until all of the clips are unsnapped.

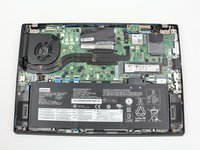
  3. Lenovo ThinkPad T480s LCD Assembly Replacement: crwdns2935265:03crwdnd2935265:01crwdnd2935265:02crwdne2935265:0 Lenovo ThinkPad T480s LCD Assembly Replacement: crwdns2935265:03crwdnd2935265:02crwdnd2935265:02crwdne2935265:0
    • Lift the bottom cover off.

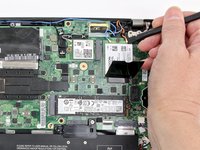
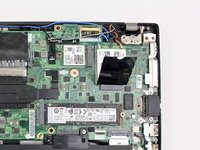
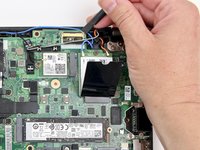
  4. Lenovo ThinkPad T480s LCD Assembly Replacement, LCD Assembly: crwdns2935265:04crwdnd2935265:01crwdnd2935265:03crwdne2935265:0 Lenovo ThinkPad T480s LCD Assembly Replacement, LCD Assembly: crwdns2935265:04crwdnd2935265:02crwdnd2935265:03crwdne2935265:0 Lenovo ThinkPad T480s LCD Assembly Replacement, LCD Assembly: crwdns2935265:04crwdnd2935265:03crwdnd2935265:03crwdne2935265:0
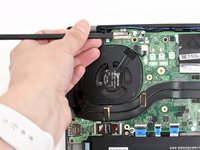
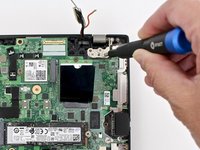
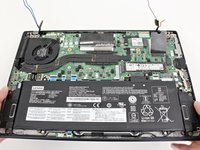
    • Use the spudger to disconnect the coaxial cables from the Wi-Fi card and WWAN card.

    • When reassembling the Wi-Fi card, reattach the black wire closest to the screw and the gray wire on the other side of the black wire. With the WWAN card, reattach the blue wire on the left and the orange wire on the right.

    • There are also small color coded arrows on each card that match the corresponding wires, to make sure you connect to the correct spot.

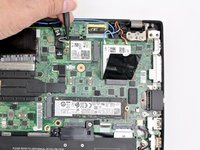
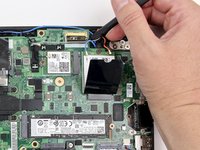
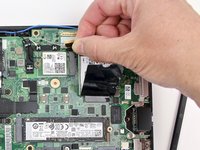
  5. Lenovo ThinkPad T480s LCD Assembly Replacement: crwdns2935265:05crwdnd2935265:01crwdnd2935265:03crwdne2935265:0 Lenovo ThinkPad T480s LCD Assembly Replacement: crwdns2935265:05crwdnd2935265:02crwdnd2935265:03crwdne2935265:0 Lenovo ThinkPad T480s LCD Assembly Replacement: crwdns2935265:05crwdnd2935265:03crwdnd2935265:03crwdne2935265:0
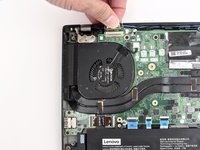
    • Use the spudger to disconnect the LCD cable from the motherboard.

  6. Lenovo ThinkPad T480s LCD Assembly Replacement: crwdns2935265:06crwdnd2935265:01crwdnd2935265:03crwdne2935265:0 Lenovo ThinkPad T480s LCD Assembly Replacement: crwdns2935265:06crwdnd2935265:02crwdnd2935265:03crwdne2935265:0 Lenovo ThinkPad T480s LCD Assembly Replacement: crwdns2935265:06crwdnd2935265:03crwdnd2935265:03crwdne2935265:0
    • Disconnect the camera cable from the motherboard using a spudger.

  7. Lenovo ThinkPad T480s LCD Assembly Replacement: crwdns2935265:07crwdnd2935265:01crwdnd2935265:02crwdne2935265:0 Lenovo ThinkPad T480s LCD Assembly Replacement: crwdns2935265:07crwdnd2935265:02crwdnd2935265:02crwdne2935265:0
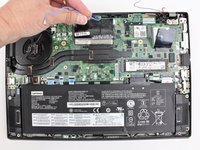
    • Remove all antenna cables from their routing.

  8. Lenovo ThinkPad T480s LCD Assembly Replacement: crwdns2935265:08crwdnd2935265:01crwdnd2935265:03crwdne2935265:0 Lenovo ThinkPad T480s LCD Assembly Replacement: crwdns2935265:08crwdnd2935265:02crwdnd2935265:03crwdne2935265:0 Lenovo ThinkPad T480s LCD Assembly Replacement: crwdns2935265:08crwdnd2935265:03crwdnd2935265:03crwdne2935265:0
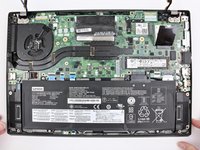
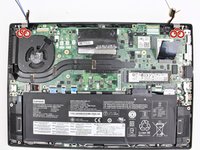
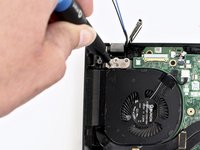
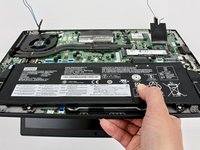
    • Using the Phillips #1 screwdriver, remove three 5 mm screws from the left hinge and three 5 mm screws from the right hinge.

  9. Lenovo ThinkPad T480s LCD Assembly Replacement: crwdns2935265:09crwdnd2935265:01crwdnd2935265:03crwdne2935265:0 Lenovo ThinkPad T480s LCD Assembly Replacement: crwdns2935265:09crwdnd2935265:02crwdnd2935265:03crwdne2935265:0 Lenovo ThinkPad T480s LCD Assembly Replacement: crwdns2935265:09crwdnd2935265:03crwdnd2935265:03crwdne2935265:0
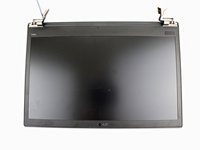
    • Carefully rotate the hinges upward and remove the bottom of the machine from the LCD unit.

crwdns2915888:0crwdne2915888:0

To reassemble your device, follow these instructions in reverse order.

Take your e-waste to an R2 or e-Stewards certified recycler.

Repair didn’t go as planned? Try some basic troubleshooting, or ask our Answers community for help.

Sarah Westberg

crwdns2935283:003/11/19crwdne2935283:0

23.366 crwdns2915208:0crwdne2915208:0

crwdns2935297:070crwdne2935297:0

crwdns2915084:0crwdne2915084:0

iFixit crwdns2935289:0iFixitcrwdne2935289:0

Staff

crwdns2931471:0136crwdne2931471:0

crwdns2935297:017.430crwdne2935297:0

crwdns2944067:00crwdne2944067:0

crwdns2917038:0crwdne2917038:0

crwdns2936625:0crwdne2936625:0:

crwdns2936751:024crwdne2936751:0 3

crwdns2936753:07crwdne2936753:0 13

crwdns2936753:030crwdne2936753:0 27

crwdns2942667:0crwdne2942667:0 558