crwdns2915892:0crwdne2915892:0
The Wi-Fi card communicates with your wireless network through the router. If it is in range, your laptop will be able to connect to the internet if it's not password protected. If your Wi-Fi card is failing, follow this guide to replace your Lenovo ThinkPad T480 Wi-Fi Card.
The main symptom of a failing Wi-Fi card is problems with connectivity—more specifically failure to locate wireless connections, intermittent wireless connections and loss of connectivity due to hardware damage.
Prior to beginning this guide, be sure to disable the internal battery, power off the device, and unplug the laptop from the charging cable.
crwdns2942213:0crwdne2942213:0
-
-
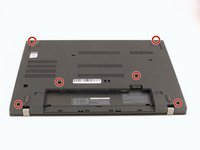
Flip the laptop over so the bottom of the device is showing.
-
-
-
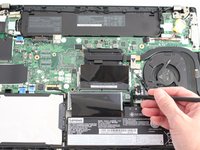
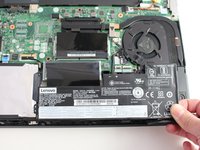
Using your fingers, slide the lock on each side of the battery to the unlocked position.
-
Remove the battery from the slot.
-
-
-
Using the Phillips #1 screwdriver, loosen the six captive screws.
-
-
-
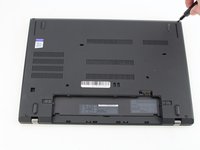
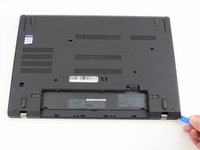
Insert the blue plastic opening tool into the space between the lower case and the chassis.
-
Slide the opening tool around the perimeter of the case to release the clips holding the case and the chassis together.
-
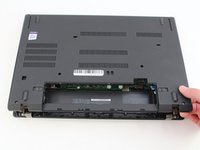
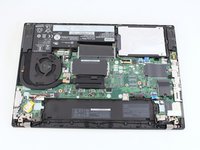
Remove the back case.
-
-
-
-
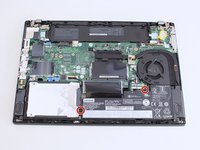
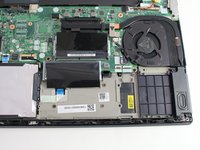
Use a Phillips #1 screwdriver to remove the two 4.6 mm screws that secure the internal battery to the frame.
-
-
-
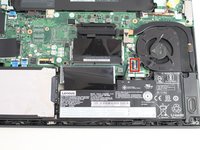
Use the spudger to slide the battery socket connector parallel to the motherboard and out of its socket on the motherboard.
-
-
-
Lift the battery straight out of its recess and remove it.
-
-
-
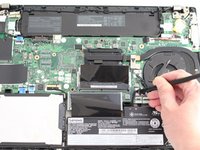
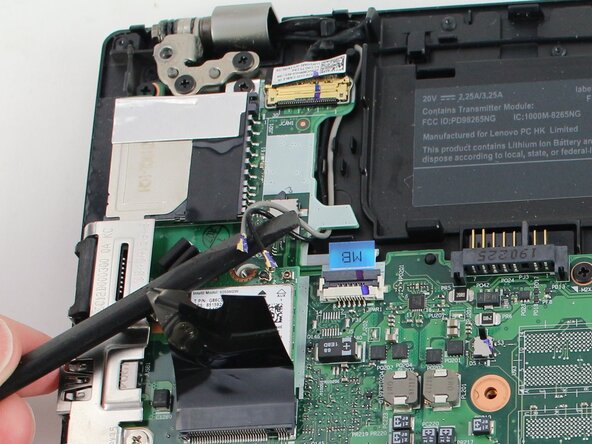
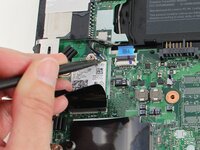
Using the Phillips #1 screwdriver, remove the single 3.6 mm screw at the top of the Wi-Fi card attaching it to the motherboard.
-
-
-
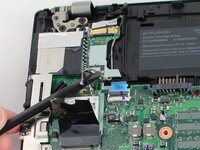
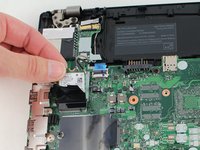
Slide a thin, ESD-safe pry tool or angled tweezers under the metal neck of the connector (as close to the head as possible) and lift straight up from the board.
-
-
-
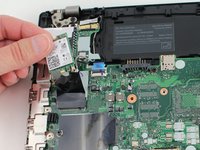
Slide the Wi-Fi card out from the slot to remove it from the board.
-


To reassemble your device, follow the above steps in reverse order.
Take your e-waste to an R2 or e-Stewards certified recycler.
Repair didn’t go as planned? Try some basic troubleshooting, or ask our Answers community for help.
crwdns2935221:0crwdne2935221:0
crwdns2935229:04crwdne2935229:0


crwdns2947412:03crwdne2947412:0
Great guide! Everyone make sure to reconnect the black cable to terminal 2 (on the left) and white to t1 (to the right).
Step 9 only worked for one of the antennaes so had to abort as they fragile, please provide an alternative method if the connector wont pop out with this method. Also a reassembly guide should be part of this, especially on how to reattach the connectors?
Hi @chrisbloggs, Thanks for your comment! ******I updated Step 9 to include a bit more detail. If you’re unable to disconnect the other cable, you might consider using an antenna disconnect tool—it's designed specifically for that task. In most cases, a spudger or tweezers will work, but the tool can be a useful alternative. Good luck with your repair!