crwdns2933423:0crwdne2933423:0

Lenovo ThinkPad T16 Gen 3 Motherboard Replacement

crwdns2942213:0crwdne2942213:0

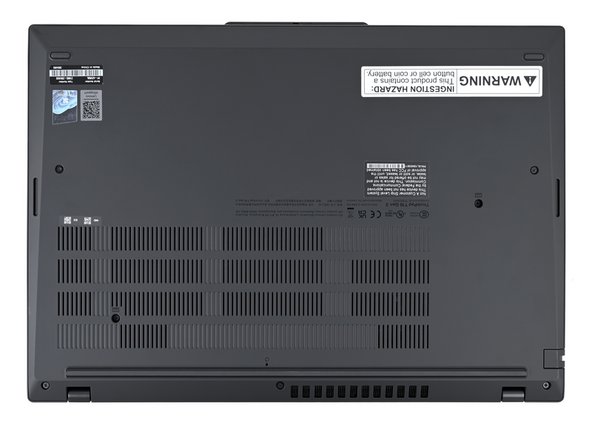
  1. Lenovo ThinkPad T16 Gen 3 Motherboard Replacement, Prepare your laptop for disassembly: crwdns2935265:01crwdnd2935265:01crwdnd2935265:03crwdne2935265:0 Lenovo ThinkPad T16 Gen 3 Motherboard Replacement, Prepare your laptop for disassembly: crwdns2935265:01crwdnd2935265:02crwdnd2935265:03crwdne2935265:0 Lenovo ThinkPad T16 Gen 3 Motherboard Replacement, Prepare your laptop for disassembly: crwdns2935265:01crwdnd2935265:03crwdnd2935265:03crwdne2935265:0
    • For your safety, discharge your battery below 25% before disassembling your laptop. A charged battery may catch fire if damaged. If your battery is swollen, take appropriate precautions.

    • Completely shut down your laptop (don't just put it in sleep mode) and disconnect all cables.

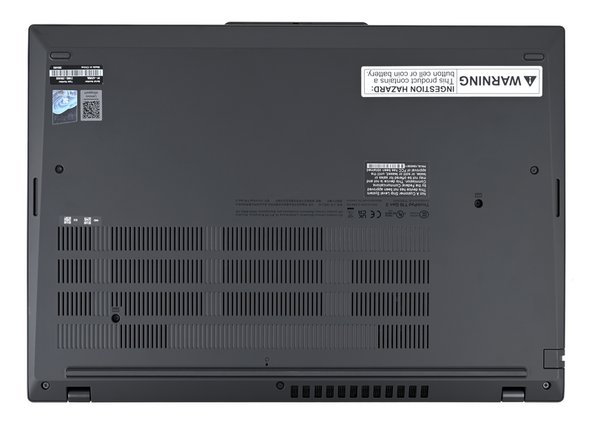
    • Flip the laptop upside-down, and rotate it so the screen hinge faces towards you.

  2. Lenovo ThinkPad T16 Gen 3 Motherboard Replacement, Loosen the keyboard screws: crwdns2935265:02crwdnd2935265:01crwdnd2935265:02crwdne2935265:0 Lenovo ThinkPad T16 Gen 3 Motherboard Replacement, Loosen the keyboard screws: crwdns2935265:02crwdnd2935265:02crwdnd2935265:02crwdne2935265:0
    • Use a Phillips screwdriver to fully loosen the two captive screws securing the keyboard to the laptop.

    • The two keyboard screws are labeled with a keyboard icon.

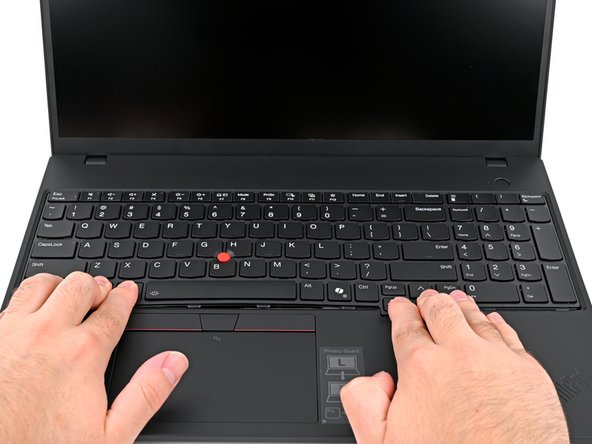
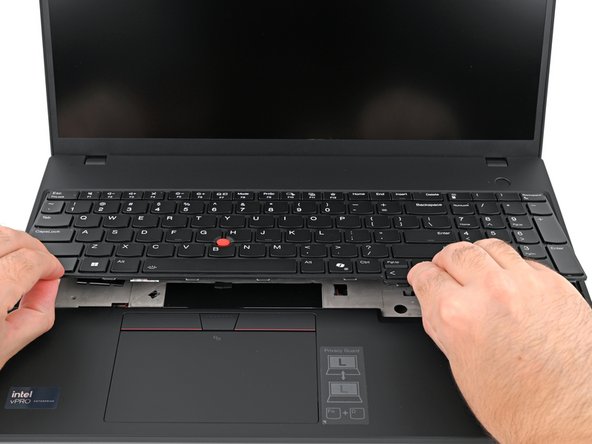
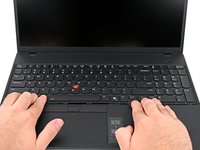
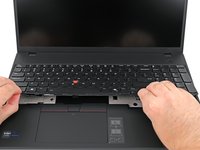
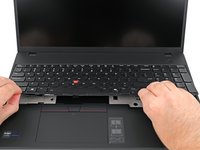
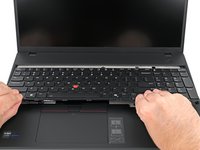
  3. Lenovo ThinkPad T16 Gen 3 Motherboard Replacement, Detach the keyboard: crwdns2935265:03crwdnd2935265:01crwdnd2935265:03crwdne2935265:0 Lenovo ThinkPad T16 Gen 3 Motherboard Replacement, Detach the keyboard: crwdns2935265:03crwdnd2935265:02crwdnd2935265:03crwdne2935265:0 Lenovo ThinkPad T16 Gen 3 Motherboard Replacement, Detach the keyboard: crwdns2935265:03crwdnd2935265:03crwdnd2935265:03crwdne2935265:0
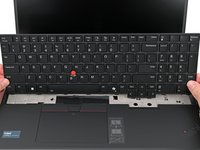
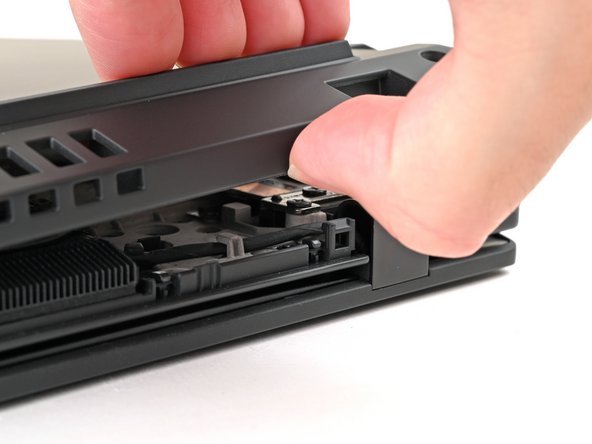
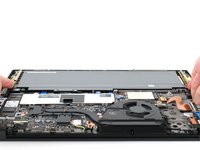
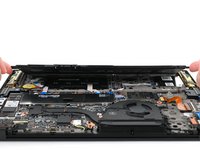
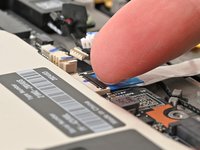
    • Place your fingers on the bottom edge of the keyboard.

    • Push the keyboard towards the screen until you can lift the bottom edge.

    • Lift the bottom edge of the keyboard slightly off your laptop.

    • Don't try to remove the keyboard yet—two ribbon cables still connect it to the laptop.

  4. Lenovo ThinkPad T16 Gen 3 Motherboard Replacement: crwdns2935265:04crwdnd2935265:01crwdnd2935265:03crwdne2935265:0 Lenovo ThinkPad T16 Gen 3 Motherboard Replacement: crwdns2935265:04crwdnd2935265:02crwdnd2935265:03crwdne2935265:0 Lenovo ThinkPad T16 Gen 3 Motherboard Replacement: crwdns2935265:04crwdnd2935265:03crwdnd2935265:03crwdne2935265:0
    • With the bottom edge lifted, pull the keyboard away from the screen until it's free from the chassis.

    • While disconnecting the cables in the next two steps, hold the keyboard upright or gently flip it over onto the trackpad. Be very careful not to strain the cables.

    • During reassembly, ensure both cables are laying completely flat to avoid bulging the keyboard or damaging components.

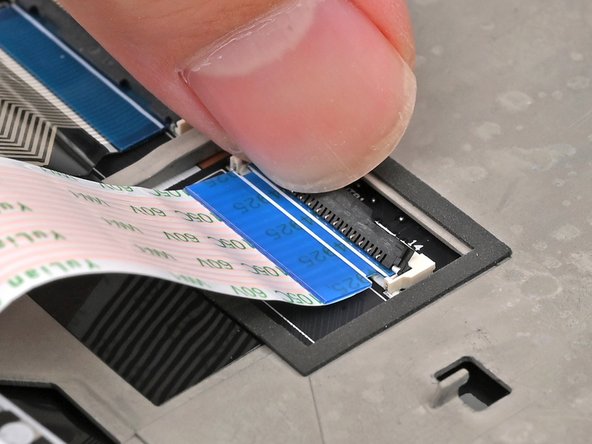
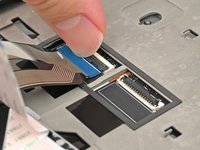
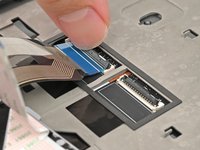
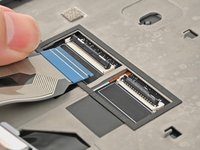
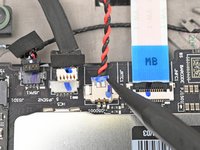
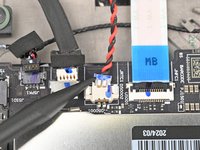
  5. Lenovo ThinkPad T16 Gen 3 Motherboard Replacement, Disconnect the TrackPoint: crwdns2935265:05crwdnd2935265:01crwdnd2935265:03crwdne2935265:0 Lenovo ThinkPad T16 Gen 3 Motherboard Replacement, Disconnect the TrackPoint: crwdns2935265:05crwdnd2935265:02crwdnd2935265:03crwdne2935265:0 Lenovo ThinkPad T16 Gen 3 Motherboard Replacement, Disconnect the TrackPoint: crwdns2935265:05crwdnd2935265:03crwdnd2935265:03crwdne2935265:0
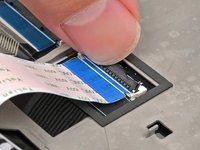
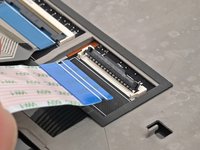
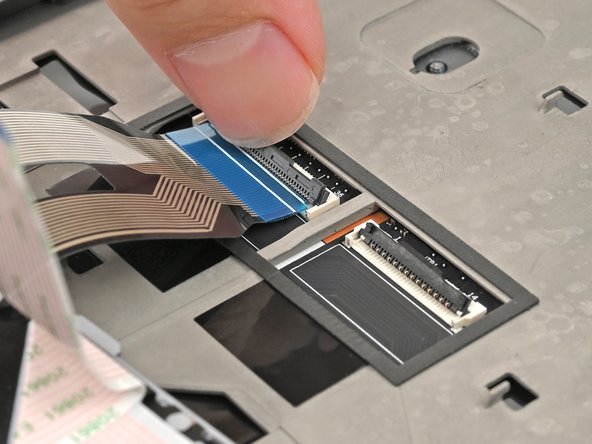
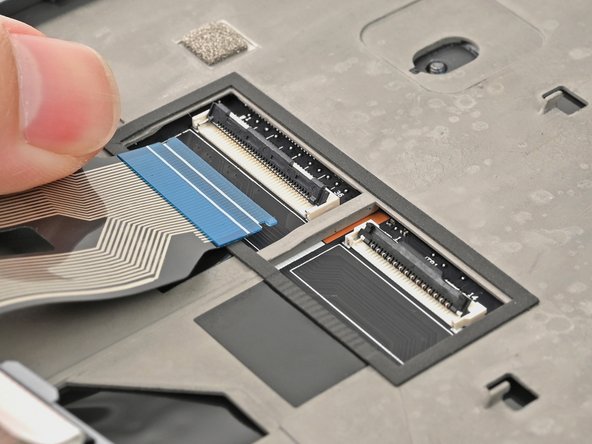
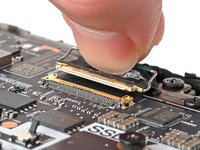
    • Use your fingernail or the flat end of a spudger to flip up the locking flap on the TrackPoint cable ZIF connector.

    • Use your fingers or tweezers to gently pull the cable out of its socket.

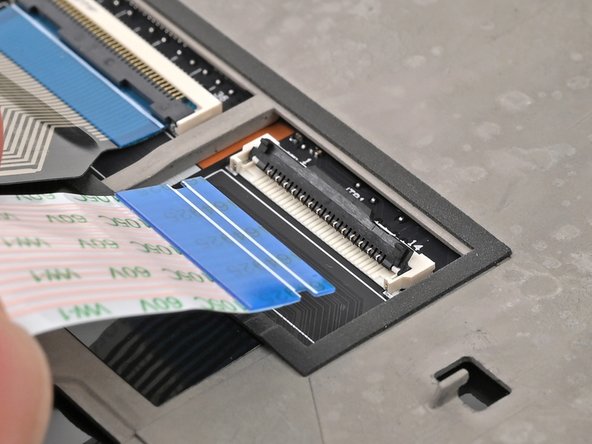
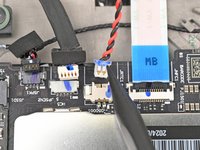
  6. Lenovo ThinkPad T16 Gen 3 Motherboard Replacement, Disconnect the keyboard: crwdns2935265:06crwdnd2935265:01crwdnd2935265:03crwdne2935265:0 Lenovo ThinkPad T16 Gen 3 Motherboard Replacement, Disconnect the keyboard: crwdns2935265:06crwdnd2935265:02crwdnd2935265:03crwdne2935265:0 Lenovo ThinkPad T16 Gen 3 Motherboard Replacement, Disconnect the keyboard: crwdns2935265:06crwdnd2935265:03crwdnd2935265:03crwdne2935265:0
    • Repeat the process to disconnect the keyboard cable.

  7. Lenovo ThinkPad T16 Gen 3 Motherboard Replacement, Remove the keyboard: crwdns2935265:07crwdnd2935265:01crwdnd2935265:01crwdne2935265:0
    • Remove the keyboard from your laptop.

  8. Lenovo ThinkPad T16 Gen 3 Motherboard Replacement: crwdns2935265:08crwdnd2935265:01crwdnd2935265:01crwdne2935265:0
    • Close your laptop, flip it upside-down, and rotate it so the screen hinge faces towards you.

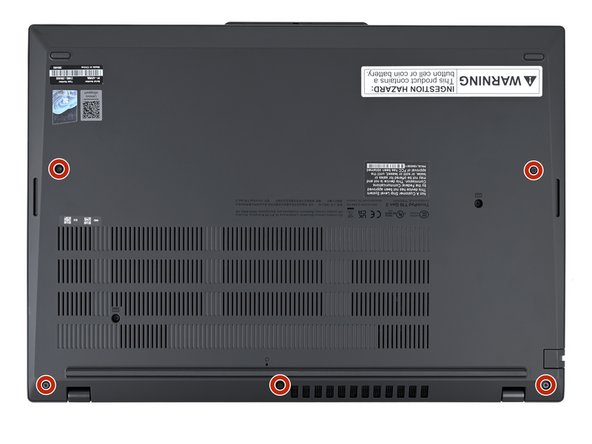
  9. Lenovo ThinkPad T16 Gen 3 Motherboard Replacement, Loosen the base cover screws: crwdns2935265:09crwdnd2935265:01crwdnd2935265:02crwdne2935265:0 Lenovo ThinkPad T16 Gen 3 Motherboard Replacement, Loosen the base cover screws: crwdns2935265:09crwdnd2935265:02crwdnd2935265:02crwdne2935265:0
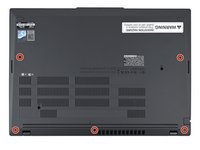
    • Use a Phillips screwdriver to fully loosen the five remaining captive screws securing the base cover.

  10. Lenovo ThinkPad T16 Gen 3 Motherboard Replacement, Pry up the base cover: crwdns2935265:010crwdnd2935265:01crwdnd2935265:03crwdne2935265:0 Lenovo ThinkPad T16 Gen 3 Motherboard Replacement, Pry up the base cover: crwdns2935265:010crwdnd2935265:02crwdnd2935265:03crwdne2935265:0 Lenovo ThinkPad T16 Gen 3 Motherboard Replacement, Pry up the base cover: crwdns2935265:010crwdnd2935265:03crwdnd2935265:03crwdne2935265:0
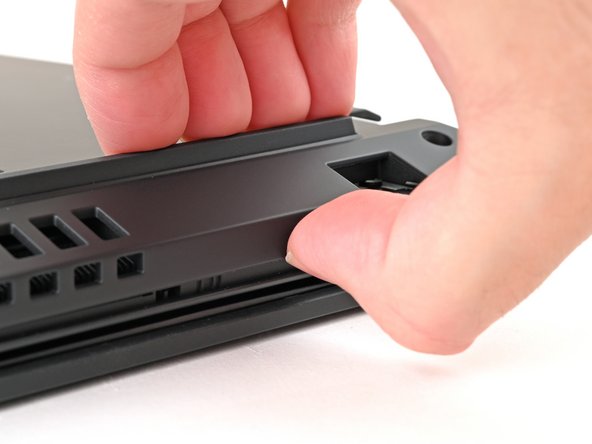
    • Insert your fingernail or an opening pick into the gap between the base cover and keyboard deck, next to one of the screen hinges.

    • Pry up the base cover until the clips unfasten.

  11. Lenovo ThinkPad T16 Gen 3 Motherboard Replacement, Remove the base cover: crwdns2935265:011crwdnd2935265:01crwdnd2935265:02crwdne2935265:0 Lenovo ThinkPad T16 Gen 3 Motherboard Replacement, Remove the base cover: crwdns2935265:011crwdnd2935265:02crwdnd2935265:02crwdne2935265:0
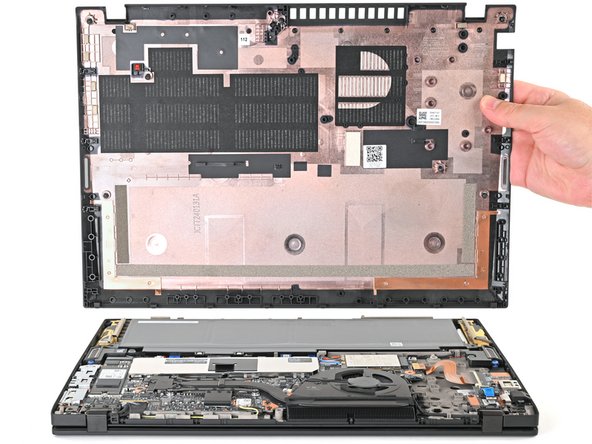
    • Grasp the base cover along the screen hinge edge and lift slowly to unfasten the remaining clips.

    • Lift and remove the base cover.

    • During reassembly, lay the base cover into the frame, inserting it into the tabs along the battery edge. Press down firmly around the perimeter to reengage all the clips.

  12. Lenovo ThinkPad T16 Gen 3 Motherboard Replacement, Loosen the battery screws: crwdns2935265:012crwdnd2935265:01crwdnd2935265:02crwdne2935265:0 Lenovo ThinkPad T16 Gen 3 Motherboard Replacement, Loosen the battery screws: crwdns2935265:012crwdnd2935265:02crwdnd2935265:02crwdne2935265:0
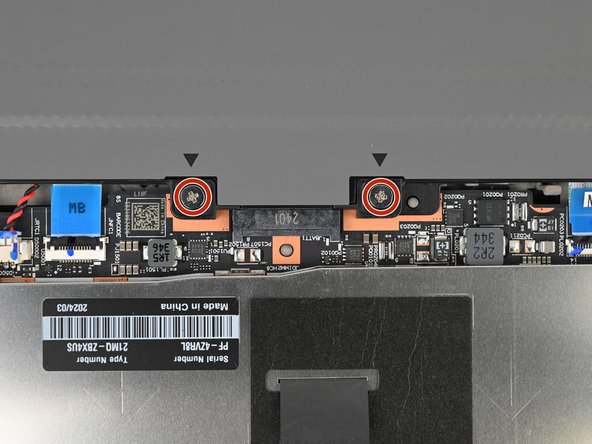
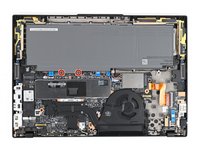
    • Because of the battery connector's design, the only way to disconnect the battery is by physically removing it.

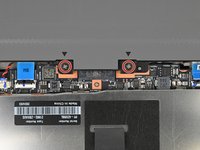
    • Use a Phillips screwdriver to fully loosen the two captive screws securing the battery connector.

  13. Lenovo ThinkPad T16 Gen 3 Motherboard Replacement, Remove the battery: crwdns2935265:013crwdnd2935265:01crwdnd2935265:03crwdne2935265:0 Lenovo ThinkPad T16 Gen 3 Motherboard Replacement, Remove the battery: crwdns2935265:013crwdnd2935265:02crwdnd2935265:03crwdne2935265:0 Lenovo ThinkPad T16 Gen 3 Motherboard Replacement, Remove the battery: crwdns2935265:013crwdnd2935265:03crwdnd2935265:03crwdne2935265:0
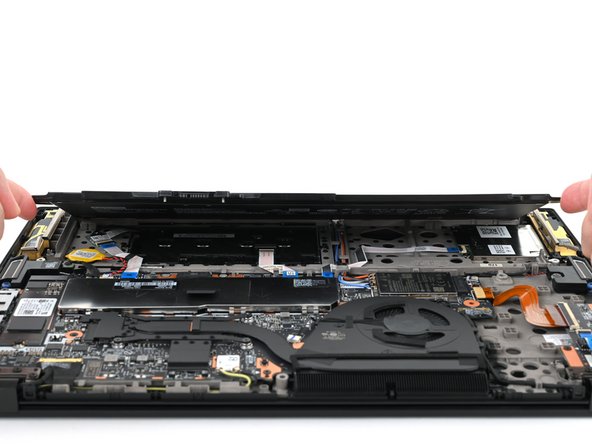
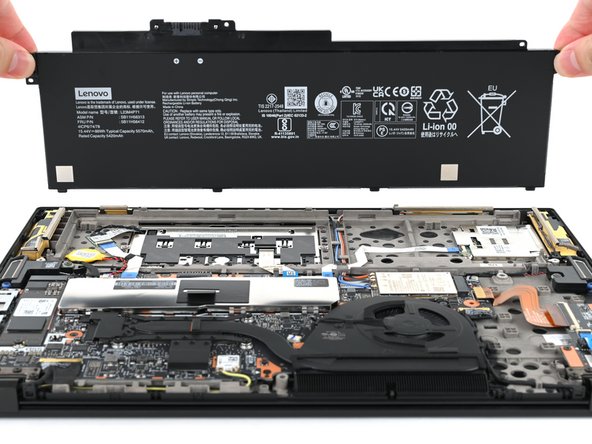
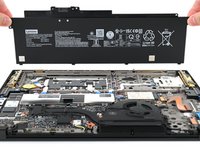
    • Lift the edge of the battery with the connector to disconnect it.

    • You may feel a little resistance from the battery connector as it disconnects—that's normal.

    • Remove the battery

    • During reassembly:

    • Slide the plastic tabs on the long edge of the battery into their recesses in the frame.

    • Lower the battery into place so the connector goes over its socket.

  14. Lenovo ThinkPad T16 Gen 3 Motherboard Replacement, Disconnect the camera cable: crwdns2935265:014crwdnd2935265:01crwdnd2935265:03crwdne2935265:0 Lenovo ThinkPad T16 Gen 3 Motherboard Replacement, Disconnect the camera cable: crwdns2935265:014crwdnd2935265:02crwdnd2935265:03crwdne2935265:0 Lenovo ThinkPad T16 Gen 3 Motherboard Replacement, Disconnect the camera cable: crwdns2935265:014crwdnd2935265:03crwdnd2935265:03crwdne2935265:0
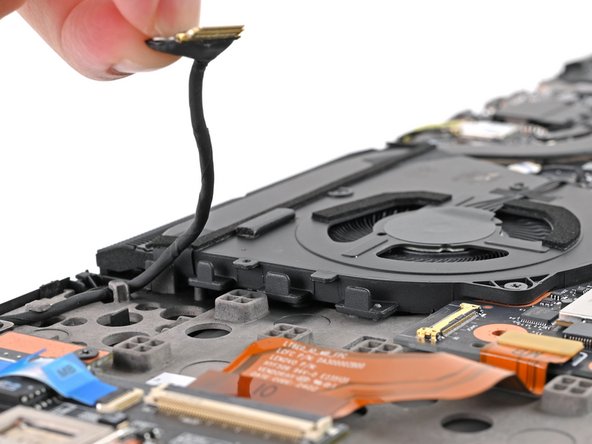
    • Use the flat end of a spudger or clean fingernail to gently push under the metal buckle of the camera cable connector to unclip it.

  15. Lenovo ThinkPad T16 Gen 3 Motherboard Replacement: crwdns2935265:015crwdnd2935265:01crwdnd2935265:02crwdne2935265:0 Lenovo ThinkPad T16 Gen 3 Motherboard Replacement: crwdns2935265:015crwdnd2935265:02crwdnd2935265:02crwdne2935265:0
    • Grab the buckle and cable together and gently pull the connector straight out of its socket.

  16. Lenovo ThinkPad T16 Gen 3 Motherboard Replacement, Free the camera cable: crwdns2935265:016crwdnd2935265:01crwdnd2935265:03crwdne2935265:0 Lenovo ThinkPad T16 Gen 3 Motherboard Replacement, Free the camera cable: crwdns2935265:016crwdnd2935265:02crwdnd2935265:03crwdne2935265:0 Lenovo ThinkPad T16 Gen 3 Motherboard Replacement, Free the camera cable: crwdns2935265:016crwdnd2935265:03crwdnd2935265:03crwdne2935265:0
    • Hold the buckle and cable together and remove the cable from the clips holding it to the fan.

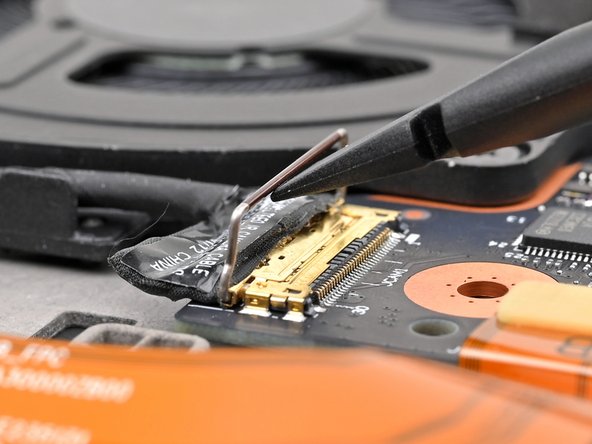
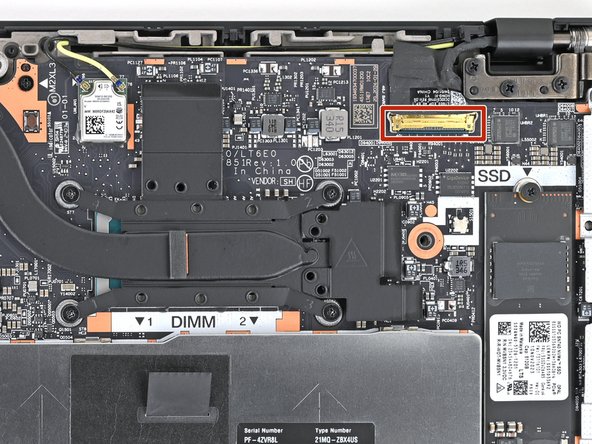
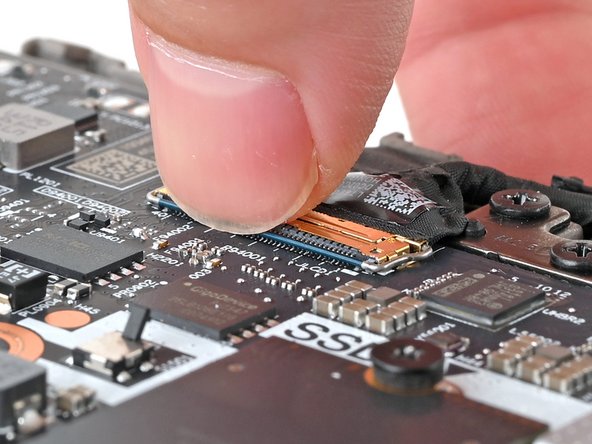
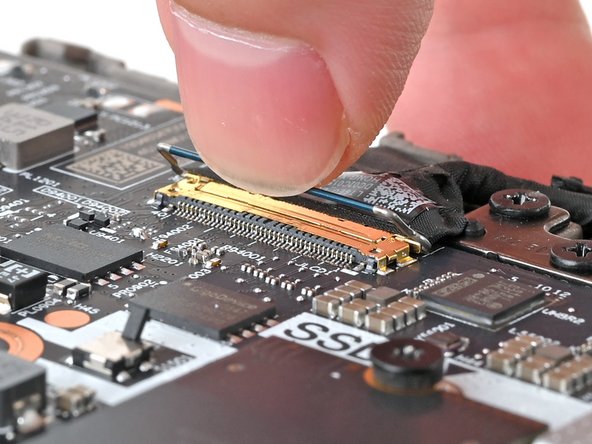
  17. Lenovo ThinkPad T16 Gen 3 Motherboard Replacement, Disconnect display cable: crwdns2935265:017crwdnd2935265:01crwdnd2935265:03crwdne2935265:0 Lenovo ThinkPad T16 Gen 3 Motherboard Replacement, Disconnect display cable: crwdns2935265:017crwdnd2935265:02crwdnd2935265:03crwdne2935265:0 Lenovo ThinkPad T16 Gen 3 Motherboard Replacement, Disconnect display cable: crwdns2935265:017crwdnd2935265:03crwdnd2935265:03crwdne2935265:0
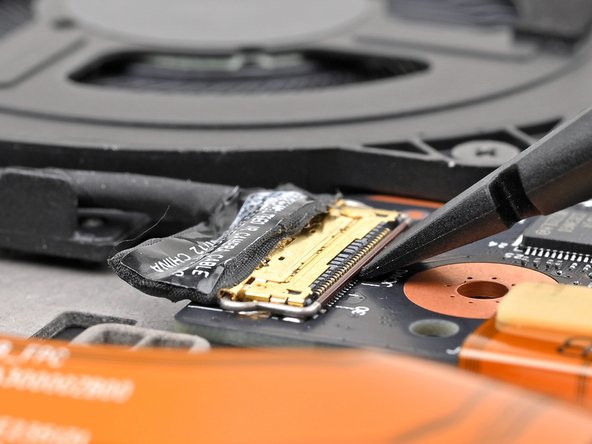
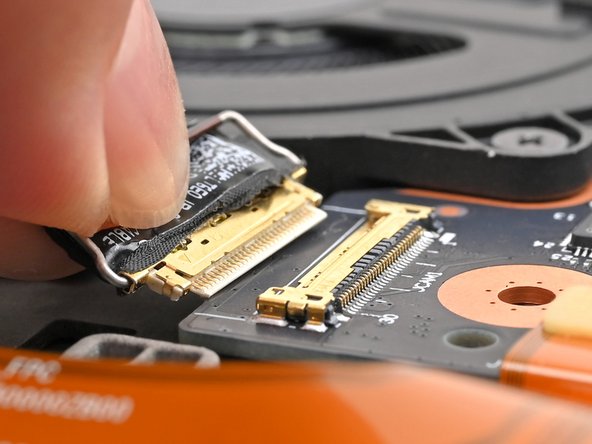
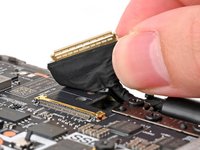
    • Use a clean fingernail or the flat end of a spudger to gently push under and lift the metal buckle of the display cable connector to unclip it.

  18. Lenovo ThinkPad T16 Gen 3 Motherboard Replacement: crwdns2935265:018crwdnd2935265:01crwdnd2935265:02crwdne2935265:0 Lenovo ThinkPad T16 Gen 3 Motherboard Replacement: crwdns2935265:018crwdnd2935265:02crwdnd2935265:02crwdne2935265:0
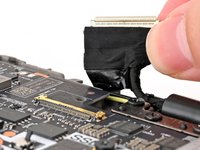
    • Use your fingers to grip the display cable buckle and gently pull the connector straight out of its socket.

  19. Lenovo ThinkPad T16 Gen 3 Motherboard Replacement, Free the display cable: crwdns2935265:019crwdnd2935265:01crwdnd2935265:02crwdne2935265:0 Lenovo ThinkPad T16 Gen 3 Motherboard Replacement, Free the display cable: crwdns2935265:019crwdnd2935265:02crwdnd2935265:02crwdne2935265:0
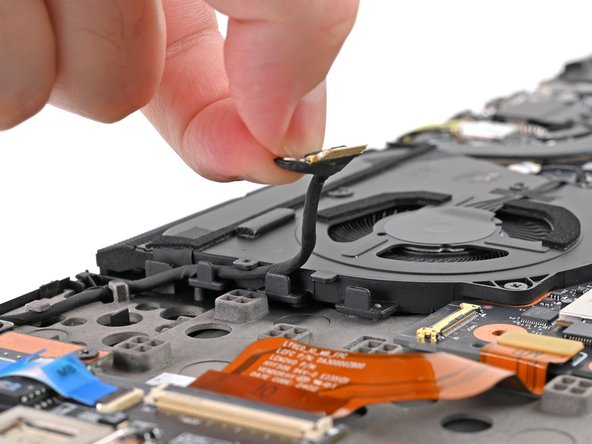
    • Hold the buckle and cable together and pull up to separate the adhesive securing the cable to the motherboard.

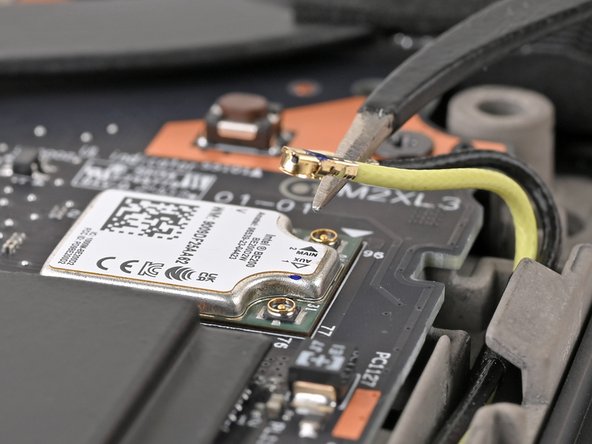
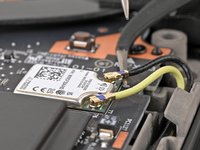
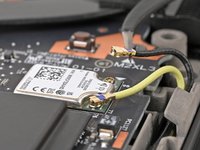
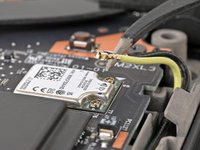
  20. Lenovo ThinkPad T16 Gen 3 Motherboard Replacement, Disconnect the WiFi antennas: crwdns2935265:020crwdnd2935265:01crwdnd2935265:03crwdne2935265:0 Lenovo ThinkPad T16 Gen 3 Motherboard Replacement, Disconnect the WiFi antennas: crwdns2935265:020crwdnd2935265:02crwdnd2935265:03crwdne2935265:0 Lenovo ThinkPad T16 Gen 3 Motherboard Replacement, Disconnect the WiFi antennas: crwdns2935265:020crwdnd2935265:03crwdnd2935265:03crwdne2935265:0
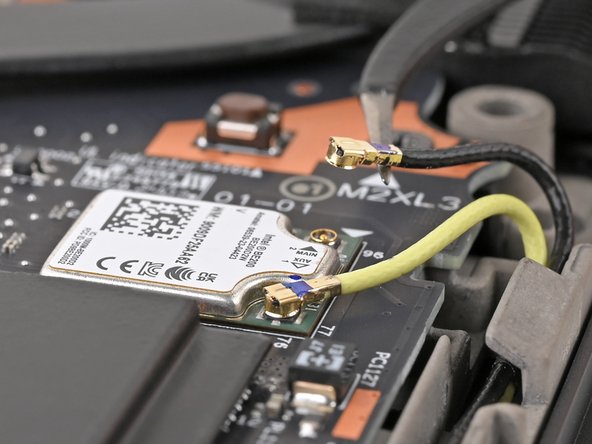
    • Insert an arm of your angled tweezers under the metal neck of one of the coaxial connectors on the Wi-Fi card and lift straight up to disconnect it.

    • Repeat for the other connector.

    • During reassembly, use tweezers to hold the connector in place over its socket and gently press down with your finger or a spudger—the connector should "snap" into place. If you're having trouble, reposition the head and try again.

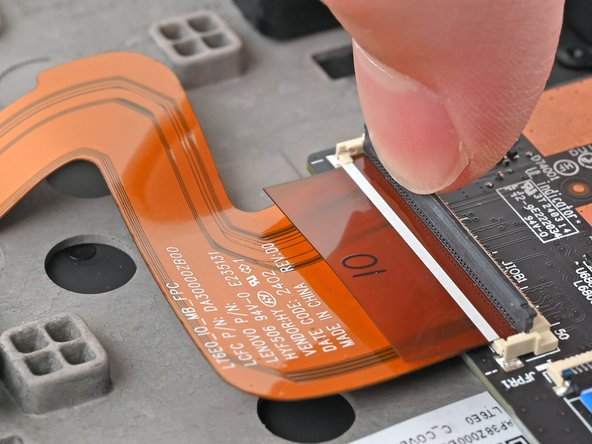
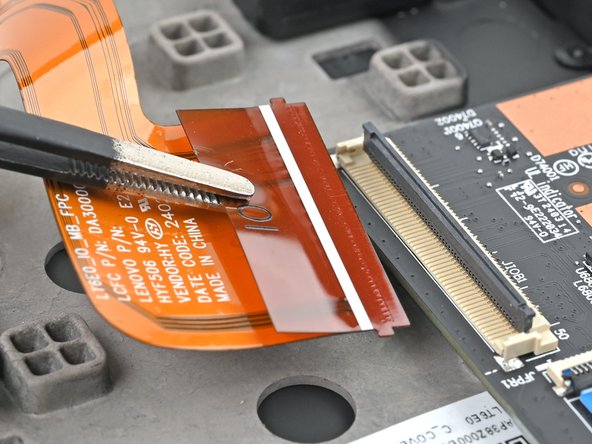
  21. Lenovo ThinkPad T16 Gen 3 Motherboard Replacement, Disconnect the interconnect cable: crwdns2935265:021crwdnd2935265:01crwdnd2935265:03crwdne2935265:0 Lenovo ThinkPad T16 Gen 3 Motherboard Replacement, Disconnect the interconnect cable: crwdns2935265:021crwdnd2935265:02crwdnd2935265:03crwdne2935265:0 Lenovo ThinkPad T16 Gen 3 Motherboard Replacement, Disconnect the interconnect cable: crwdns2935265:021crwdnd2935265:03crwdnd2935265:03crwdne2935265:0
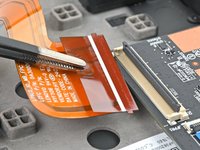
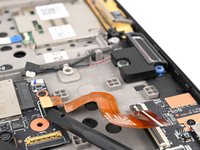
    • Use a clean fingernail or the flat end of a spudger to flip up the locking flap on the I/O board interconnect cable connector.

    • Use tweezers or your fingers to gently pull the cable by its pull tab out of its socket.

  22. Lenovo ThinkPad T16 Gen 3 Motherboard Replacement, Remove the interconnect cable: crwdns2935265:022crwdnd2935265:01crwdnd2935265:03crwdne2935265:0 Lenovo ThinkPad T16 Gen 3 Motherboard Replacement, Remove the interconnect cable: crwdns2935265:022crwdnd2935265:02crwdnd2935265:03crwdne2935265:0 Lenovo ThinkPad T16 Gen 3 Motherboard Replacement, Remove the interconnect cable: crwdns2935265:022crwdnd2935265:03crwdnd2935265:03crwdne2935265:0
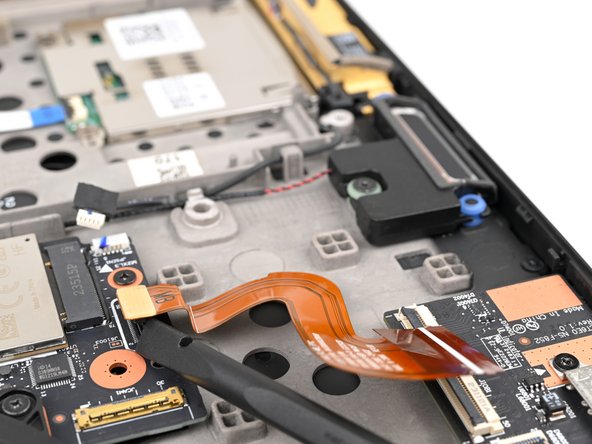
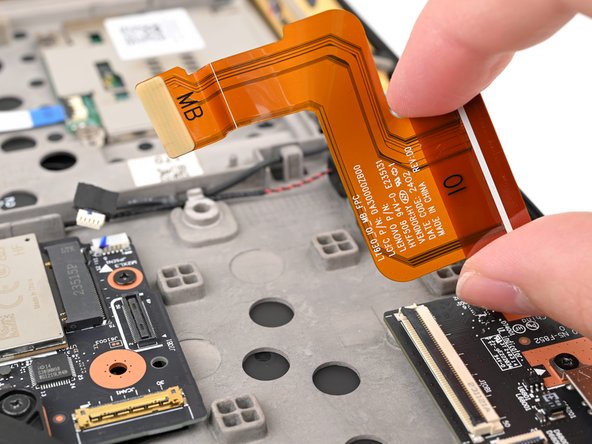
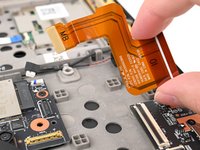
    • Insert the flat end of a spudger or a clean fingernail under a short edge of the interconnect cable press connector (located on the motherboard) and pry up to disconnect it.

    • Remove the interconnect ribbon cable from the laptop.

  23. Lenovo ThinkPad T16 Gen 3 Motherboard Replacement, Disconnect the motherboard cables: crwdns2935265:023crwdnd2935265:01crwdnd2935265:03crwdne2935265:0 Lenovo ThinkPad T16 Gen 3 Motherboard Replacement, Disconnect the motherboard cables: crwdns2935265:023crwdnd2935265:02crwdnd2935265:03crwdne2935265:0 Lenovo ThinkPad T16 Gen 3 Motherboard Replacement, Disconnect the motherboard cables: crwdns2935265:023crwdnd2935265:03crwdnd2935265:03crwdne2935265:0
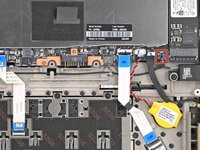
    • Use your fingernails to grip the right speaker connector by the lip near the back and gently pull the connector out of its socket (labeled"JSPK1").

    • Alternatively, you can use the point of a spudger to push on alternating sides of the connector to walk it out of the socket.

    • Unplug the connector from the motherboard.

    • Many of these connectors have a small marking that shows which side of the connector should be facing up. To reconnect, align the connector and use a spudger or clean fingernail to push it fully into the socket.

  24. Lenovo ThinkPad T16 Gen 3 Motherboard Replacement: crwdns2935265:024crwdnd2935265:01crwdnd2935265:03crwdne2935265:0 Lenovo ThinkPad T16 Gen 3 Motherboard Replacement: crwdns2935265:024crwdnd2935265:02crwdnd2935265:03crwdne2935265:0 Lenovo ThinkPad T16 Gen 3 Motherboard Replacement: crwdns2935265:024crwdnd2935265:03crwdnd2935265:03crwdne2935265:0
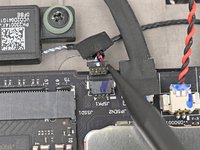
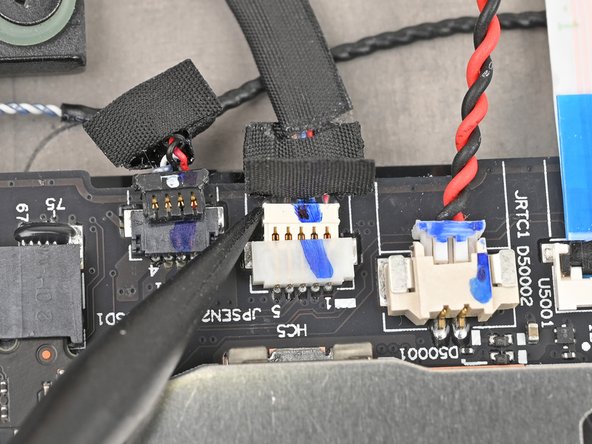
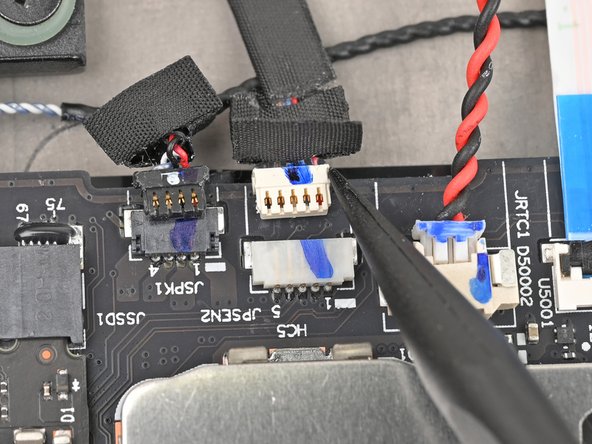
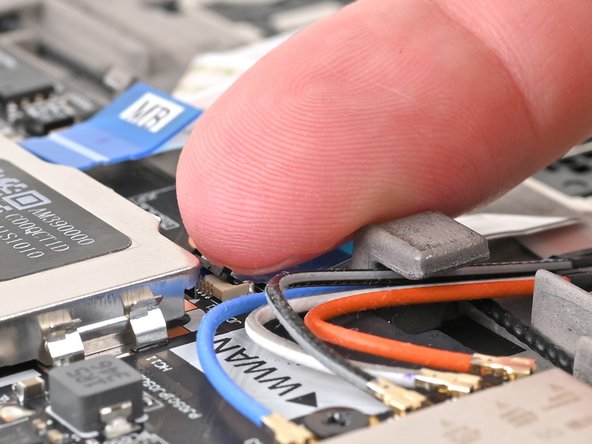
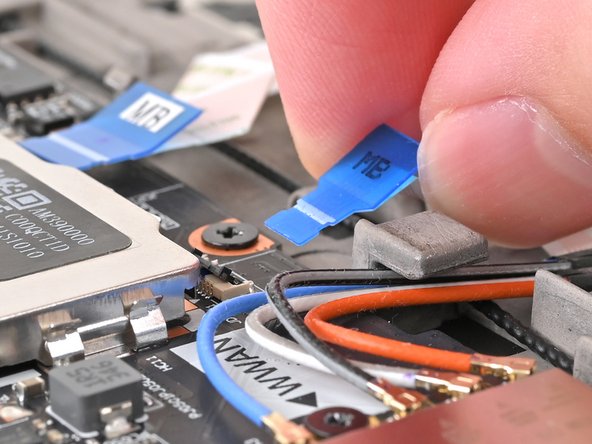
    • Use your fingernails to grab on the lip located at the back of the WWAN antenna connector labeled "JPSEN2."

    • Alternatively, you can use the point of a spudger to push on alternating sides of the connector to walk it out of the socket.

    • Unplug the connector from the motherboard.

  25. Lenovo ThinkPad T16 Gen 3 Motherboard Replacement: crwdns2935265:025crwdnd2935265:01crwdnd2935265:03crwdne2935265:0 Lenovo ThinkPad T16 Gen 3 Motherboard Replacement: crwdns2935265:025crwdnd2935265:02crwdnd2935265:03crwdne2935265:0 Lenovo ThinkPad T16 Gen 3 Motherboard Replacement: crwdns2935265:025crwdnd2935265:03crwdnd2935265:03crwdne2935265:0
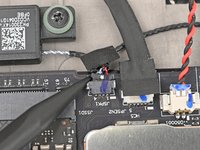
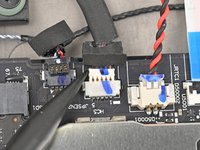
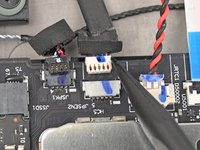
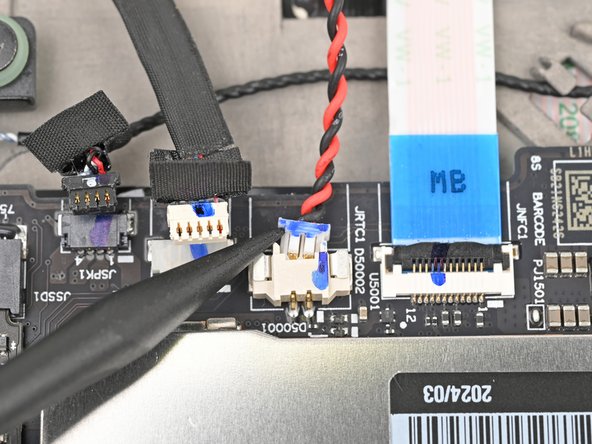
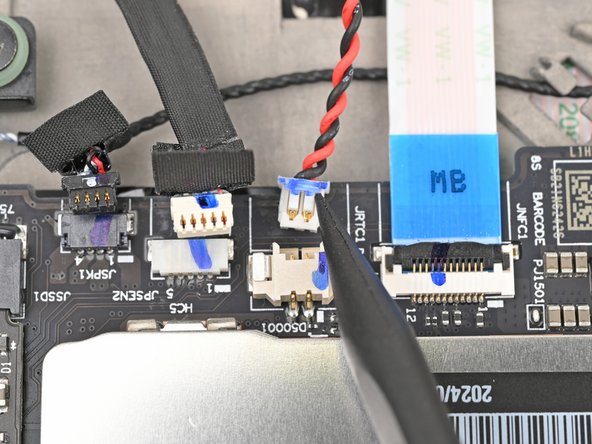
    • Use your fingernails to grab on the lip located at the back of the CMOS battery connector, labeled "JRTC1."

    • Alternatively, you can use the point of a spudger to push on alternating sides of the connector to walk it out of the socket.

    • Unplug the connector from the motherboard.

  26. Lenovo ThinkPad T16 Gen 3 Motherboard Replacement: crwdns2935265:026crwdnd2935265:01crwdnd2935265:03crwdne2935265:0 Lenovo ThinkPad T16 Gen 3 Motherboard Replacement: crwdns2935265:026crwdnd2935265:02crwdnd2935265:03crwdne2935265:0 Lenovo ThinkPad T16 Gen 3 Motherboard Replacement: crwdns2935265:026crwdnd2935265:03crwdnd2935265:03crwdne2935265:0
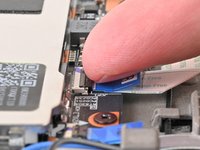
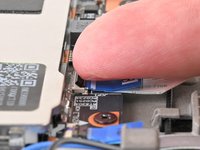
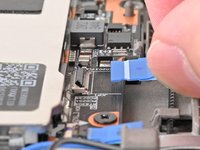
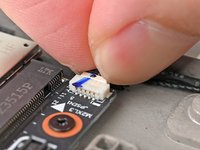
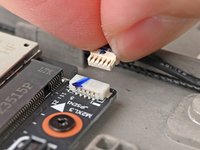
    • Use a clean fingernail or the flat end of a spudger to flip up the locking flap on the NFC interconnect cable ZIF connector, labeled "JNFC1."

    • Use tweezers or your fingers to grip the cable's plastic pull tab and gently pull the cable out of its socket.

  27. Lenovo ThinkPad T16 Gen 3 Motherboard Replacement: crwdns2935265:027crwdnd2935265:01crwdnd2935265:03crwdne2935265:0 Lenovo ThinkPad T16 Gen 3 Motherboard Replacement: crwdns2935265:027crwdnd2935265:02crwdnd2935265:03crwdne2935265:0 Lenovo ThinkPad T16 Gen 3 Motherboard Replacement: crwdns2935265:027crwdnd2935265:03crwdnd2935265:03crwdne2935265:0
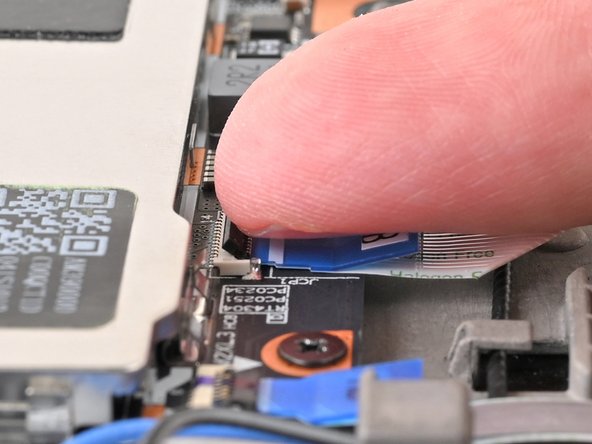
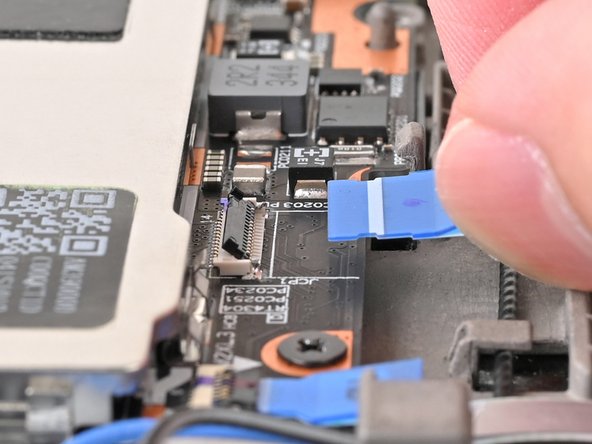
    • Use a clean fingernail or the flat end of a spudger to flip up the locking flap on the trackpad interconnect cable connector, labeled "JCP1."

    • Use tweezers or your fingers to grip the cable's plastic pull tab and gently pull the cable out of its socket.

  28. Lenovo ThinkPad T16 Gen 3 Motherboard Replacement: crwdns2935265:028crwdnd2935265:01crwdnd2935265:03crwdne2935265:0 Lenovo ThinkPad T16 Gen 3 Motherboard Replacement: crwdns2935265:028crwdnd2935265:02crwdnd2935265:03crwdne2935265:0 Lenovo ThinkPad T16 Gen 3 Motherboard Replacement: crwdns2935265:028crwdnd2935265:03crwdnd2935265:03crwdne2935265:0
    • Use a clean fingernail or the flat end of a spudger to flip up the locking flap on the smart card reader interconnect cable connector, labeled "JSC1."

    • Use tweezers or your fingers to grip the cable's plastic pull tab and gently pull the cable out of its socket.

  29. Lenovo ThinkPad T16 Gen 3 Motherboard Replacement, Disconnect the antenna cables: crwdns2935265:029crwdnd2935265:01crwdnd2935265:03crwdne2935265:0 Lenovo ThinkPad T16 Gen 3 Motherboard Replacement, Disconnect the antenna cables: crwdns2935265:029crwdnd2935265:02crwdnd2935265:03crwdne2935265:0 Lenovo ThinkPad T16 Gen 3 Motherboard Replacement, Disconnect the antenna cables: crwdns2935265:029crwdnd2935265:03crwdnd2935265:03crwdne2935265:0
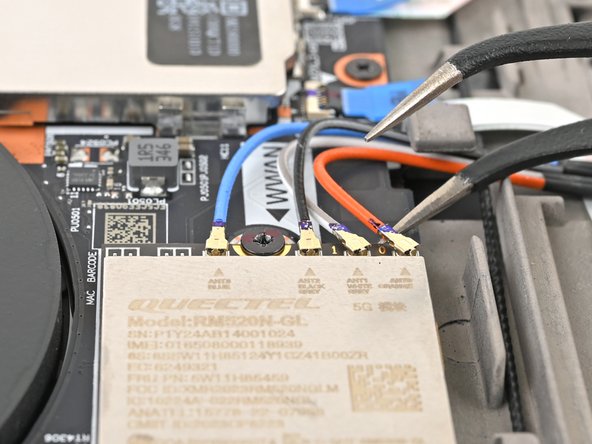
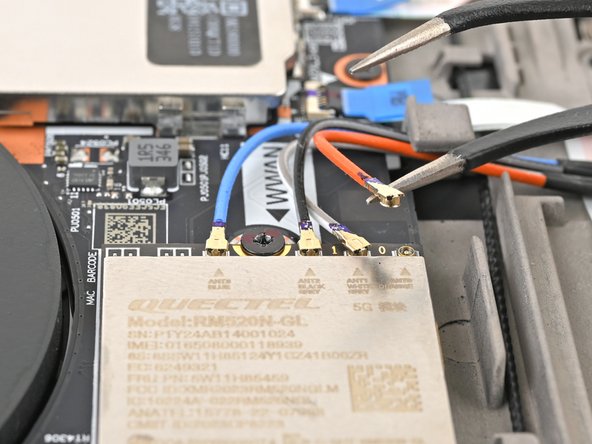
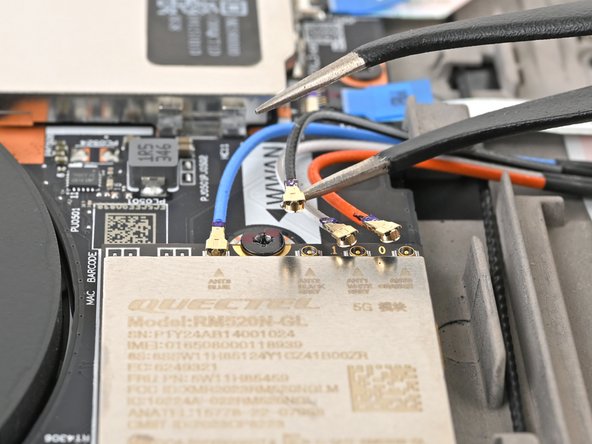
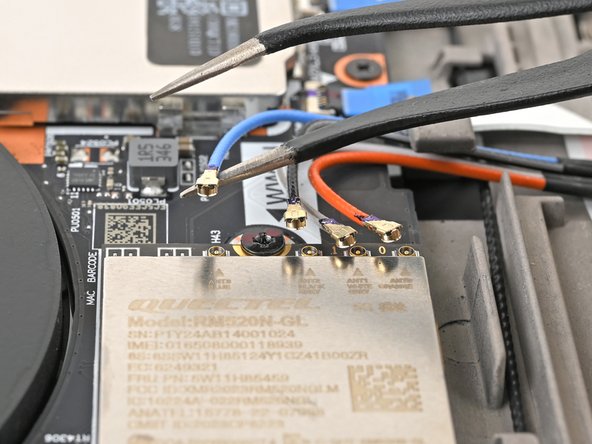
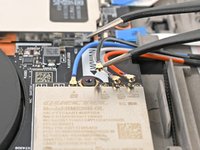
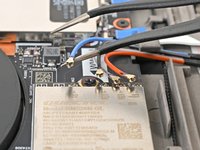
    • Insert one arm of your angled tweezers under the metal neck of one of the antenna coaxial connectors on the WWAN card and lift straight up to disconnect it.

  30. Lenovo ThinkPad T16 Gen 3 Motherboard Replacement: crwdns2935265:030crwdnd2935265:01crwdnd2935265:03crwdne2935265:0 Lenovo ThinkPad T16 Gen 3 Motherboard Replacement: crwdns2935265:030crwdnd2935265:02crwdnd2935265:03crwdne2935265:0 Lenovo ThinkPad T16 Gen 3 Motherboard Replacement: crwdns2935265:030crwdnd2935265:03crwdnd2935265:03crwdne2935265:0
    • Repeat the process to disconnect the remaining antenna cables from the WWAN card.

    • During reassembly, use tweezers to hold each connector in place over its socket and gently press down with your finger or a spudger—the connector should "snap" into place. If you're having trouble, reposition the head instead of using more force.

  31. Lenovo ThinkPad T16 Gen 3 Motherboard Replacement, Free the antenna cables: crwdns2935265:031crwdnd2935265:01crwdnd2935265:03crwdne2935265:0 Lenovo ThinkPad T16 Gen 3 Motherboard Replacement, Free the antenna cables: crwdns2935265:031crwdnd2935265:02crwdnd2935265:03crwdne2935265:0 Lenovo ThinkPad T16 Gen 3 Motherboard Replacement, Free the antenna cables: crwdns2935265:031crwdnd2935265:03crwdnd2935265:03crwdne2935265:0
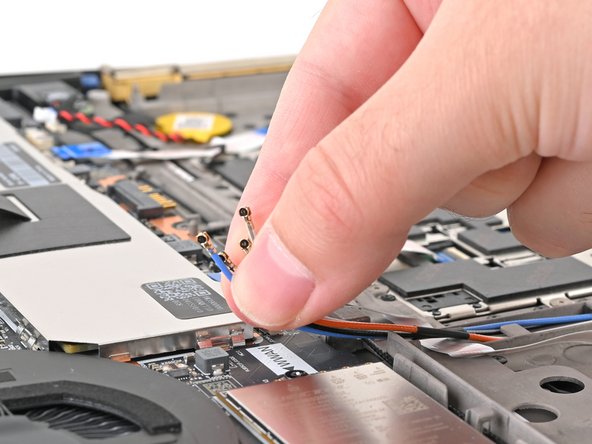
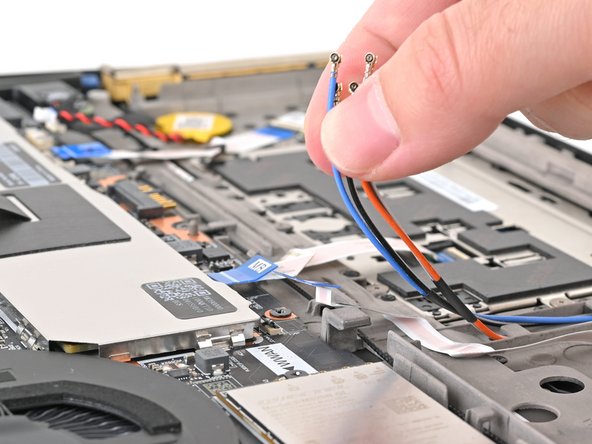
    • Hold all the antenna cables together and guide them out of their clip on the chassis.

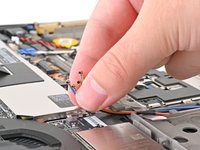
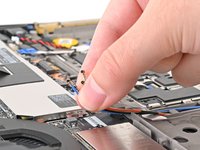
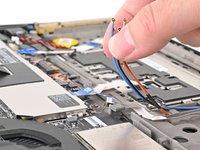
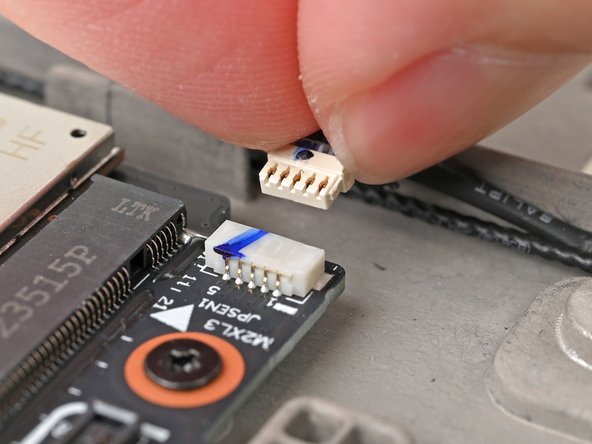
  32. Lenovo ThinkPad T16 Gen 3 Motherboard Replacement, Disconnect JPSEN1: crwdns2935265:032crwdnd2935265:01crwdnd2935265:02crwdne2935265:0 Lenovo ThinkPad T16 Gen 3 Motherboard Replacement, Disconnect JPSEN1: crwdns2935265:032crwdnd2935265:02crwdnd2935265:02crwdne2935265:0
    • Use your fingernails to grab on the lip located at the back of the WWAN antenna connector labeled "JPSEN1."

    • Alternatively, you can use the point of a spudger to push on alternating sides of the connector to walk it out of the socket.

    • Unplug the connector from the motherboard.

  33. Lenovo ThinkPad T16 Gen 3 Motherboard Replacement, Remove I/O bracket screws: crwdns2935265:033crwdnd2935265:01crwdnd2935265:01crwdne2935265:0
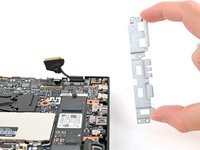
    • Use a Phillips screwdriver to remove the three 4 mm‑long screws securing the I/O bracket.

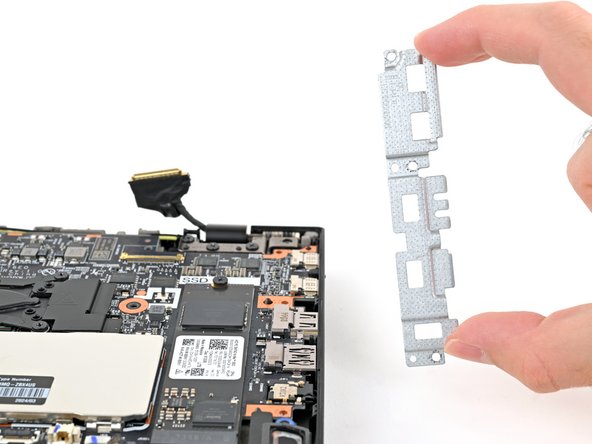
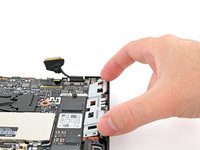
  34. Lenovo ThinkPad T16 Gen 3 Motherboard Replacement, Remove the I/O bracket: crwdns2935265:034crwdnd2935265:01crwdnd2935265:02crwdne2935265:0 Lenovo ThinkPad T16 Gen 3 Motherboard Replacement, Remove the I/O bracket: crwdns2935265:034crwdnd2935265:02crwdnd2935265:02crwdne2935265:0
    • Pick up the I/O bracket and remove it from the laptop.

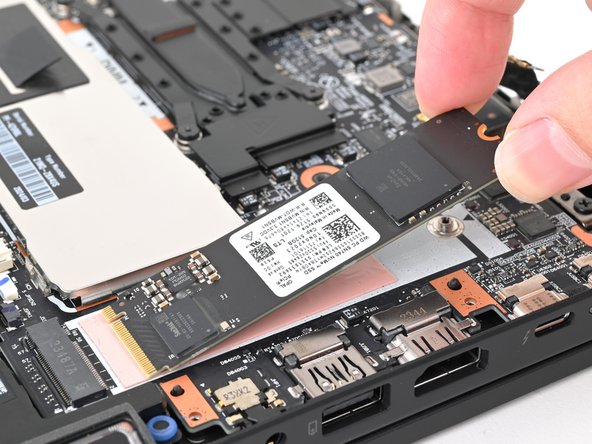
  35. Lenovo ThinkPad T16 Gen 3 Motherboard Replacement, Remove the SSD screw: crwdns2935265:035crwdnd2935265:01crwdnd2935265:02crwdne2935265:0 Lenovo ThinkPad T16 Gen 3 Motherboard Replacement, Remove the SSD screw: crwdns2935265:035crwdnd2935265:02crwdnd2935265:02crwdne2935265:0
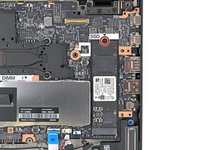
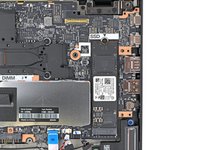
    • Use a Phillips screwdriver to remove the 4 mm‑long screw securing the SSD to the motherboard.

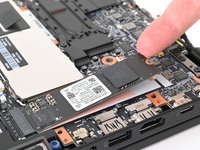
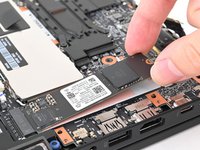
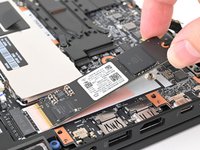
  36. Lenovo ThinkPad T16 Gen 3 Motherboard Replacement, Remove the SSD: crwdns2935265:036crwdnd2935265:01crwdnd2935265:03crwdne2935265:0 Lenovo ThinkPad T16 Gen 3 Motherboard Replacement, Remove the SSD: crwdns2935265:036crwdnd2935265:02crwdnd2935265:03crwdne2935265:0 Lenovo ThinkPad T16 Gen 3 Motherboard Replacement, Remove the SSD: crwdns2935265:036crwdnd2935265:03crwdnd2935265:03crwdne2935265:0
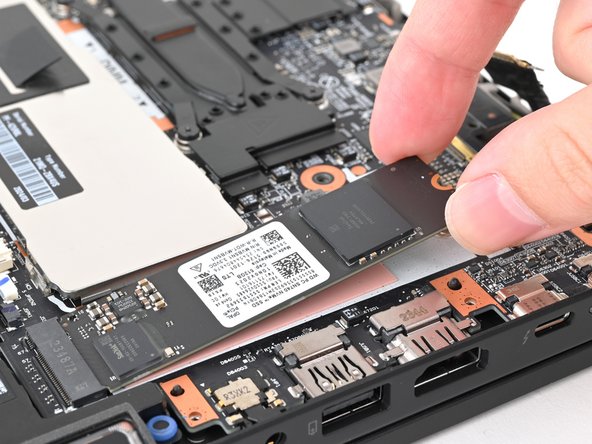
    • Use your fingernail or the flat end of a spudger to lift the edge of the SSD with a screw notch enough to grip it with your fingers.

    • Use your fingers to pull the SSD straight out of its socket and remove it.

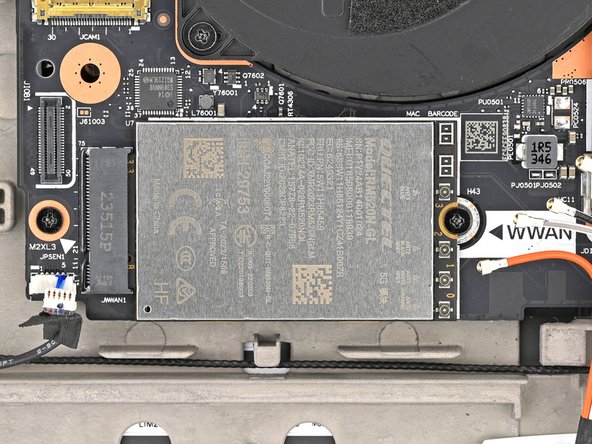
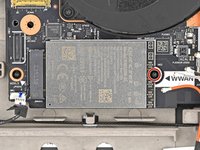
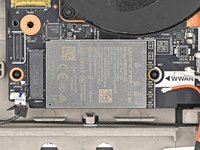
  37. Lenovo ThinkPad T16 Gen 3 Motherboard Replacement, Remove the WWAN card screw: crwdns2935265:037crwdnd2935265:01crwdnd2935265:02crwdne2935265:0 Lenovo ThinkPad T16 Gen 3 Motherboard Replacement, Remove the WWAN card screw: crwdns2935265:037crwdnd2935265:02crwdnd2935265:02crwdne2935265:0
    • Use a Phillips screwdriver to remove the 4 mm‑long screw securing the WWAN card to the motherboard.

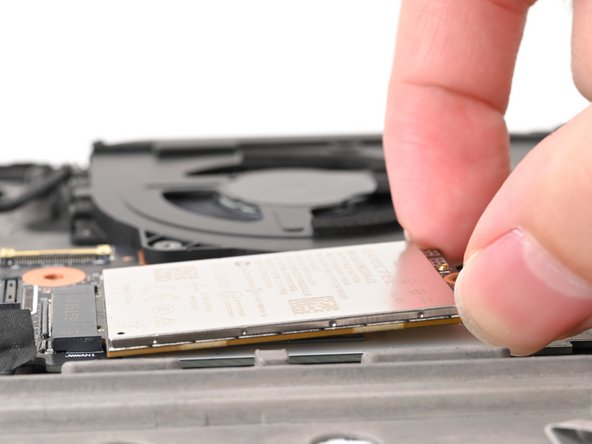
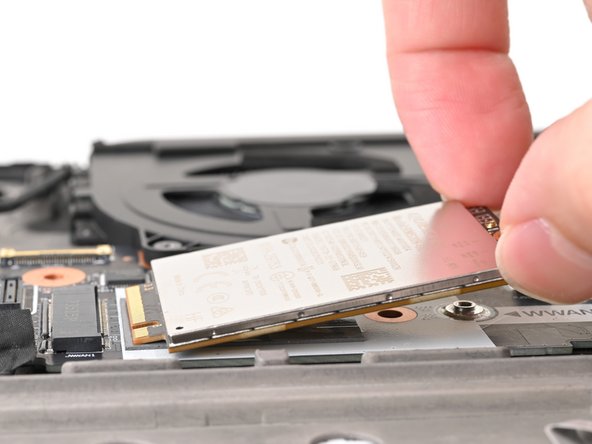
  38. Lenovo ThinkPad T16 Gen 3 Motherboard Replacement, Remove the WWAN card: crwdns2935265:038crwdnd2935265:01crwdnd2935265:03crwdne2935265:0 Lenovo ThinkPad T16 Gen 3 Motherboard Replacement, Remove the WWAN card: crwdns2935265:038crwdnd2935265:02crwdnd2935265:03crwdne2935265:0 Lenovo ThinkPad T16 Gen 3 Motherboard Replacement, Remove the WWAN card: crwdns2935265:038crwdnd2935265:03crwdnd2935265:03crwdne2935265:0
    • Use your fingernail to lift up the WWAN card enough to grasp it with your fingers.

    • Pull the WWAN card straight out of its socket and remove it from the laptop.

  39. Lenovo ThinkPad T16 Gen 3 Motherboard Replacement, Remove the RAM shield: crwdns2935265:039crwdnd2935265:01crwdnd2935265:02crwdne2935265:0 Lenovo ThinkPad T16 Gen 3 Motherboard Replacement, Remove the RAM shield: crwdns2935265:039crwdnd2935265:02crwdnd2935265:02crwdne2935265:0
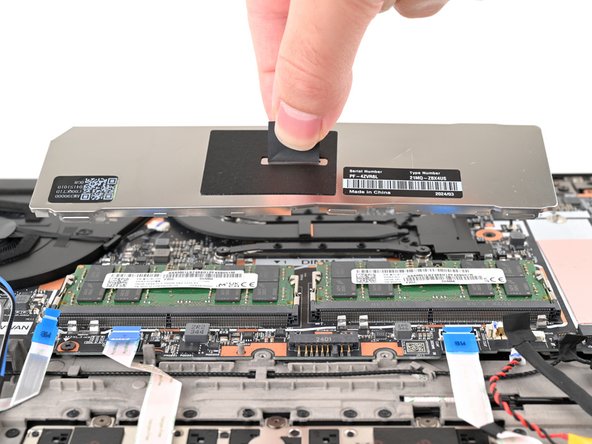
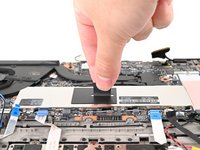
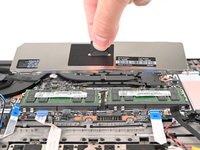
    • Grab the pull tab in the middle of the RAM shield and pull straight up to remove it from its clips.

    • Since the RAM shield is thin, it may bend slightly during removal. During reassembly, lay the shield into place and press down firmly around the perimeter to engage all the clips.

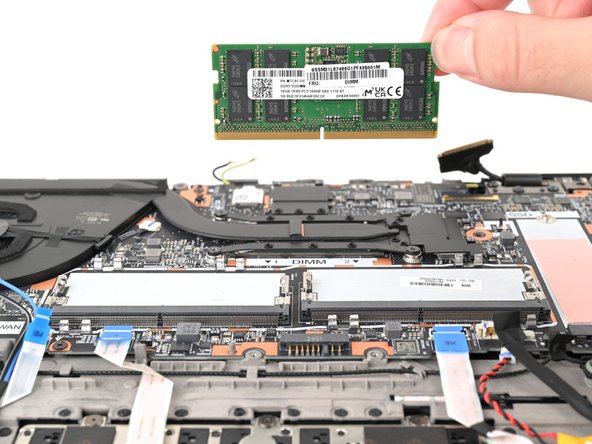
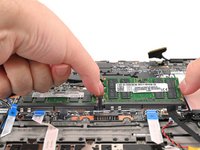
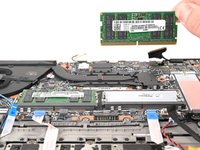
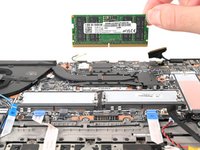
  40. Lenovo ThinkPad T16 Gen 3 Motherboard Replacement, Remove the RAM: crwdns2935265:040crwdnd2935265:01crwdnd2935265:03crwdne2935265:0 Lenovo ThinkPad T16 Gen 3 Motherboard Replacement, Remove the RAM: crwdns2935265:040crwdnd2935265:02crwdnd2935265:03crwdne2935265:0 Lenovo ThinkPad T16 Gen 3 Motherboard Replacement, Remove the RAM: crwdns2935265:040crwdnd2935265:03crwdnd2935265:03crwdne2935265:0
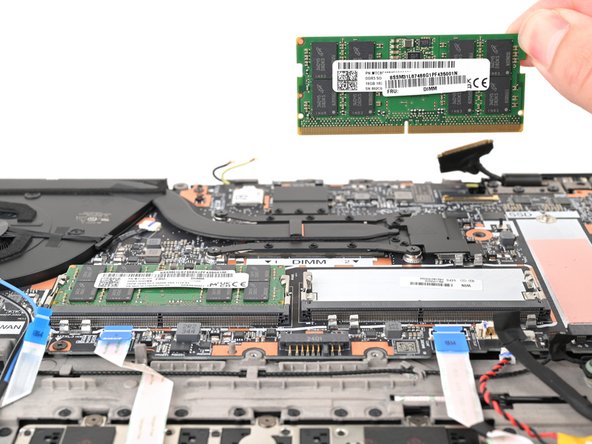
    • Use your fingers to simultaneously push the two metal tabs on the edges of the RAM module down and outwards to unlatch them—the RAM should pop up at a slight angle.

    • Remove the RAM stick.

    • Repeat the above process for the other stick of RAM.

    • During reassembly, fully insert the RAM at the angle it popped up at, then press down to engage the metal arms.

  41. Lenovo ThinkPad T16 Gen 3 Motherboard Replacement, Loosen the heatsink screws: crwdns2935265:041crwdnd2935265:01crwdnd2935265:02crwdne2935265:0 Lenovo ThinkPad T16 Gen 3 Motherboard Replacement, Loosen the heatsink screws: crwdns2935265:041crwdnd2935265:02crwdnd2935265:02crwdne2935265:0
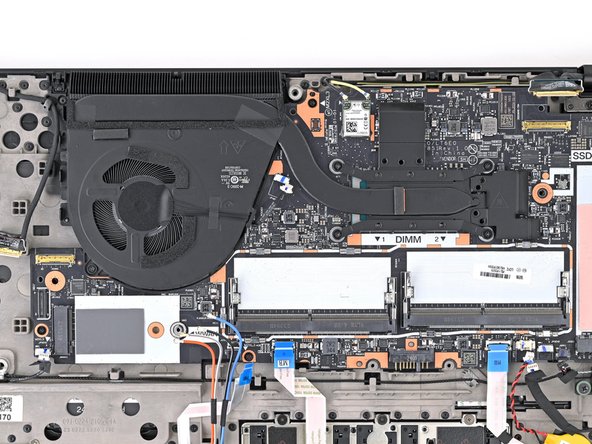
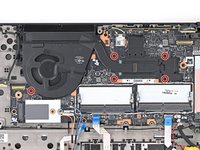
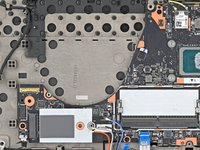
    • Use a Phillips screwdriver to fully loosen the five captive screws securing the fan and heatsink.

    • During reassembly, tighten the screws in an "X" pattern in the order labeled: bottom left, top right, bottom right, top left.

  42. Lenovo ThinkPad T16 Gen 3 Motherboard Replacement, Remove the fan and heatsink assembly: crwdns2935265:042crwdnd2935265:01crwdnd2935265:03crwdne2935265:0 Lenovo ThinkPad T16 Gen 3 Motherboard Replacement, Remove the fan and heatsink assembly: crwdns2935265:042crwdnd2935265:02crwdnd2935265:03crwdne2935265:0 Lenovo ThinkPad T16 Gen 3 Motherboard Replacement, Remove the fan and heatsink assembly: crwdns2935265:042crwdnd2935265:03crwdnd2935265:03crwdne2935265:0
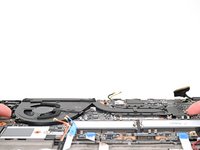
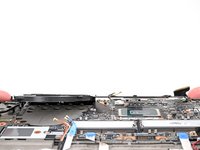
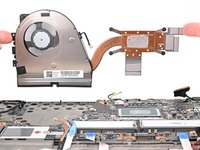
    • Grasp the fan and heatsink assembly by its edges and remove it from the laptop.

    • You may feel a little resistance from the thermal paste and pads between the heatsink and the components on the motherboard — this is normal.

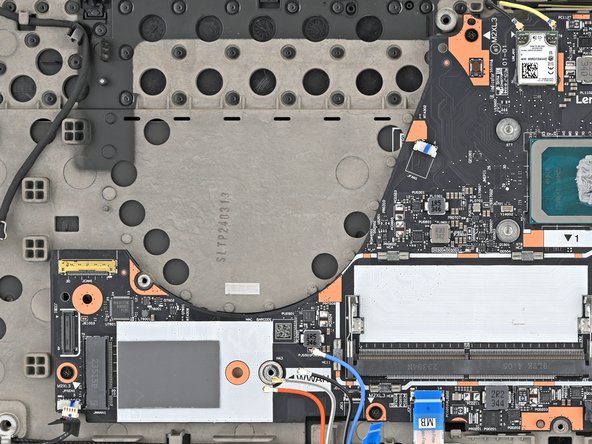
  43. Lenovo ThinkPad T16 Gen 3 Motherboard Replacement, Remove the motherboard screws: crwdns2935265:043crwdnd2935265:01crwdnd2935265:02crwdne2935265:0 Lenovo ThinkPad T16 Gen 3 Motherboard Replacement, Remove the motherboard screws: crwdns2935265:043crwdnd2935265:02crwdnd2935265:02crwdne2935265:0
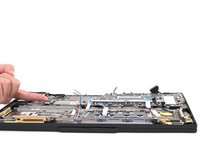
    • Use a Phillips screwdriver to remove the three 4 mm‑long screws securing the motherboard.

  44. Lenovo ThinkPad T16 Gen 3 Motherboard Replacement, Remove the motherboard: crwdns2935265:044crwdnd2935265:01crwdnd2935265:03crwdne2935265:0 Lenovo ThinkPad T16 Gen 3 Motherboard Replacement, Remove the motherboard: crwdns2935265:044crwdnd2935265:02crwdnd2935265:03crwdne2935265:0 Lenovo ThinkPad T16 Gen 3 Motherboard Replacement, Remove the motherboard: crwdns2935265:044crwdnd2935265:03crwdnd2935265:03crwdne2935265:0
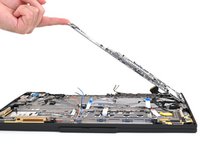
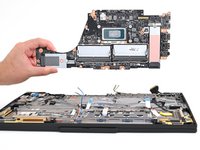
    • Use your finger to lift the motherboard by the edge closest to the fan.

    • Raise the motherboard to a 45‑degree angle to free the ports from their cutouts.

    • Grip the edges of the motherboard and remove it.

    • During reassembly, insert the motherboard downward at a 45‑degree angle so the ports go into their cutouts, then lower the board into place. Make sure no cables get trapped underneath the board and that the board is aligned with its screw holes.

crwdns2915888:0crwdne2915888:0

Compare your new replacement part to the original part—you may need to transfer remaining components or remove adhesive and thermal backings from the new part before you install it.

To reassemble your device, follow these instructions in reverse order.

Take your e-waste to an R2 or e-Stewards certified recycler.

Repair didn’t go as planned? Try some basic troubleshooting, or ask our Answers community for help.

Nick Schultz

crwdns2935283:003/24/24crwdne2935283:0

19,612 crwdns2915208:0crwdne2915208:0

crwdns2935297:0114crwdne2935297:0

crwdns2915084:0crwdne2915084:0

iFixit crwdns2935289:0iFixitcrwdne2935289:0

Staff

crwdns2931471:0120crwdne2931471:0

crwdns2935297:020,068crwdne2935297:0

crwdns2947412:00crwdne2947412:0

crwdns2917038:0crwdne2917038:0

crwdns2936625:0crwdne2936625:0:

crwdns2936751:024crwdne2936751:0 3

crwdns2936753:07crwdne2936753:0 9

crwdns2936753:030crwdne2936753:0 30

crwdns2942667:0crwdne2942667:0 416