crwdns2933423:0crwdne2933423:0

Lenovo ThinkPad P50 Display Replacement

crwdns2942213:0crwdne2942213:0

  1. Lenovo ThinkPad P50 Display Replacement, Battery: crwdns2935265:01crwdnd2935265:01crwdnd2935265:02crwdne2935265:0 Lenovo ThinkPad P50 Display Replacement, Battery: crwdns2935265:01crwdnd2935265:02crwdnd2935265:02crwdne2935265:0
    • Slide the battery latch to the left to unlock it and remove the battery.

  2. Lenovo ThinkPad P50 Display Replacement, Bottom case screws: crwdns2935265:02crwdnd2935265:01crwdnd2935265:01crwdne2935265:0
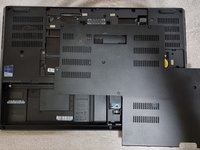
    • Loosen the six 12.6 mm captive screws that secure the lower case with the Phillips #00 screwdriver.

    • The screws will not come all the way out; do not attempt to remove them from the case.

    • Pull up the notch with your fingernail or a spudger.

  3. Lenovo ThinkPad P50 Display Replacement, Bottom case: crwdns2935265:03crwdnd2935265:01crwdnd2935265:02crwdne2935265:0 Lenovo ThinkPad P50 Display Replacement, Bottom case: crwdns2935265:03crwdnd2935265:02crwdnd2935265:02crwdne2935265:0
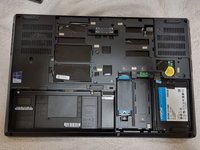
    • Lift the lower case up and off of the chassis.

  4. Lenovo ThinkPad P50 Display Replacement, Display: crwdns2935265:04crwdnd2935265:01crwdnd2935265:02crwdne2935265:0 Lenovo ThinkPad P50 Display Replacement, Display: crwdns2935265:04crwdnd2935265:02crwdnd2935265:02crwdne2935265:0
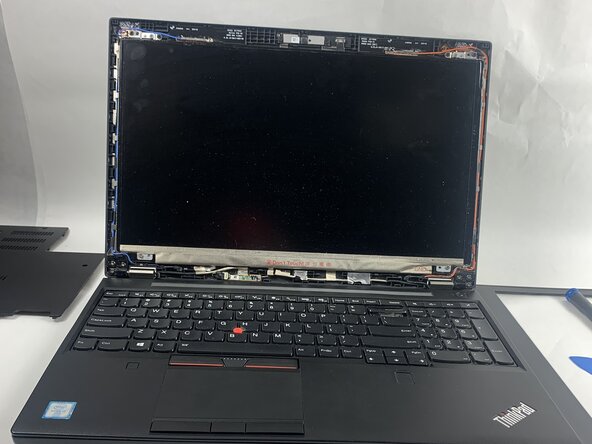
    • Use an iFixit opening pick to carefully remove the plastic bezel from the front of the display.

    • There are clips beneath the trim that need to be carefully detached.

    • Avoid using metal tools, as they can damage the plastic components.

  5. Lenovo ThinkPad P50 Display Replacement: crwdns2935265:05crwdnd2935265:01crwdnd2935265:01crwdne2935265:0
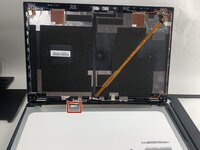
    • Remove the four 2.5 mm screws located along the corners with a Phillips #00 screwdriver.

  6. Lenovo ThinkPad P50 Display Replacement: crwdns2935265:06crwdnd2935265:01crwdnd2935265:03crwdne2935265:0 Lenovo ThinkPad P50 Display Replacement: crwdns2935265:06crwdnd2935265:02crwdnd2935265:03crwdne2935265:0 Lenovo ThinkPad P50 Display Replacement: crwdns2935265:06crwdnd2935265:03crwdnd2935265:03crwdne2935265:0
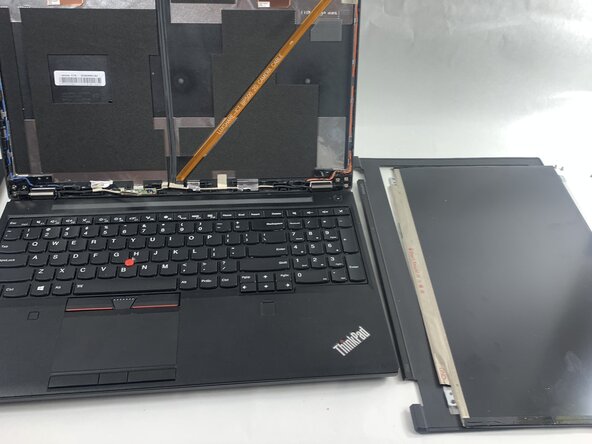
    • Carefully tilt the screen forward and lay it face down on the keyboard, making sure not to strain or damage the cable still attached to it.

    • Display (sometimes called eDP cables in laptops) and camera cable connectors often have a small metal buckle running around the socket, locking them in place. The connectors are typically wide and may have tape attached to the buckle.

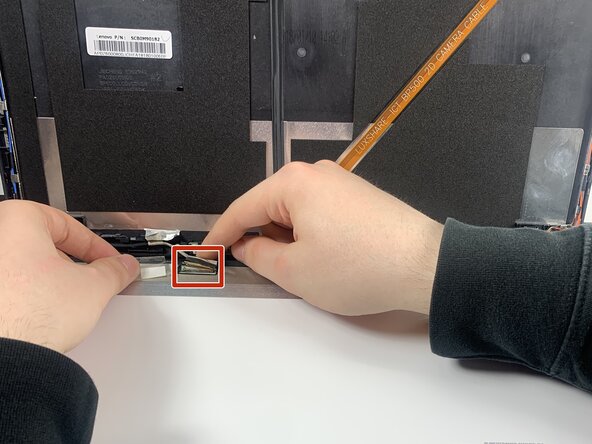
    • Gently push the tip of a spudger under the metal buckle to unclip it, then swing it over the socket.

    • Hold the buckle and cable together and gently pull the connector straight out of its socket.

crwdns2915888:0crwdne2915888:0

To reassemble your device, follow the above steps in reverse order.
Take your e-waste to an R2 or e-Stewards certified recycler.
Repair didn’t go as planned? Try some basic troubleshooting or ask our Answers community for help.

Sara Richardson

crwdns2935283:003/21/25crwdne2935283:0

609 crwdns2915208:0crwdne2915208:0

crwdns2935297:05crwdne2935297:0

crwdns2915084:0crwdne2915084:0

UMass Dartmouth, Team 3-1, Botvin Spring 2025 crwdns2935289:0UMass Dartmouth, Team 3-1, Botvin Spring 2025crwdne2935289:0

UMASSD-BOTVIN-S25S3G1

crwdns2931471:03crwdne2931471:0

crwdns2935297:05crwdne2935297:0

crwdns2947412:00crwdne2947412:0

crwdns2917038:0crwdne2917038:0

crwdns2936625:0crwdne2936625:0:

crwdns2936751:024crwdne2936751:0 1

crwdns2936753:07crwdne2936753:0 7

crwdns2936753:030crwdne2936753:0 29

crwdns2942667:0crwdne2942667:0 84