crwdns2942213:0crwdne2942213:0
-
-
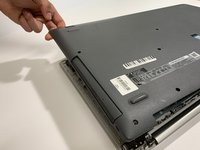
Flip the laptop over so that the back panel is facing upwards.
-
-
-
Remove fourteen 7mm Phillips #00 screws from the back panel.
-
-
-
Carefully remove the optical drive by pulling the bezel away from the laptop.
-
-
-
-
Use your fingers or an opening tool to gently remove the back panel from the bottom of the laptop.
-
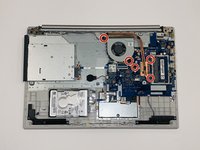
Lay both sides of the laptop next to each other.
-
-
-
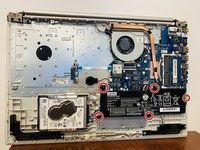
Remove five 7mm Phillips #0 screws from the battery holder.
-
-
-
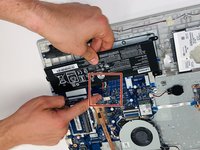
Pinch the connecting cord with one hand and pry the battery connector with the other hand, while gently pulling the connector straight out and towards the bottom edge of the base.
-
-
-
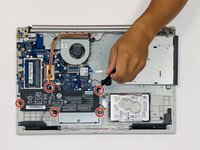
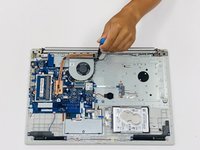
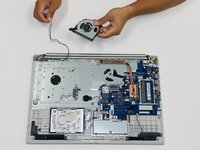
Remove five 7mm Phillips #00 screws from the cooling fan.
-
-
-
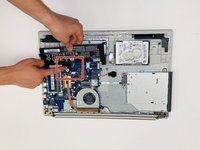
Gently lift the fan assembly out of the laptop.
-
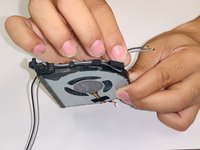
Gently remove the connecting wires from the exterior of the fan by slowly "weaving" the cord between the ridges of the fan.
-


To reassemble your device, follow these instructions in reverse order.
To reassemble your device, follow these instructions in reverse order.
crwdns2935221:0crwdne2935221:0
crwdns2935227:0crwdne2935227:0


crwdns2947410:01crwdne2947410:0
Very helpful instructions. However, Step 6 indicates that you should remove 5 screws, but really you only need the 2 on the left that are actually connecting the fan to the system board, the rest are unnecessary. In fact, the machine I replaced this on only had the one screw in the top-left.