crwdns2915892:0crwdne2915892:0
The screen/display is one of the most common repairs in all electronic devices. Screens and displays can easily crack or break when dropped from elevated surfaces and heights. Cracking the screen can result in cosmetic damages to the device, and any damage to the display may impact the overall functionality of a device.
If your device is not displaying images properly or if there are dead pixels on the display, it may be time to replace it. Follow this guide to remove and replace the display assembly* of your Lenovo IdeaPad Flex 5-1570 laptop.
*This guide will cover the process of removing the display assembly from the device and not the display. If you’re looking to remove and replace the display/screen of your device, please visit the Lenovo IdeaPad Flex 5-1570 Display Replacement guide.
crwdns2942213:0crwdne2942213:0
-
-
Remove the ten 5 mm Phillips #00 screws that are holding the back panel on.
-
-
-
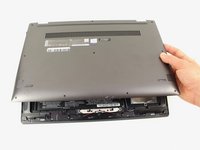
Use a spudger to pry open the back case at the two hinge cutouts.
-
Gently use the plastic opening tool around the edges of the laptop to pry up the clips holding the rest of the back panel.
-
-
-
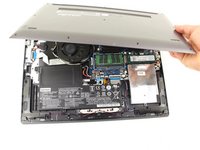
Once all the clips have been disengaged, lift off the back cover.
-
-
-
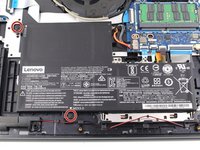
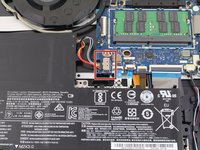
Remove the two 5 mm Phillips #00 screws that secure the battery in place.
-
-
-
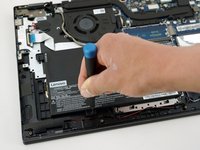
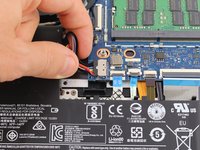
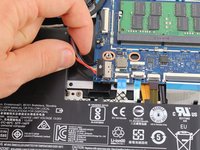
Using your fingers, grasp the entire bundle of wires to pull the battery cable from its connector. This will cut off power to the motherboard.
-
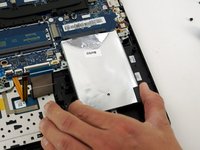
Remove the battery from the device.
-
-
-
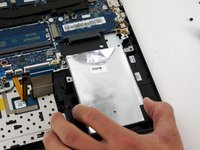
Remove the three 5 mm Phillips #00 screws that secure the hard drive.
-
-
-
Using your hands, gently pull the hard drive back, sliding it out from the port.
-
-
-
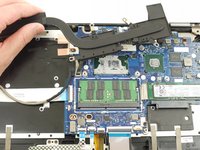
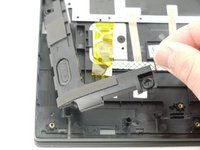
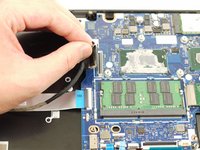
Remove the two 5 mm Phillips #00 screws that secure the fan in place.
-
-
-
-
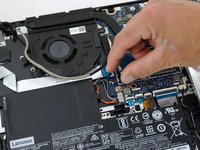
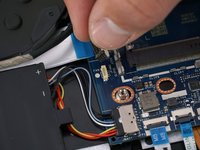
Using your hands, remove the wire that is wrapped around the base of the fan.
-
-
-
Disconnect the wire holding the fan and the motherboard together.
-
Remove the fan from the device.
-
-
-
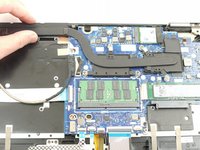
Using the Phillips #00 screwdriver, remove five 5 mm screws.
-
-
-
Carefully remove the heatsink from the device.
-
-
crwdns2935267:0crwdne2935267:0Tweezers$4.99
-
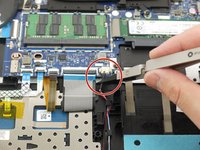
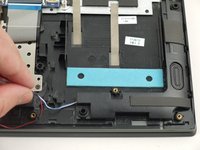
Using the iFixit nylon tipped tweezers, disconnect the wire that connects the speakers to the motherboard.
-
-
-
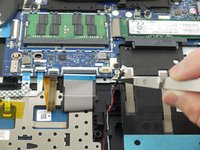
Using your hands, gently pull the left speaker up and out of the device.
-
-
-
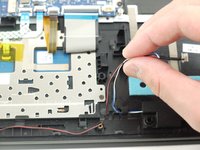
Repeat the previous step for the other speaker and remove the speakers from the device.
-
-
-
Using the Phillips #00 screwdriver, remove the three 5 mm Phillips #00 screws securing the motherboard.
-
-
-
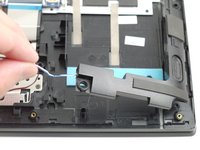
Disconnect the auxiliary port cable from the motherboard.
-
-
-
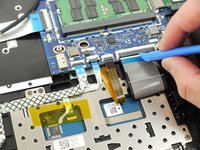
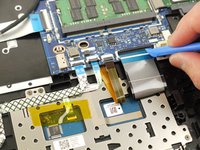
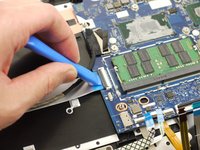
Using a plastic opening tool, unlock the four ZIF connectors of the flat cables.
-
Lift up the connector locking tab and disconnect the cables from the motherboard.
-
-
-
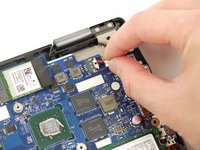
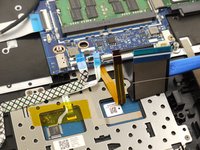
Disconnect the display cable from the motherboard.
-
-
-
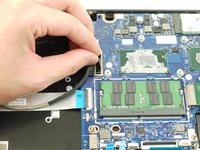
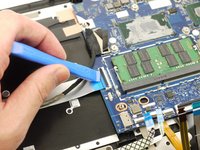
Using the plastic opening tool, unlock the connector for the side ports panel and disconnect the cable from the motherboard.
-
-
-
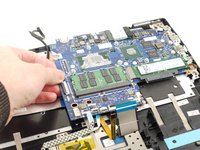
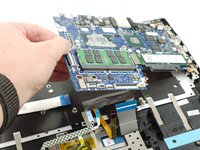
Carefully lift and remove the motherboard from the device.
-
-
-
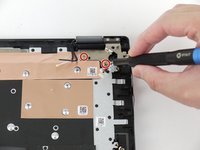
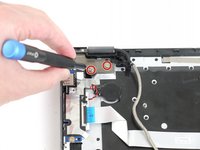
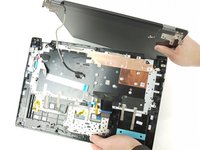
Using the Phillips #00 screwdriver, remove the four total 5 mm screws from the left and right hinges (two screws on each hinge).
-
-
-
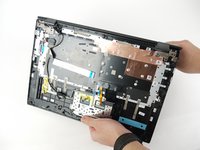
Disconnect the display assembly from the rest of the device.
-


To reassemble your device, follow these instructions in reverse order.
Take your e-waste to an R2 or e-Stewards certified recycler.
To reassemble your device, follow these instructions in reverse order.
Take your e-waste to an R2 or e-Stewards certified recycler.
