crwdns2933423:0crwdne2933423:0

Lenovo IdeaPad 3-1481W000NGUS Fan Replacement

crwdns2942213:0crwdne2942213:0

  1. Lenovo IdeaPad 3-1481W000NGUS Fan Replacement, Back Cover: crwdns2935265:01crwdnd2935265:01crwdnd2935265:03crwdne2935265:0 Lenovo IdeaPad 3-1481W000NGUS Fan Replacement, Back Cover: crwdns2935265:01crwdnd2935265:02crwdnd2935265:03crwdne2935265:0 Lenovo IdeaPad 3-1481W000NGUS Fan Replacement, Back Cover: crwdns2935265:01crwdnd2935265:03crwdnd2935265:03crwdne2935265:0
    crwdns2935267:0crwdne2935267:0
    Magnetic Project Mat
    $19.95
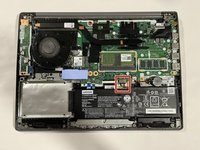
    • Orient the laptop so that the bottom is facing up.

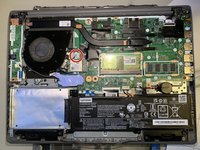
    • Remove the six 7 mm screws using a Phillips #00 screwdriver.

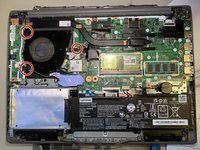
    • Remove the four 4 mm screws using a Phillips #00 screwdriver.

    • Throughout this repair, keep track of each screw and make sure it goes back exactly where it came from.

  2. Lenovo IdeaPad 3-1481W000NGUS Fan Replacement: crwdns2935265:02crwdnd2935265:01crwdnd2935265:03crwdne2935265:0 Lenovo IdeaPad 3-1481W000NGUS Fan Replacement: crwdns2935265:02crwdnd2935265:02crwdnd2935265:03crwdne2935265:0 Lenovo IdeaPad 3-1481W000NGUS Fan Replacement: crwdns2935265:02crwdnd2935265:03crwdnd2935265:03crwdne2935265:0
    • Pry up the sides of the back case using the iFixit opening tool. Then, lift to remove.

    • You may hear snapping when removing the panel. This is normal!

  3. Lenovo IdeaPad 3-1481W000NGUS Fan Replacement, Wi-Fi Card: crwdns2935265:03crwdnd2935265:01crwdnd2935265:02crwdne2935265:0 Lenovo IdeaPad 3-1481W000NGUS Fan Replacement, Wi-Fi Card: crwdns2935265:03crwdnd2935265:02crwdnd2935265:02crwdne2935265:0
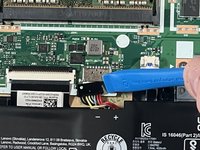
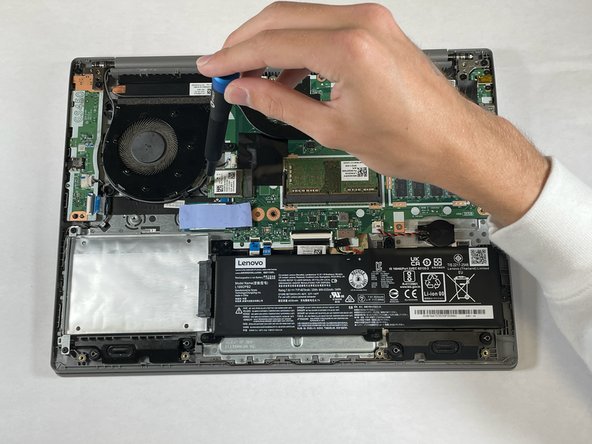
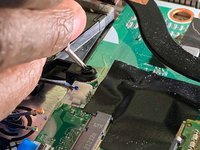
    • Use your fingernail or an opening tool to gently pull out and disconnect the battery pack cable.

    • Do not pull on the cables.

  4. Lenovo IdeaPad 3-1481W000NGUS Fan Replacement: crwdns2935265:04crwdnd2935265:01crwdnd2935265:02crwdne2935265:0 Lenovo IdeaPad 3-1481W000NGUS Fan Replacement: crwdns2935265:04crwdnd2935265:02crwdnd2935265:02crwdne2935265:0
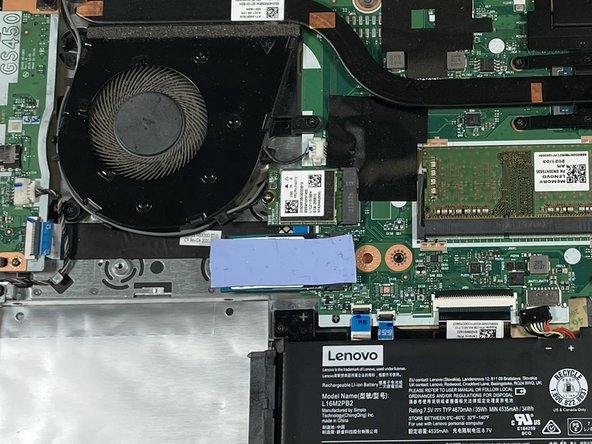
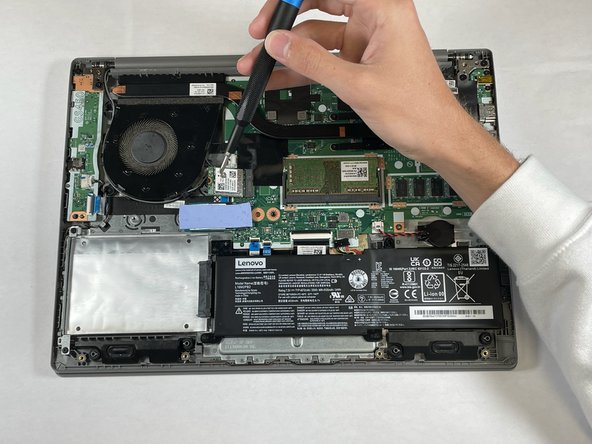
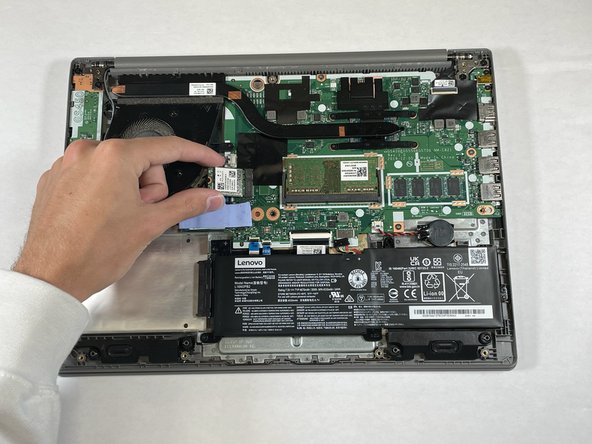
    • Use the spudger to remove each cable from the Wi-Fi card, one cable at a time.

    • The cables do not need much force to be removed.

  5. Lenovo IdeaPad 3-1481W000NGUS Fan Replacement: crwdns2935265:05crwdnd2935265:01crwdnd2935265:03crwdne2935265:0 Lenovo IdeaPad 3-1481W000NGUS Fan Replacement: crwdns2935265:05crwdnd2935265:02crwdnd2935265:03crwdne2935265:0 Lenovo IdeaPad 3-1481W000NGUS Fan Replacement: crwdns2935265:05crwdnd2935265:03crwdnd2935265:03crwdne2935265:0
    • Remove the single 2 mm screw using a Phillips #00 screwdriver.

    • Try not to press to hard down on the computer to avoid damage.

  6. Lenovo IdeaPad 3-1481W000NGUS Fan Replacement: crwdns2935265:06crwdnd2935265:01crwdnd2935265:03crwdne2935265:0 Lenovo IdeaPad 3-1481W000NGUS Fan Replacement: crwdns2935265:06crwdnd2935265:02crwdnd2935265:03crwdne2935265:0 Lenovo IdeaPad 3-1481W000NGUS Fan Replacement: crwdns2935265:06crwdnd2935265:03crwdnd2935265:03crwdne2935265:0
    • Pull the card away from the housing capsule on the right side of the Wi-Fi card to remove it from the laptop.

    • Make sure no cables are still connected or wrapped around the Wi-Fi card when removing.

  7. Lenovo IdeaPad 3-1481W000NGUS Fan Replacement, Fan: crwdns2935265:07crwdnd2935265:01crwdnd2935265:02crwdne2935265:0 Lenovo IdeaPad 3-1481W000NGUS Fan Replacement, Fan: crwdns2935265:07crwdnd2935265:02crwdnd2935265:02crwdne2935265:0
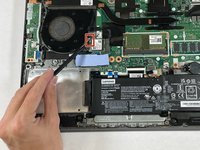
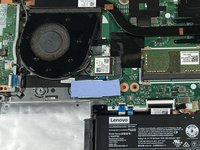
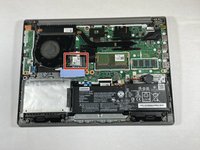
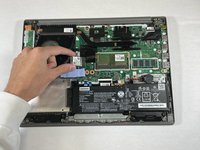
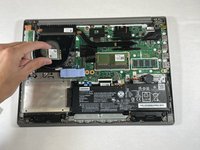
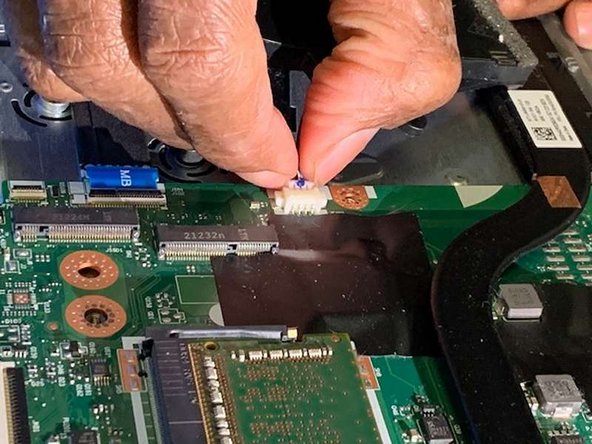
    • Use your fingernails to gently "walk" the fan connector out of its motherboard socket.

    • Be gentle while unplugging the connector. Using too much force may damage the computer.

  8. Lenovo IdeaPad 3-1481W000NGUS Fan Replacement: crwdns2935265:08crwdnd2935265:01crwdnd2935265:02crwdne2935265:0 Lenovo IdeaPad 3-1481W000NGUS Fan Replacement: crwdns2935265:08crwdnd2935265:02crwdnd2935265:02crwdne2935265:0
    • Remove the three 5.5 mm screws that secure the fan with the Phillips #0 screwdriver.

  9. Lenovo IdeaPad 3-1481W000NGUS Fan Replacement: crwdns2935265:09crwdnd2935265:01crwdnd2935265:01crwdne2935265:0
    • Unwrap the wires from around the outside of the fan.
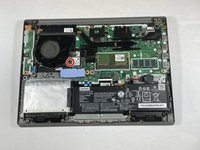
    • Remove the fan.

crwdns2915888:0crwdne2915888:0

To reassemble your device, follow the above steps in reverse order.
Take your e-waste to an R2 or e-Stewards certified recycler.
Repair didn’t go as planned? Try some basic troubleshooting or ask our Answers community for help.

David Richey

crwdns2935283:009/19/24crwdne2935283:0

97 crwdns2915208:0crwdne2915208:0

crwdns2935295:0crwdne2935295:0

crwdns2915084:0crwdne2915084:0

University of North Texas, Team 2-2, Coppersmith Fall 2024 crwdns2935289:0University of North Texas, Team 2-2, Coppersmith Fall 2024crwdne2935289:0

UNT-COPPERSMITH-F24S2G2

crwdns2931471:04crwdne2931471:0

crwdns2935297:04crwdne2935297:0

crwdns2947412:00crwdne2947412:0

crwdns2917038:0crwdne2917038:0

crwdns2936625:0crwdne2936625:0:

crwdns2936751:024crwdne2936751:0 1

crwdns2936753:07crwdne2936753:0 1

crwdns2936753:030crwdne2936753:0 6

crwdns2942667:0crwdne2942667:0 41