crwdns2915892:0crwdne2915892:0
A dead or defunct CMOS battery can prevent the laptop from properly turning on. The CMOS battery powers the BIOS/UEFI chip in your laptop to keep track of system settings while your laptop is off. CMOS batteries deteriorate naturally overtime due to a limited number of charge cycles.
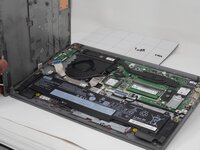
The replacement of the CMOS battery involves the removal of the bottom panel of the laptop, which is necessary to expose the laptop's internal components. For this replacement guide,a T5 Torx screwdriver is required to remove the Torx screws from the bottom panel, along with a Jimmy tool to detach the bottom panel from the laptop. A Philips #000 screwdriver is required to remove the screws from the battery pack. Use this step-by-step replacement guide to remove the dead CMOS battery from your laptop.
Warning: Swollen batteries are fire hazards and need to be handled with caution. Follow these safety guidelines when removing swollen or corroded batteries from your laptop. What to do with a swollen battery - iFixit
Make sure that the laptop is powered off before CMOS battery removal or tampering with any of the electrical components.
crwdns2942213:0crwdne2942213:0
-
-
Unscrew and remove the T5 Torx screws that secure the lower case:
-
Six 6.5 mm screws
-
Four 5 mm screws
-
Insert a Jimmy into the seam between the lower case and chassis.
-
Pry around the entire perimeter until the lower case fully releases.
-
Remove the lower case.
-
-
-
-
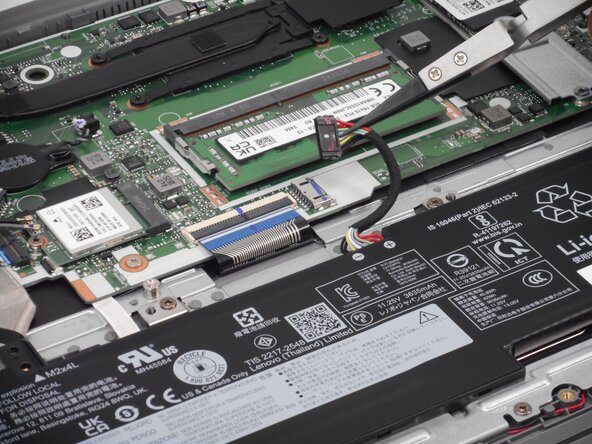
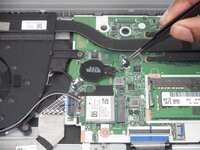
Use tweezers or your fingernails to gently "walk" the battery connector directly out of its motherboard socket.
-
-
-
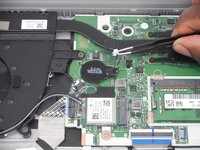
Use tweezers to disconnect the CMOS battery connector from its motherboard port.
-
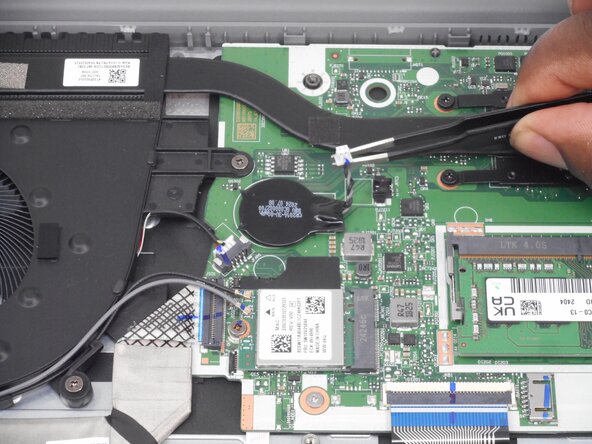
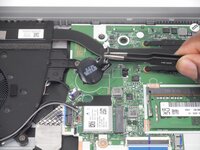
Remove the CMOS battery (adhesive will come off when the CMOS is removed).
-


To reassemble your device, follow the above steps in reverse order.
Take your e-waste to an R2 or e-Stewards certified recycler.
Repair didn’t go as planned? Try some basic troubleshooting or ask our Answers community for help.

crwdns2935287:0crwdne2935287:0

University of Memphis, Team 3-2, Sneed Spring 2025 crwdns2935289:0University of Memphis, Team 3-2, Sneed Spring 2025crwdne2935289:0
UM-SNEED-S25S3G2
crwdns2931471:04crwdne2931471:0
crwdns2935297:06crwdne2935297:0