crwdns2915892:0crwdne2915892:0
Before you start, you will need either another broken JBL Tune 5XX to fetch the part you need from or you could probably get around with a 3D printed part if you have the skills for it.
crwdns2942213:0crwdne2942213:0
-
-
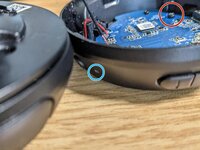
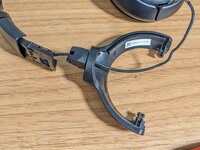
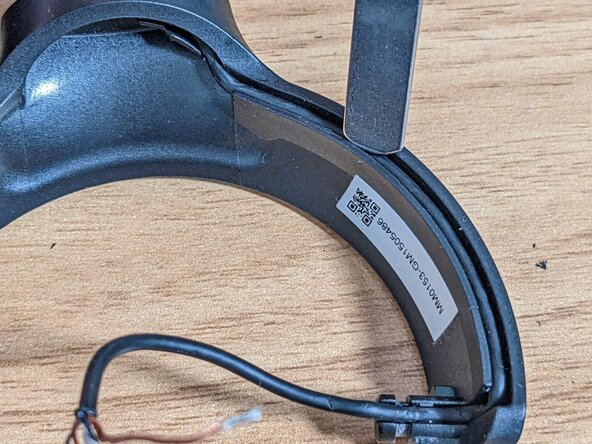
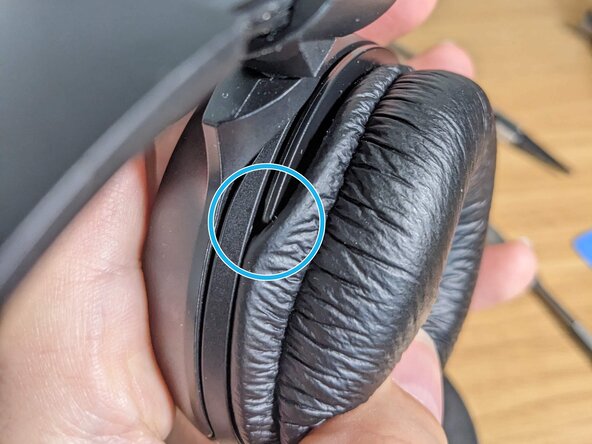
Here is a visual of the damage. The ear cup holder connected to the headband is broken. Unfortunately since it is plastic, there is very little one can do to glue it back. Putting a screw through it does not work as well as there is a hidden pin in the swing head that allow the 90 degrees rotation of the whole earcup.
-
-
-
To make sure to not break the headbad, start by removing the cover for the sliding mechanism. This will allow you to push hard on it later when removing the swivel cover.
-
With the earpiece in your hands, use your two tumbs to firmly press the cover out. It should slide up. Do not try to pry it out as you would break the plastic clips.
-
-
-
Remove the cushion on the earpiece that is broken by simply pulling on it. It is just set into a recess in the plastic so it should come off very easily.
-
-
-
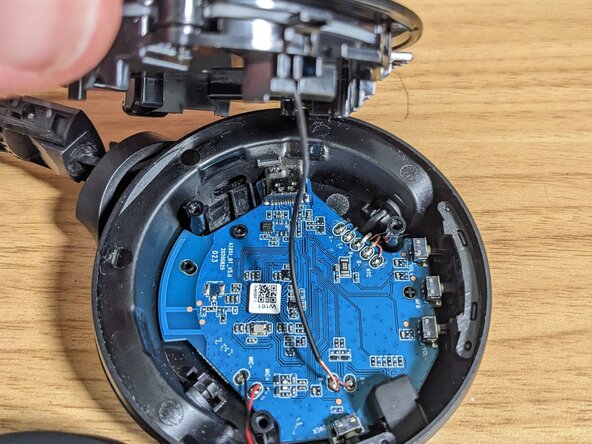
The earpiece has 3 screws holding it to the back of it. Use your screwdriver to remove them all. The top of the earpiece should lift from the bottom piece.
-
Be careful when you lift the speaker as it is connected by a cable to the board below.
-
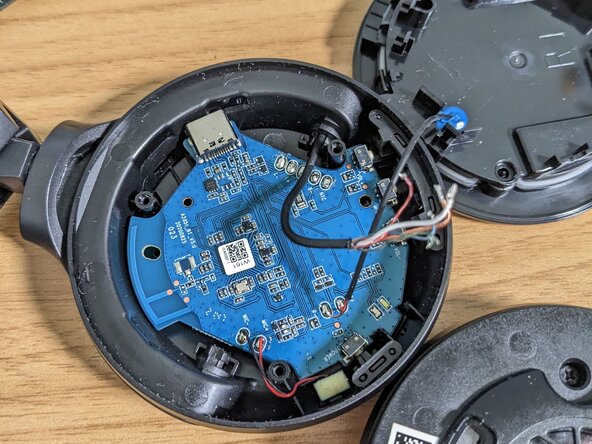
Note: In this guide, we are working on the right earcup that holds the power as well as sound volume as it was the one that was broken. The left side also has a board it is attached to.
-
-
-
Remove the small plastic that cover the leds for the power and put it aside.
-
Then remove the screw that hold the board to the bottom of the earpiece.
-
-
-
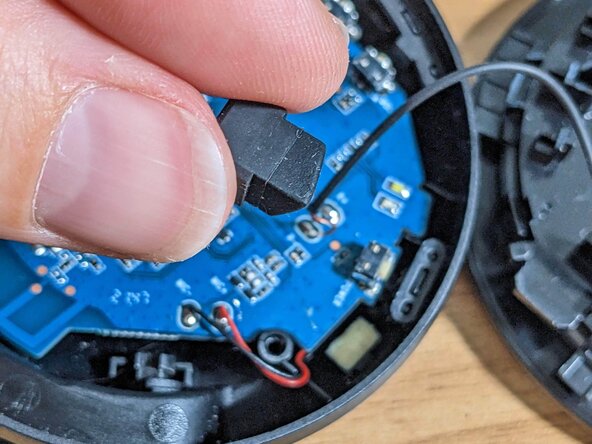
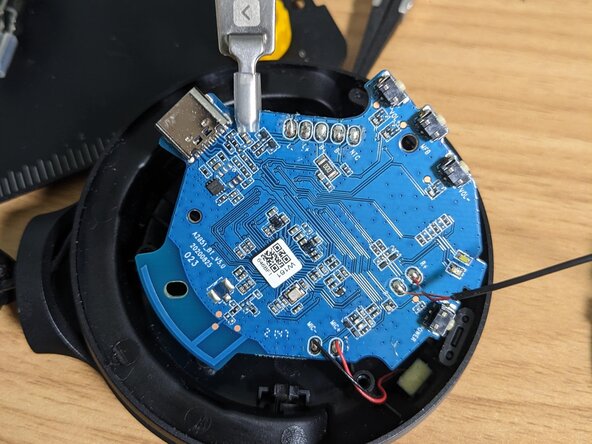
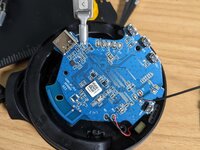
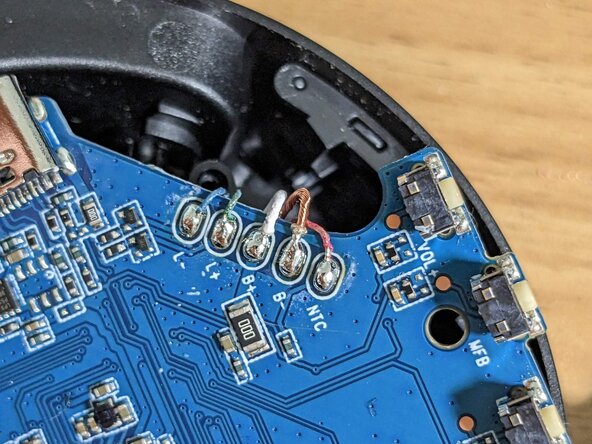
Now that the board is movable (you can pray it a bit using the spatula tool in the I fix it kit), warm up your soldering iron as you will have to de-solder all 5 power and data cables.
-
Be careful not to detach the microphone that is held in place with glue when moving the board.
-
Once done, you should be able to lift the board entirely (careful with the microphone).
-
-
-
-
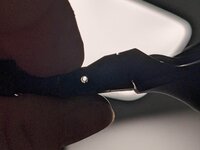
Careful pry the earpiece out of the ear cup holder. The holder flex just enough for it to get out of its sockets.
-
Note: if the piece does not want to come out, I recommend pushing it with the spatula, just to get it to start getting out. It has a small lip that get stuck easily. You should not need to use much force.
-
Pull slowly the cable from the earpiece entirely.
-
-
-
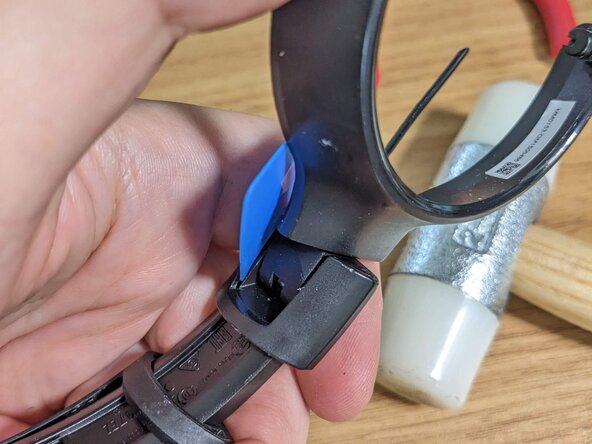
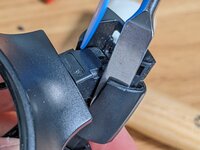
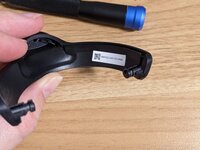
Time to remove the earpiece connection cover. You will need one of the plastic piece as well as some long tool like the spatula from the kit.
-
There are two small clips on each side of the cover that you have to reach to be able to slide it out. After having inserted both tools, you can pull the cover. You might have to use a decent amount of force (and thus why we removed the cover of the band at the beginning). Wiggling it out did the trick for me.
-
Note: They are most likely the most annoying part of that guide. Sliding them over is pretty tricky. Take your time. The cover are quite flexible so it should be ok.
-
-
-
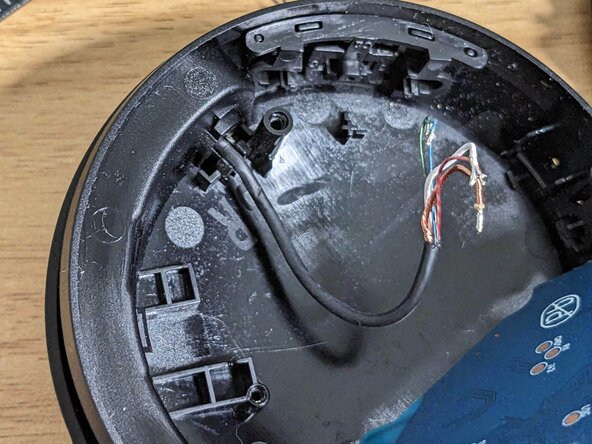
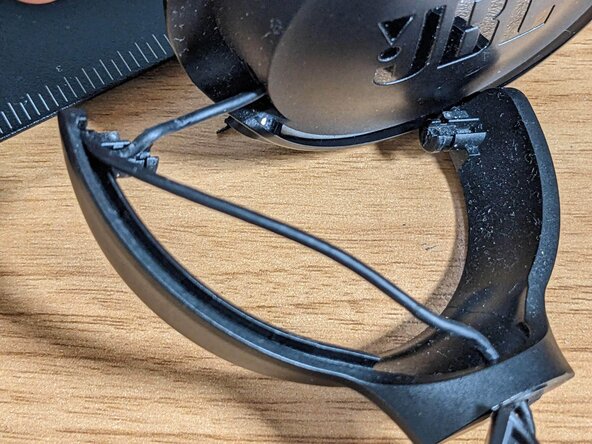
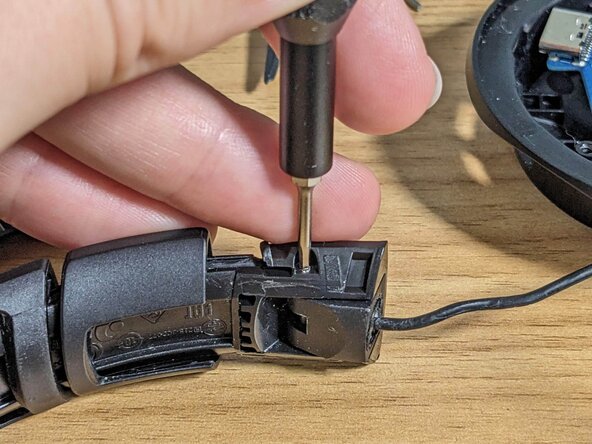
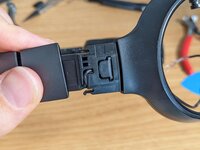
Now that the cover is out of the way, you will have to remove the "rivet / bar holder" (for a lack of a better word) that attach the earpiece holder to the headband.
-
Using a hammer and one of the attachment of the I fix it kit (ther is one that is very close in diameter), slowly hammer out the piece until it start sliding. You do not need much force here either.
-
Important! The bar has a direction! One of the side has a serrated end that lodge itself in the plastic and prevent it to move. Carefully observe which side it is (it is ever so slightly larger) and push from the other side. The resistance will tell you if you are doing it wrong.
-
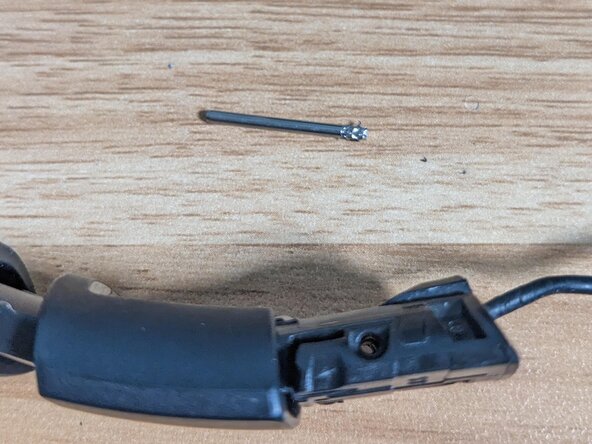
After it has started to come out, use the snipe nose plier to pull it entirely. Be carefull to not hammer it out too much or you will damage your desk.
-
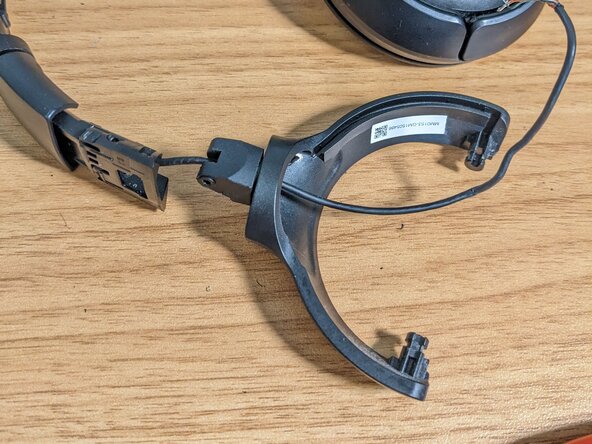
Once done, you should be able to slide out the last part of the broken hinge.
-
-
-
We can now start to reassemble the replacement piece.
-
Slide the new earpiece holder over the cable, making sure you do not kink or break the small wires that compose it.
-
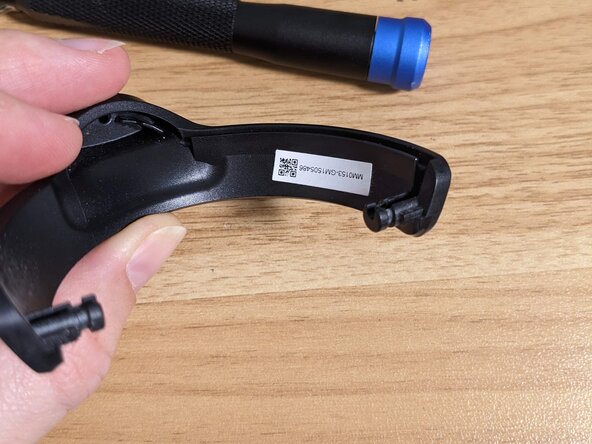
Note: If you want to keep the older sticker from manufacturing, now is a good time to transfer it. You can soften the glue with some isopropanol and stick it to the new piece.
-
-
-
Align the new earpiece cup holder with the hole from before and re-insert the holding bar we pried out.
-
Note: use a lamp to make sure you are aligned before re-adding the bar.
-
Put the cable all the way as well. It is stuck in the headband by sharp turns so you do not need to be careful about pulling too much of the cable.
-
The ear cup holder should sit nice and snuggly as well as swing as it once did.
-
-
-
Use the spatula to set the cable back into its channel. It should hold the cable tighly and ensure it does not move around.
-
Do not press too hard or you will kink the cable and might damage it. A gentle push works.
-
-
-
Re-seat the ear cup holder onto the earcup, making sure you pass the cable through.
-
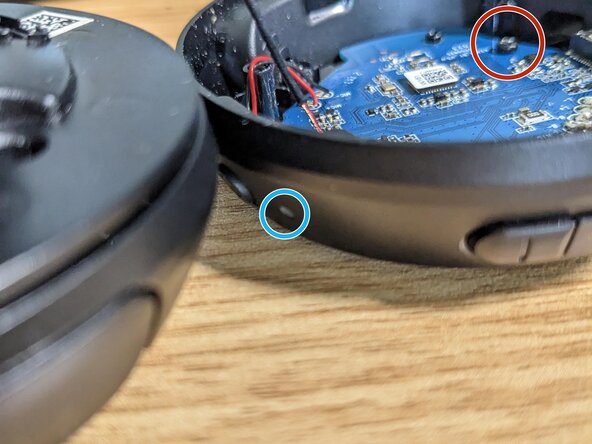
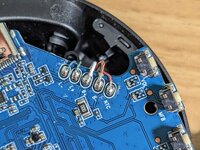
Re-solder the cables in place, making sure you keep the original order.
-
Once done, re-add the screw, as well as the led cover.
-
-
-
Set the speaker over the bottom earpiece, making sure you align the screw channels as well as the air channel.
-
It should sit quite tight to the bottom with only a small gap left. You will ear a "click" when it is right.
-
Put back the 3 screws and it should sit quite nicely.
-
Note: At that point, you should be able to test it everything works and the reparation was successful. Give it a check before you continue.
-
-
-
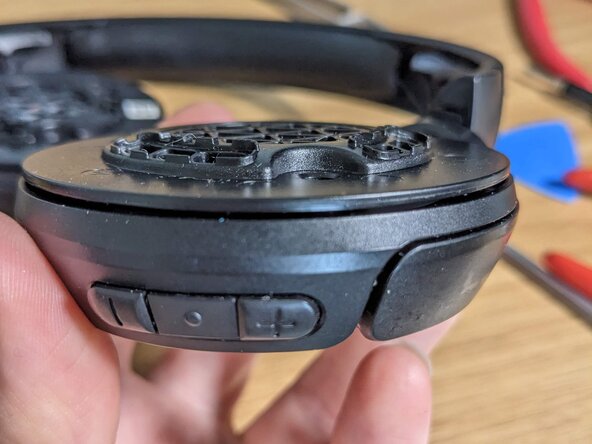
When reinstalling the ear-cover, use the little notch in the plastic to make it easier for yourself.
-
Once you manage to get a tiny bit holding in the grove, slowly rotate the cover until a full rotation is complete.
-
After you are done, you should be able to rotate the cover freely with minimal resistance.
-
-
-
Re-add the headband cover by sliding them on place.
-
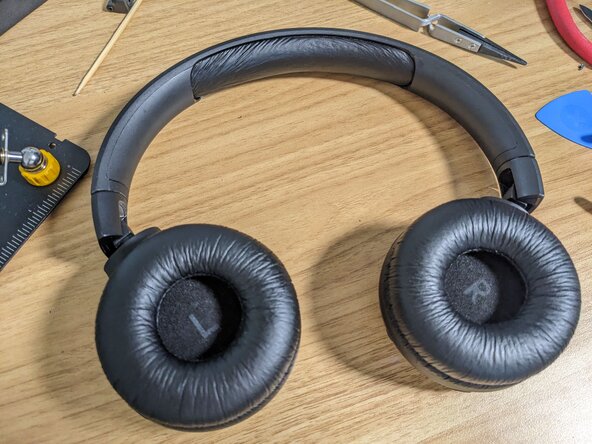
You are done.
-


Thank you for reading!
Thank you for reading!
crwdns2935221:0crwdne2935221:0
crwdns2935227:0crwdne2935227:0
crwdns2947412:02crwdne2947412:0
Hi, from your experience, can these elements be switched left and right? If I buy a half-broken Tune 510BT, should I search for "left ear is okay" (for my case), or any "one ear is okay" fit?
Or maybe it's interchangeable even within 5xx series?
I believe you cannot swap left and right as they would swing the wrong way (one clockwise the other counter-clockwise). For the model, I am pretty confident most from the 5xx serie should work (like 500BT for instance). Just make sure on the picture that the hinge look the same.
Menorine -