crwdns2915892:0crwdne2915892:0
There are many benefits to adding a second drive to your iMac such as improved speeds, greater storage space, and less heartache when installing new software. Use this guide to install one using our optical bay hard drive enclosure.
crwdns2942213:0crwdne2942213:0
-
-
Lay your iMac front side down on a table with the lower edge facing yourself.
-
Loosen the single Phillips screw in the center of the access door.
-
Remove the access door from your iMac.
-
-
crwdns2935267:0crwdne2935267:0Heavy-Duty Suction Cups (Pair)$14.95
-
Stick two suction cups to opposing corners of the glass panel.
-
-
-
Gently pull the glass panel straight up off the iMac.
-
-
-
Remove the following 12 screws securing the front bezel to the rear case:
-
Eight 13 mm T8 Torx.
-
Four 25 mm T8 Torx.
-
-
-
Gently lift the front bezel from its top edge off the rear case.
-
Once the top edge of the front bezel has cleared the rear case, rotate the front bezel toward the stand and lift it off the rear case.
-
Rotate the front bezel away from the rest of the device and lay it above the top edge of the iMac.
-
-
-
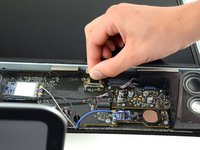
Disconnect the microphone cable connector, removing tape as necessary.
-
-
-
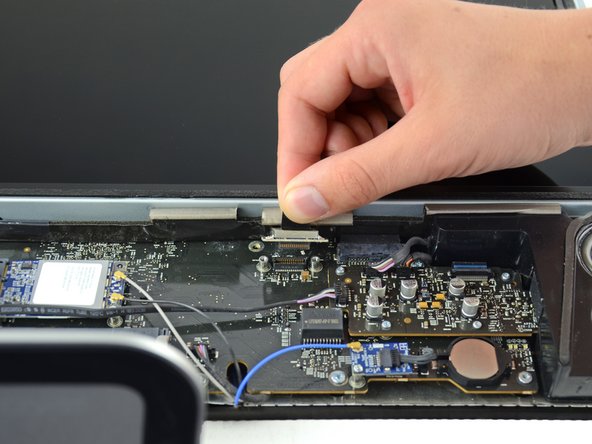
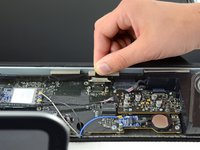
Remove the two 5.3 mm T6 torx screws from the LCD connector.
-
Firmly grasp the pull tab on top of the connector and pull it straight up out of its port.
-
-
-
Remove the eight T8 Torx screws securing the display panel to the rear case.
-
-
-
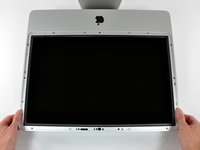
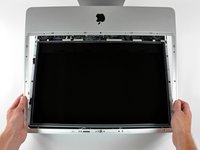
Place your hands on either side of the bottom of the display panel, and lift it up enough that you can reach the connectors inside.
-
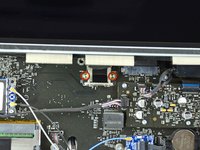
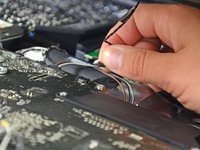
While holding the display panel up with one hand, locate and remove the display thermal sensor cable from its connector.
-
-
-
While still holding the display panel up, use two fingers to firmly push down on the power supply cable connector from its socket.
-
-
-
-
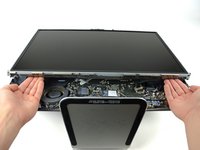
Lift and remove the display panel from the device.
-
-
-
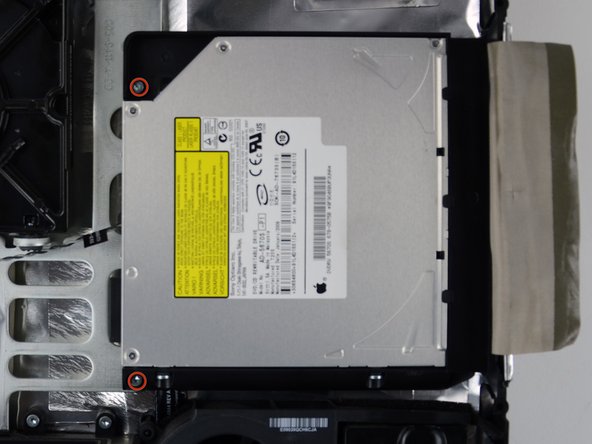
Peel off the tape holding the optical drive in place.
-
Remove the two 7.1 mm T10 torx screws.
-
-
-
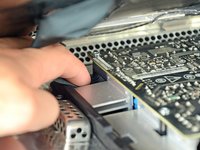
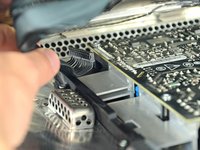
Firmly grab the optical drive connector and pull it straight out of the optical drive.
-
Remove the optical drive from the device.
-
-
-
Remove the piece of foam tape covering the optical drive thermal sensor.
-
-
-
To remove the optical drive thermal sensor, use the tip of a spudger to lift the center finger of the thermal sensor bracket while applying slight tension to the thermal sensor cable.
-
-
-
Use the flat end of a spudger to pry the optical drive thermal sensor bracket up off the adhesive securing it to the optical drive.
-
-
-
Use a spudger to remove the small piece of EMI foam from the bottom of the optical drive.
-
-
-
Peel the EMI tape off the optical drive.
-
-
-
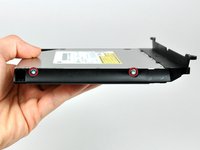
Remove the two T10 Torx screws from both sides of the optical drive (four screws total).
-
-
-
Use the tip of a spudger to press each of the optical drive bracket tabs out of their slots on the bottom of the optical drive.
-
-
-
Rotate the optical drive bracket slightly away from the optical drive.
-
Pull the optical drive bracket away from the open end of the optical drive, minding any tabs that may get caught.
-
-
-
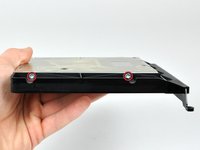
Remove the three 3.0 mm Phillips screws from the optical bay enclosure.
-
-
-
Starting from the left edge, gently pull open the optical bay enclosure.
-
Continue to pull open the two halves of the enclosure until they separate.
-
-
-
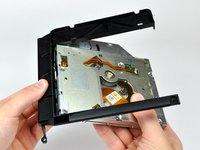
Remove the two 3.0 mm Phillips screws securing the faceplate to the optical bay enclosure.
-
-
-
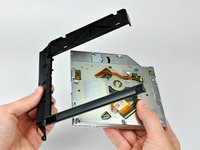
Lift the black plastic faceplate out of the optical bay enclosure.
-
Reassemble the optical bay enclosure without the faceplate, reusing the original three 3.0 mm Phillips screws to keep it intact.
-
-
-
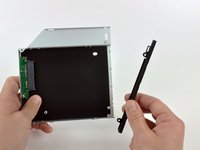
Remove the plastic positioner from the optical bay hard drive enclosure by pressing in on one of the clips on either side and lifting it up and out of the enclosure.
-
-
-
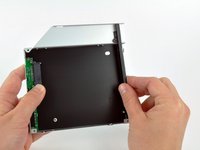
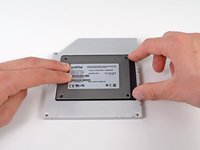
Make sure that the hard drive connectors are facing down before placing it into the enclosure.
-
Gently place the hard drive into the enclosure's hard drive slot.
-
While firmly holding the enclosure in place with one hand, use your other hand to press the hard drive into the enclosure connectors.
-
-
-
Once the hard drive is snug, reinsert the plastic positioner while holding the hard drive against the bottom of the enclosure.
-
Reconnect any cables you have removed from the original optical drive onto the optical bay enclosure.
-


To reassemble your device, follow these instructions in reverse order.
To reassemble your device, follow these instructions in reverse order.
crwdns2935221:0crwdne2935221:0
crwdns2935229:047crwdne2935229:0


crwdns2947412:03crwdne2947412:0
Many many many thanks, everything went fine with my iMac early 2009 which is now ready for a second life with my kids :)
Mystery: I have removed and replaced my bezel many times - most recently to repair the vid card. However this time while powering up fine before replacing the bezel - now, once bezel is in place it won’t power on - but I hear a ‘click’ in the lower right corner after pushing the power. But then, if I pull the bezel back about an inch from the top - it starts >Something seems to be ‘shorting’ ?
Many thanks Brittany and ifixit, no problems encountered and it took me about 2 hours only because I checked and double checked everything I did. iMac early 2009, saved it from the scrap heap for a while longer.