crwdns2915892:0crwdne2915892:0
This guide shows you how to replace the broken display in your Huawei P8 Lite.
crwdns2942213:0crwdne2942213:0
-
-
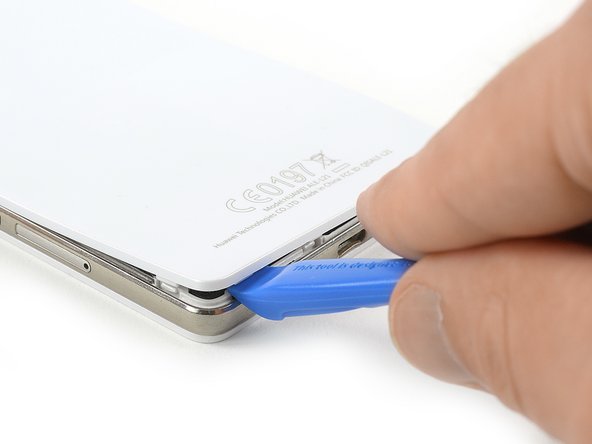
Use an Opening Tool and start to lever up the back cover of your Huawei P8 Lite at the bottom of your phone.
-
-
-
There are clips around the whole mid frame, holding down the back cover. Open all of them with the Opening Tool.
-
When all clips are open, remove the back cover from the rest of the phone.
-
-
-
Use a tweezer to remove the warranty sticker which sits on a screw in the bottom right of your phone.
-
-
-
Remove the 4 black Torx T5 screws which hold down the lower part of the loudspeaker.
-
Remove the three silver Phillips #00 screws which hold down the upper part of the loudspeaker.
-
-
-
-
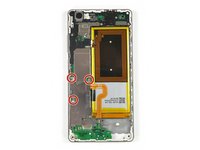
Remove the three Phillips #00 screws that hold the metal plate in place.
-
Remove the metal plate with a tweezer.
-
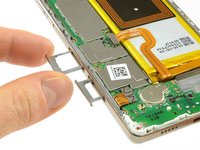
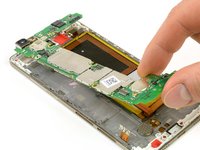
Unplug the battery flex connector with a spudger.
-
-
-
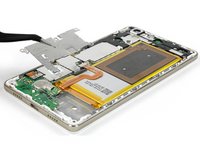
Remove the two Torx T5 screws.
-
Remove the five Phillips #00 screws.
-
-
-
Carefully pry off the plastic cover on the left side. The NFC antenna contacts might be slightly glued to the cover.
-
Then remove the top cover.
-
-
-
Remove the SIM card and SD card trays.
-
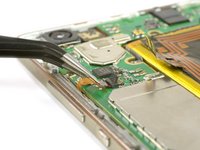
Disconnect the three plug connectors and one ZIF connector.
-
-
-
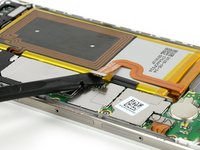
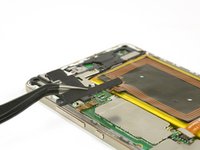
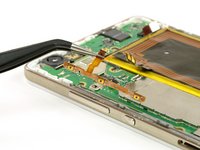
Remove the volume and power button cable.
-
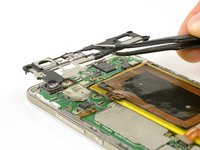
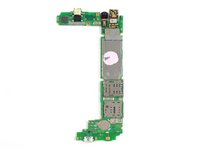
Take out the motherboard by lifting the bottom part first.
-
-
crwdns2935267:0crwdne2935267:0Plastic Cards$2.99
-
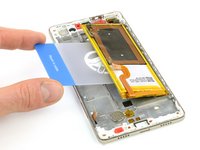
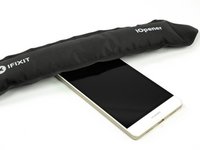
Heat up the top, bottom and both sides of the display with an iOpener to soften the adhesive.
-
-
-
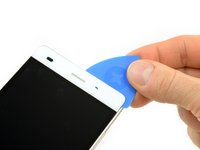
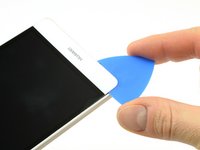
Use an opening pick to get underneath the top right part of the display and loosen the adhesive.
-
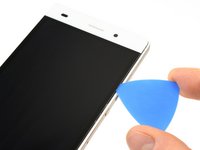
Only with the very tip of the opening pick slide along the side of the display towards the bottom.
-
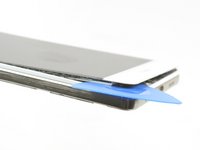
Loosen the adhesive underneath the complete lower part of the display.
-
-
-
Slowly but constantly lift the bottom part of the display to get underneath the screen and further loosen the adhesive.
-
Thread the cable through the midframe.
-
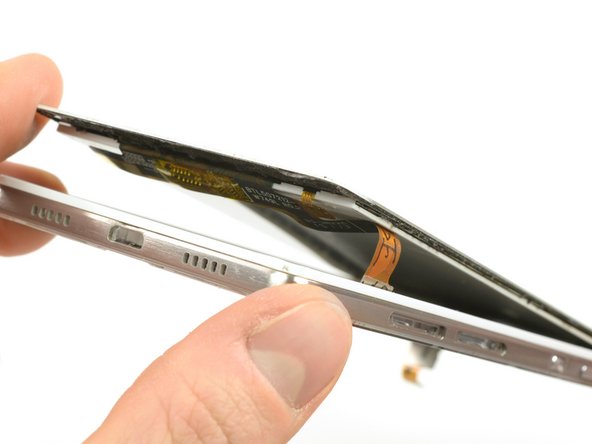
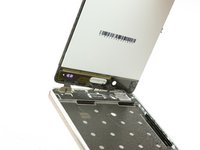
Open the display all the way and remove it from the midframe.
-


To reassemble your device, follow these instructions in reverse order. Make sure to test the new display and remove any old residue from the adhesive.
crwdns2935221:0crwdne2935221:0
crwdns2935229:031crwdne2935229:0

crwdns2935287:0crwdne2935287:0

Tobias Isakeit - Repairability Engineer crwdns2935289:0Tobias Isakeit - Repairability Engineercrwdne2935289:0
Business
crwdns2934841:01crwdne2934841:0
crwdns2935297:01 145crwdne2935297:0