crwdns2915892:0crwdne2915892:0
Use this guide to remove and replace the complete display with the frame of a Huawei P8.
crwdns2942213:0crwdne2942213:0
-
-
First switch off your phone.
-
Remove the trays for the SD card and the SIM card.
-
-
-
Remove the two Torx T2 screws located at the bottom next to the device's Micro USB port.
-
-
-
Use an iSclack or a suction handle to separate the display unit from the rear panel.
-
-
-
Remove the two Phillips #00 screws that secure the front camera and display/battery connector brackets
-
-
-
Use a tweezer to remove the bracket covering the display and the battery flex connector.
-
Unplug the battery flex connector with a Spudger.
-
Remove the bracket covering the flex connector of the front camera.
-
-
-
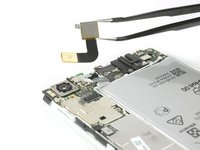
Unplug the headphone jack and the front camera flex connectors.
-
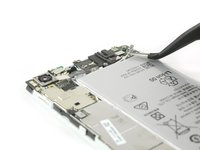
Remove the front camera.
-
-
-
Use a spudger to disconnect the power/volume cable and fold it out of the way.
-
Remove the liquid contact indicator.
-
-
-
-
Remove the five Phillips #00 screws that hold down the motherboard of your Huawei P8.
-
-
-
Unplug the vibration motor flex connector.
-
Disconnect the antenna cable.
-
-
-
Unplug the display flex connector from the main board with a Spudger.
-
Disconnect and remove the antenna cable with a tweezer.
-
-
-
Remove the motherboard from the phone.
-
-
-
Carefully peel up the flex cable of your loudspeaker.
-
If the cable is difficult to peel, heat the loudspeaker assembly with an iOpener or a heat gun.
-
Lift up the loudspeaker assembly with a spudger and remove it.
-
-
-
Free the end of the first adhesive pull tab to get a good grip on it.
-
Pull the adhesive tab in a slow constant movement to free the battery.
-
-
-
Free the end of the second adhesive pull tab.
-
Pull the adhesive tab in a slow constant movement.
-
-
crwdns2935267:0crwdne2935267:0Tesa 61395 Tape$5.99
-
Slowly lift the battery out.
-
-
-
Remove the vibration motor gasket.
-
Remove the vibration motor.
-
-
-
Remove the power and volume button flex cable.
-
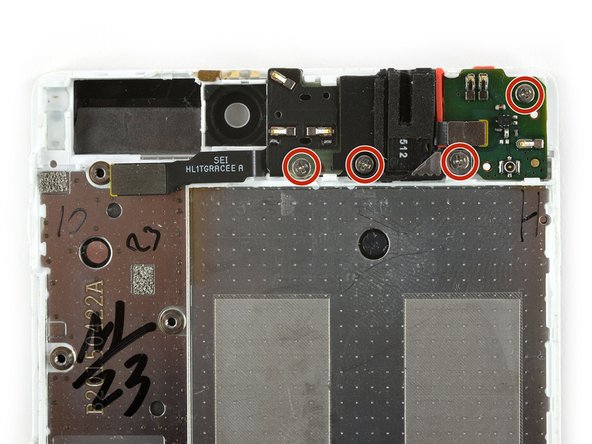
Remove the four Phillips #00 screws.
-
Use a tweezer to remove the plastic bracket which is covering the corner of the headphone jack.
-
-
-
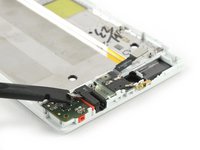
Use a spudger to disconnect the headphone jack flex cable.
-
Use a tweezer to remove the first daughter board which was connected to the headphone jack.
-
Remove the second daughter board including the headphone jack.
-
-
-
Remove the gasket which was placed under the daughterboard in the top right corner of your phone.
-
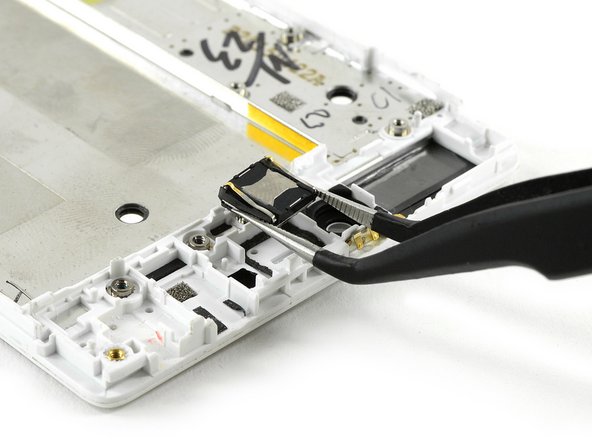
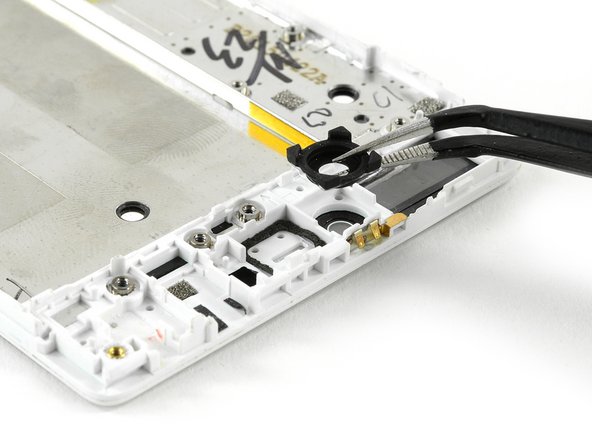
Remove the earpiece speaker with a tweezer. Take care of its connectors while doing so.
-
Remove the front camera gasket.
-


To reassemble your device, follow these instructions in reverse order. Reapply adhesive where necessary and transfer the rubber gaskets and sealings of your old frame to the new one.
To reassemble your device, follow these instructions in reverse order. Reapply adhesive where necessary and transfer the rubber gaskets and sealings of your old frame to the new one.
crwdns2935221:0crwdne2935221:0
crwdns2935229:08crwdne2935229:0

crwdns2915084:0crwdne2915084:0

iFixit EU Team crwdns2935289:0iFixit EU Teamcrwdne2935289:0
Staff
crwdns2931471:037crwdne2931471:0
crwdns2935297:01,205crwdne2935297:0
crwdns2947412:02crwdne2947412:0
Cracking guide, although mentioning the need to removed the stuck down power and volume buttons could be a great addition.
Hi,
aftet a quiet small shock this phone just stopped calling. everything works includind sms data and wifi, but no call.
could it be fixed by antenna replacement?
thanks !