crwdns2942213:0crwdne2942213:0
-
crwdns2935201:0crwdne2935201:0 crwdns2935203:0crwdne2935203:0
-
Apply a heated iOpener to the rear glass to loosen the adhesive underneath. Apply the iOpener for at least two minutes.
-
-
crwdns2935201:0crwdne2935201:0 crwdns2935203:0crwdne2935203:0
-
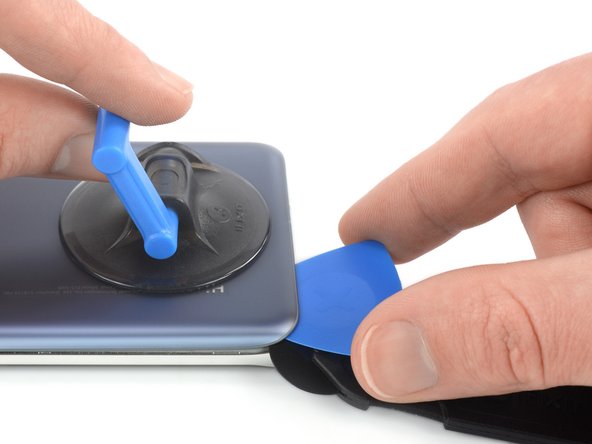
Secure a suction handle to the bottom edge of the rear glass, as close to the curved edge as possible.
-
Lift the back cover with the suction handle to create a small gap between the back cover and the frame.
-
Insert an iMac opening wheel into the gap.
-
Slide the opening wheel to the bottom left corner to slice the adhesive.
-
-
crwdns2935201:0crwdne2935201:0 crwdns2935203:0crwdne2935203:0
-
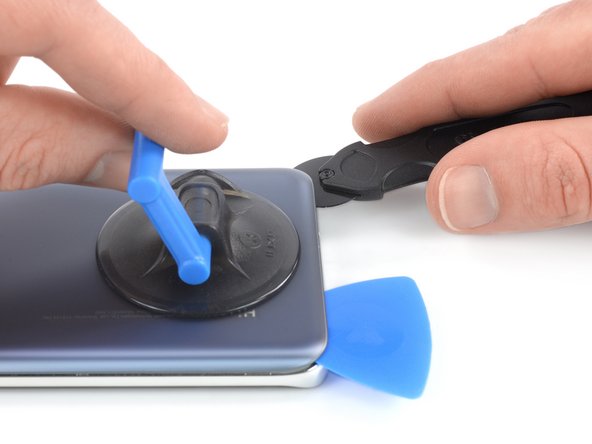
Insert an opening pick into the gap between rear glass and frame at the bottom left corner of your phone to prevent the adhesive from resealing.
-
-
crwdns2935201:0crwdne2935201:0 crwdns2935203:0crwdne2935203:0
-
Reinsert the opening wheel at the bottom edge of the rear glass.
-
Slide the opening wheel to the bottom right corner to slice the adhesive.
-
Insert an opening pick underneath the bottom right corner of the rear glass, next to the opening wheel to prevent the adhesive from resealing.
-
-
crwdns2935201:0crwdne2935201:0 crwdns2935203:0crwdne2935203:0
-
Insert the opening wheel underneath the bottom left corner of the rear glass.
-
Slide the opening wheel along the left edge of your Huawei P40 Pro to cut the adhesive.
-
Insert an opening pick underneath the top left corner of the rear glass, next to the opening wheel to prevent the adhesive from resealing.
-
-
crwdns2935201:0crwdne2935201:0 crwdns2935203:0crwdne2935203:0
-
Insert the opening wheel underneath the top left corner of the rear glass.
-
Slide the opening wheel along the top edge of your phone to cut the adhesive.
-
Insert an opening pick underneath the top right corner of the rear glass, next to the opening wheel to prevent the adhesive from resealing
-
-
crwdns2935201:0crwdne2935201:0 crwdns2935203:0crwdne2935203:0
-
Insert the opening wheel underneath the top right corner of the rear glass.
-
Slide the opening wheel along the right edge of your phone to cut the remaining adhesive.
-
-
crwdns2935201:0crwdne2935201:0 crwdns2935203:0crwdne2935203:0
-
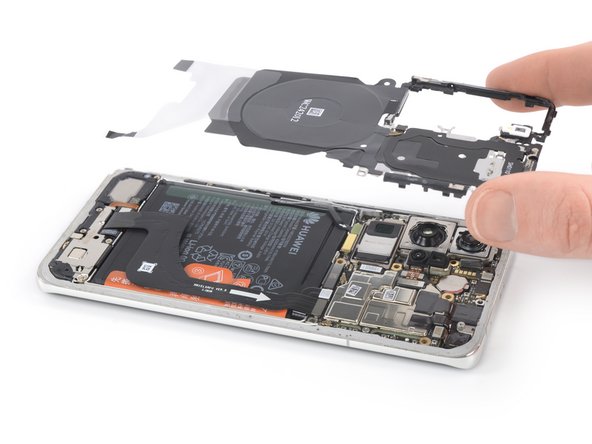
Remove the eleven 4.5 mm-long Phillips #00 screws.
-
-
crwdns2935201:0crwdne2935201:0 crwdns2935203:0crwdne2935203:0
-
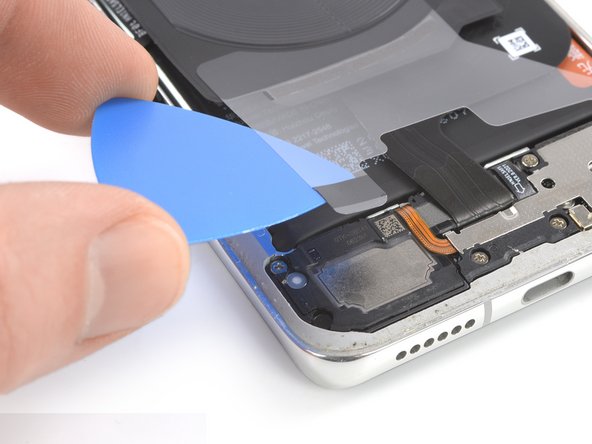
Slide an opening pick underneath the bottom right corner of the protective foil.
-
Use the opening pick to gently peel the protective foil off the daughterboard cover.
-
Repeat the previous procedure to peel the bottom left protective foil corner off the speaker.
-
-
crwdns2935201:0crwdne2935201:0 crwdns2935203:0crwdne2935203:0
-
Slide an opening pick underneath the bottom left corner of the plastic midframe.
-
Slide the opening pick along the left edge of the midframe to release the plastic clips holding it in place.
-
-
crwdns2935201:0crwdne2935201:0 crwdns2935203:0crwdne2935203:0
-
Insert the tip of an opening pick at the top edge of the midframe next to the top left corner.
-
Tilt the opening pick downwards to pop the plastic clips out of their sockets.
-
Slide the opening pick along the top edge of the midframe to release the remaining plastic clips.
-
-
-
crwdns2935201:0crwdne2935201:0 crwdns2935203:0crwdne2935203:0
-
Use the flat end of a spudger to pry up and disconnect the interconnect cable.
-
-
crwdns2935201:0crwdne2935201:0 crwdns2935203:0crwdne2935203:0
-
Use the flat end of a spudger to pry up and disconnect the battery cable.
-
-
crwdns2935201:0crwdne2935201:0 crwdns2935203:0crwdne2935203:0
-
Use a spudger tor pry up and disconnect the antenna flex cable.
-
-
crwdns2935201:0crwdne2935201:0 crwdns2935203:0crwdne2935203:0
-
Fold the antenna cable to the side to avoid damaging it during the battery removal.
-
-
crwdns2935201:0crwdne2935201:0 crwdns2935203:0crwdne2935203:0
-
Fold the interconnect flex cable toward the charging port in order to get access to the battery pull tabs.
-
-
crwdns2935201:0crwdne2935201:0 crwdns2935203:0crwdne2935203:0
crwdns2935267:0crwdne2935267:0Tweezers$4.99-
Use a pair of blunt nose tweezers or a clean fingernail to peel the orange adhesive strip labelled with a 1 off the battery.
-
-
crwdns2935201:0crwdne2935201:0 crwdns2935203:0crwdne2935203:0
-
Use a pair of blunt nose tweezers or a clean fingernail to peel the orange adhesive strip labelled with a 2 off the battery.
-
-
crwdns2935201:0crwdne2935201:0 crwdns2935203:0crwdne2935203:0
-
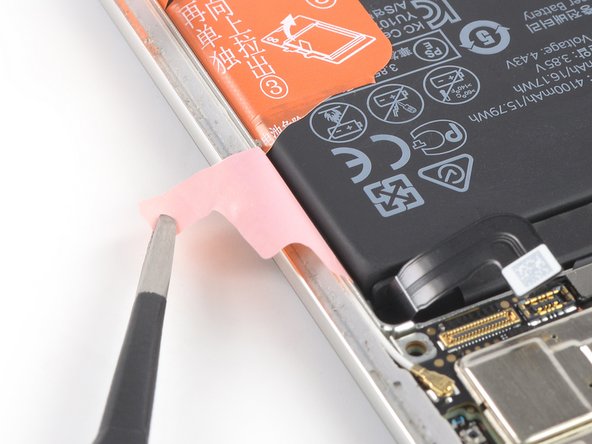
Peel the orange adhesive strip labelled with a 3 off the battery.
-
Pull up on the orange adhesive strip to lift the battery out of its recess and swing it up to an upright position.
-
-
crwdns2935201:0crwdne2935201:0 crwdns2935203:0crwdne2935203:0
-
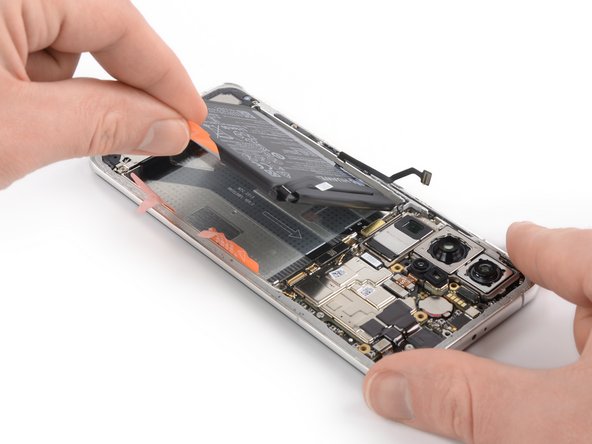
Peel the battery off the remaining adhesive.
-
Remove the battery.
-
Peel the battery's adhesive sticker off the midframe.
-
-
crwdns2935201:0crwdne2935201:0 crwdns2935203:0crwdne2935203:0
crwdns2935267:0crwdne2935267:0Tweezers$4.99-
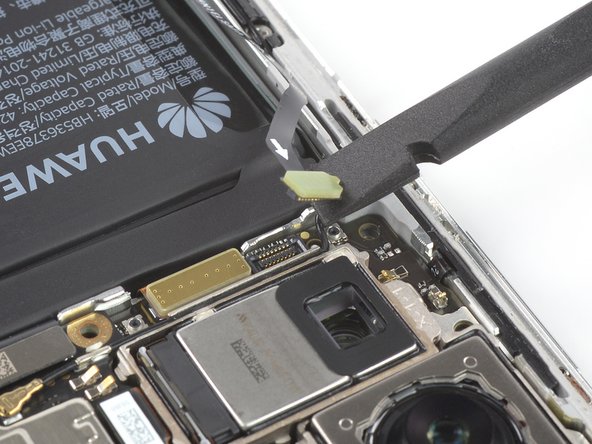
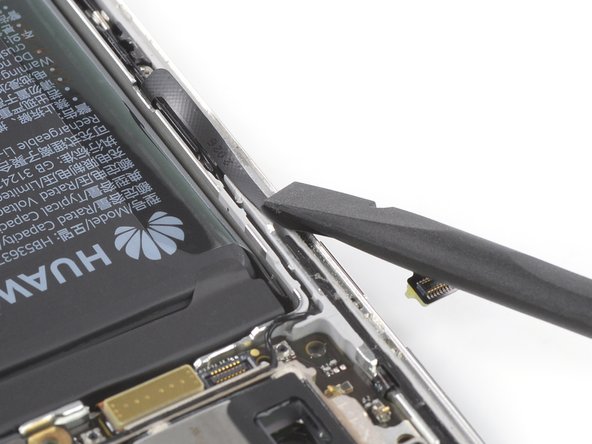
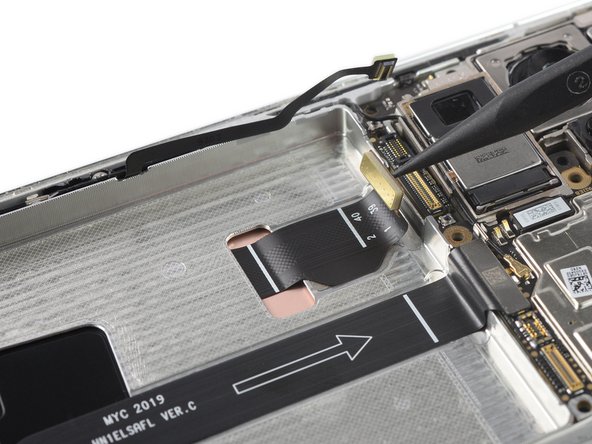
Use a spudger to disconnect the display flex cable from the motherboard by prying the connector straight up from its socket.
-
The display flex cable is adhered to the midframe with mild adhesive. Use a pair of tweezers or your fingers to carefully peel it off.
-
-
crwdns2935201:0crwdne2935201:0 crwdns2935203:0crwdne2935203:0
-
Apply a heated iOpener or a heat gun to the screen to loosen the adhesive underneath. Apply the iOpener for at least two minutes.
-
-
crwdns2935201:0crwdne2935201:0 crwdns2935203:0crwdne2935203:0
-
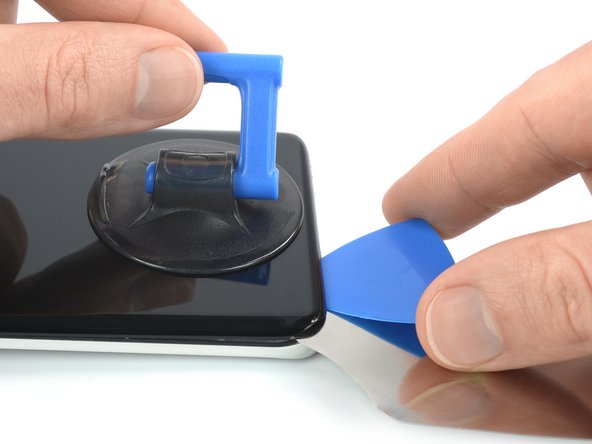
Once the screen is warm to touch, apply a suction cup to the bottom edge of the screen.
-
Lift the screen with the suction handle to create a small gap between the screen and the frame.
-
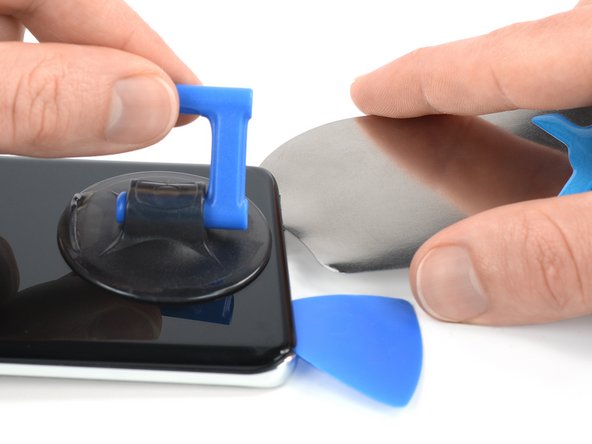
Insert an iFlex in the gap between the midframe and the screen.
-
Slide the iFlex to the bottom left corner of the screen to slice its adhesive.
-
-
crwdns2935201:0crwdne2935201:0 crwdns2935203:0crwdne2935203:0
-
Insert an opening pick next to the bottom left corner of the screen to prevent the adhesive from resealing.
-
-
crwdns2935201:0crwdne2935201:0 crwdns2935203:0crwdne2935203:0
-
Relocate the iFlex to the center of the bottom edge and slide it to the bottom right corner of the screen to slice the display adhesive.
-
Insert an opening pick next to the bottom right corner of the screen to prevent the adhesive from resealing.
-
-
crwdns2935201:0crwdne2935201:0 crwdns2935203:0crwdne2935203:0
-
Insert the iFlex next to the bottom left corner of the screen.
-
Slide the iFlex along the left edge of your Huawei P40 Pro to slice the adhesive.
-
-
crwdns2935201:0crwdne2935201:0 crwdns2935203:0crwdne2935203:0
-
Insert an opening pick next to the top left corner of the screen to prevent the adhesive from resealing.
-
-
crwdns2935201:0crwdne2935201:0 crwdns2935203:0crwdne2935203:0
-
Insert the iFlex next to the bottom right corner of the screen.
-
Slide the iFlex along the right edge of your Huawei P40 Pro to slice the adhesive.
-
-
crwdns2935201:0crwdne2935201:0 crwdns2935203:0crwdne2935203:0
-
Insert an opening pick next to the top right corner of the screen to prevent the adhesive from resealing.
-
-
crwdns2935201:0crwdne2935201:0 crwdns2935203:0crwdne2935203:0
-
Insert the iFlex next to the top left corner of the screen.
-
Slide the iFlex along the top edge of your phone to cut the remaining adhesive.
-
-
crwdns2935201:0crwdne2935201:0 crwdns2935203:0crwdne2935203:0
-
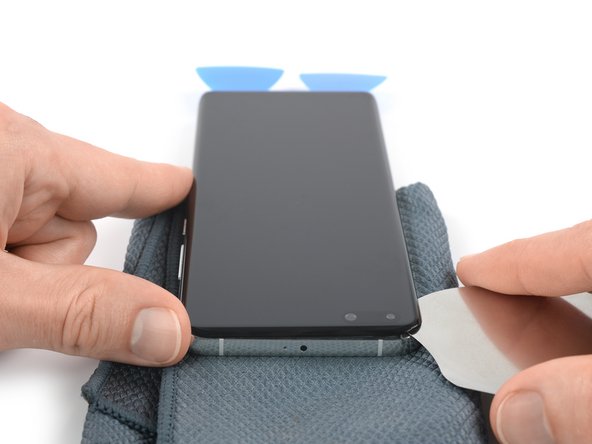
Thread the display flex cable through the gap in the midframe and remove the screen.
-
-
crwdns2935201:0crwdne2935201:0 crwdns2935203:0crwdne2935203:0
-
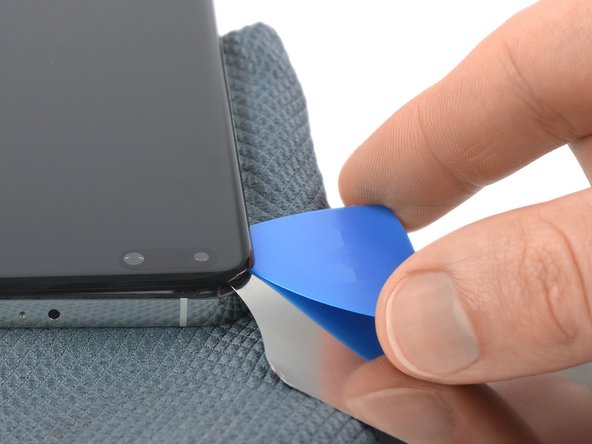
Slide an opening pick underneath the earpiece speaker module assembly.
-
Use to opening pick to separate the earpiece speaker module assembly from the screen.
-


crwdns2935221:0crwdne2935221:0
crwdns2935229:07crwdne2935229:0


crwdns2947410:01crwdne2947410:0
hi.. can i use lcd huawei p40 pro at my huawei p40 pro plus?