crwdns2915892:0crwdne2915892:0
prereq loudspeaker replacement
crwdns2942213:0crwdne2942213:0
-
-
Before you begin, switch off your phone.
-
Apply a heated iOpener to the back of the phone to loosen the adhesive beneath the back cover. Apply the iOpener for at least two minutes.
-
-
-
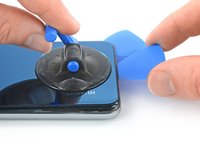
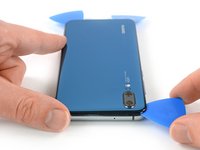
Secure a suction handle to the bottom of the back cover, as close to the edge as possible.
-
Lift the back cover with the suction handle to create a small gap between the cover and the frame.
-
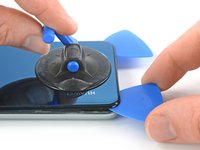
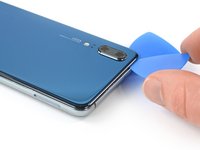
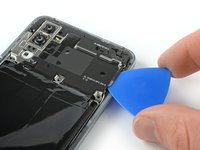
Insert an opening pick into the gap.
-
If you have trouble, apply more heat to further soften the adhesive. Follow the iOpener instructions to avoid overheating.
-
Slide the opening pick to the bottom right corner.
-
-
-
Insert a second opening pick and slide it to the bottom left corner to cut the adhesive.
-
Leave the opening picks in place to prevent the adhesive from resealing.
-
-
-
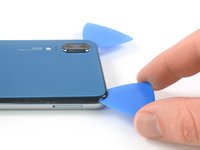
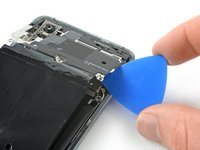
Insert a third opening pick at the bottom left corner.
-
Start to slide the tip of the opening pick from the bottom left corner along the side of the phone to cut the adhesive.
-
Leave the opening pick in its place at the top left corner to prevent the adhesive from resealing.
-
-
-
If the adhesive becomes hard to cut it most likely cooled down. Use your iOpener to reheat it.
-
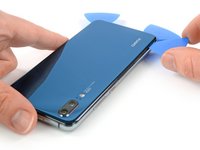
Insert a fourth opening pick under the top left corner of the back cover.
-
Slide the opening pick along the top edge of the phone to cut the adhesive.
-
Leave the opening pick in the top right corner to prevent the adhesive from resealing.
-
-
-
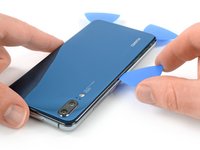
Insert a fifth opening pick at the top right corner of the phone.
-
Slide the opening pick along the right side to cut the remaining adhesive.
-
-
-
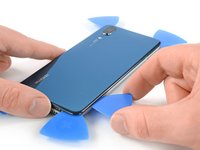
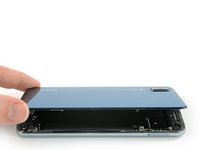
Lift and remove the back cover.
-
Before installing fresh adhesive and reassembling, remove any remaining adhesive from the phone, and clean the glued areas with isopropyl alcohol and a lint-free cloth.
-
-
crwdns2935267:0crwdne2935267:0Tweezers$4.99
-
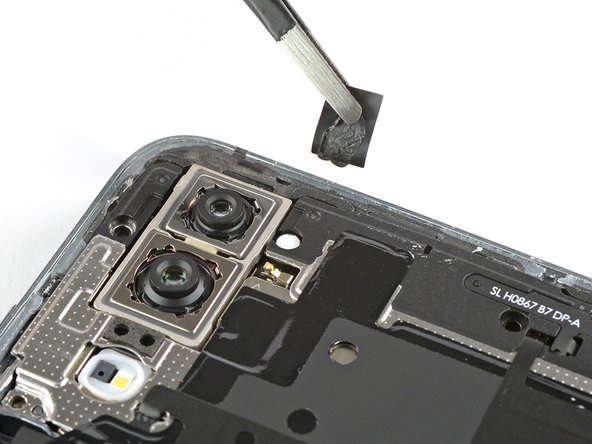
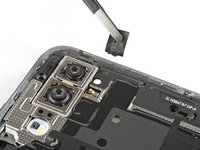
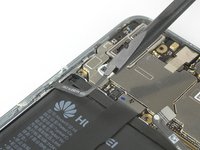
Use a pair of tweezers to peel the black tape next to the rear camera off the motherboard cover.
-
-
-
Remove the eight Phillips #00 screws (3.1 mm length).
-
-
-
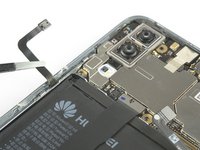
Use a pair of tweezers to peel the black foil at the bottom end of the phone off the loudspeaker.
-
-
-
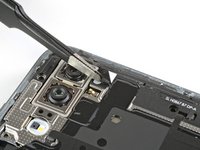
Slide an opening pick under the right side of the motherboard cover.
-
Rotate the opening pick slightly to pry up the motherboard cover.
-
-
-
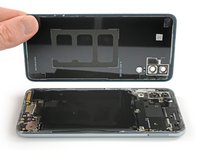
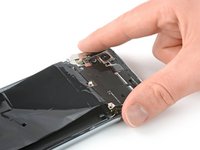
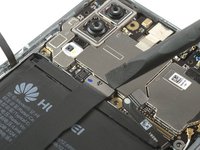
Remove the motherboard cover with NFC.
-
-
-
-
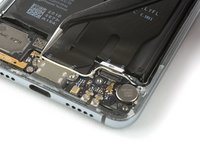
Use a spudger to pry up and disconnect the battery connector.
-
-
-
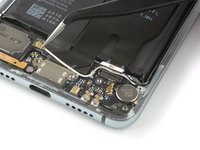
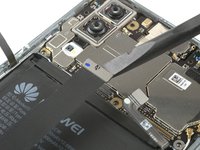
Remove the three Phillips #00 screws (3.2 mm length).
-
-
crwdns2935267:0crwdne2935267:0Tweezers$4.99
-
Use a pair of tweezers to remove the daughterboard cover.
-
-
-
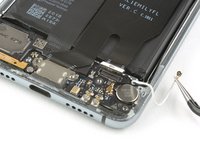
Remove the two Phillips #00 screws (3.2 mm length).
-
-
-
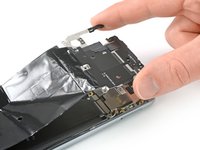
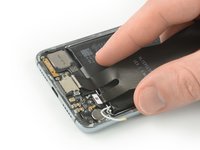
Use a spudger to pry up and disconnect the main daughterboard connector from the daughterboard.
-
-
crwdns2935267:0crwdne2935267:0Tweezers$4.99
-
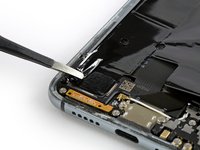
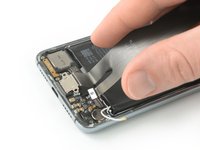
Use a pair of tweezers to pry up and disconnect the connector of the white coax cable from the motherboard.
-
Unroute the white coax cable from the metal clips on the daughterboard and fold it to the side.
-
-
-
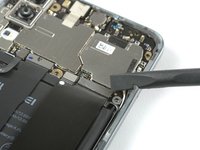
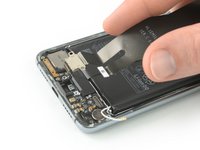
Use a spudger to disconnect the main flex cable connector from the motherboard.
-
-
-
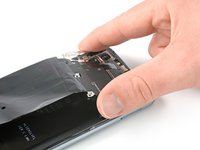
Remove the charging port and main flex cable by lifting it upwards and then pulling it in the direction of the motherboard.
-
-
-
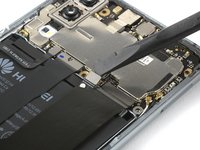
Use a spudger to pry up and disconnect the power and volume button flex connector.
-
-
-
Use a spudger to pry up and disconnect the display flex connector and fold the display cable out of your way to remove the battery.
-
-
-
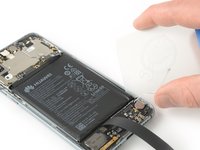
Apply a heated iOpener to the screen to loosen the adhesive beneath the battery. Apply the iOpener for at least two minutes.
-
-
crwdns2935267:0crwdne2935267:0Plastic Cards$2.99
-
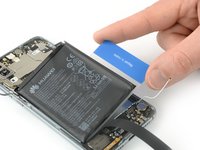
Start to slide a plastic card under the bottom right corner of the battery to cut the adhesive.
-
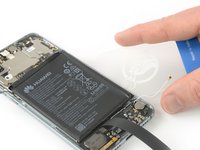
Slide the plastic card along the right side of the battery to further release the adhesive. Gently start to pry up the battery while doing so.
-
-
-
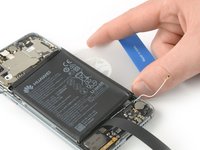
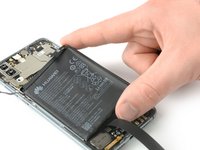
Slide the plastic card under the whole upper part of the battery and cut the adhesive with it.
-
Slide the plastic card down to the bottom end of the battery to cut the remaining adhesive.
-
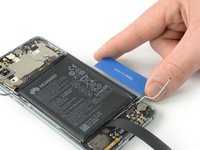
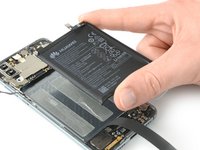
Use the plastic card to pry up the battery.
-
-
crwdns2935267:0crwdne2935267:0Tesa 61395 Tape$5.99
-
Remove the battery.
-
-
-
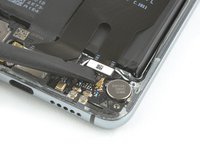
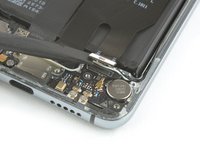
Remove the two Phillips #00 screws (3.4 mm length).
-
-
crwdns2935267:0crwdne2935267:0Tweezers$4.99
-
Use a pair of tweezers to disconnect the black coax cable and fold it out of your way.
-
-
-
Use a pair of tweezers to remove the daughterboard.
-
-
-
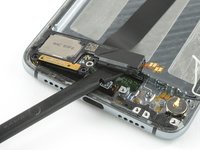
Remove the two Phillips #00 screws (3.2 mm length).
-
-
-
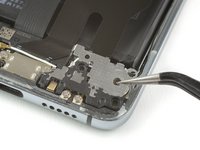
Apply a heated iOpener to the bottom end of the screen to loosen the adhesive underneath the loudspeaker. Apply the iOpener for at least two minutes.
-
-
crwdns2935267:0crwdne2935267:0Tweezers$4.99
-
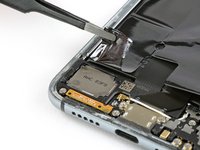
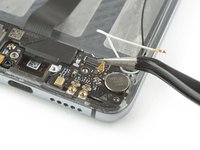
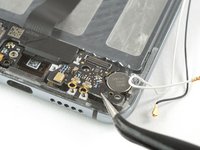
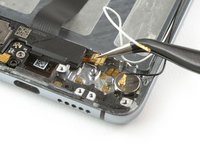
Use one arm of a pair of tweezers to peel up the contact cable of the loudspeaker.
-
-
-
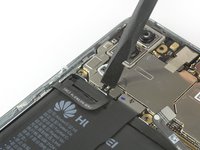
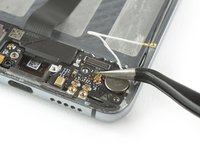
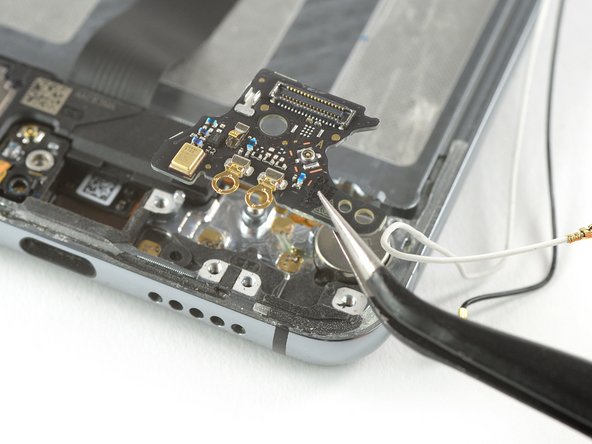
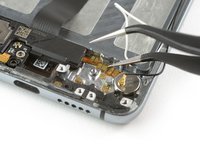
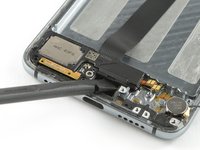
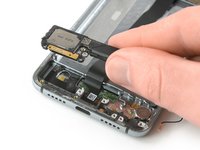
Insert a spudger between the midframe and the right side of the loudspeaker.
-
Use the spudger to pry up the loudspeaker.
-


To reassemble your device, follow these instructions in reverse order.
To reassemble your device, follow these instructions in reverse order.

