crwdns2915892:0crwdne2915892:0
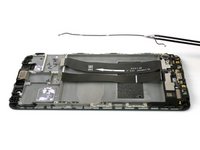
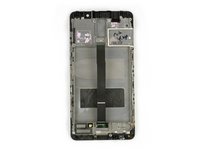
Use this guide to replace the display with its frame of your Huawei Mate 9 smartphone.
crwdns2942213:0crwdne2942213:0
-
-
First switch off your phone and remove the SIM card tray.
-
-
-
Remove both screws on the bottom with a Torx T2 screwdriver.
-
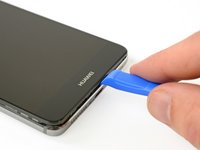
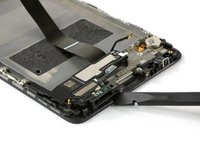
Use a plastic opening tool to get between the display and the case. Open the smartphone by carefully prying out the display with all the parts out of the case.
-
-
-
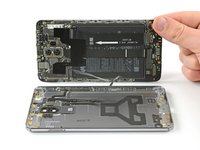
Swing open the phone to the right side.
-
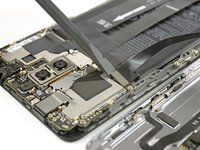
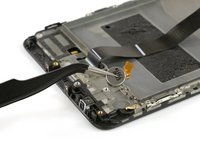
Disconnect the fingerprint sensor cable with a spudger.
-
-
-
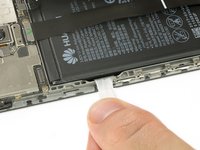
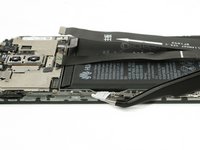
Peel out the adhesive strip which is placed beneath the battery by steadily pulling at the tab in a flat angle.
-
-
-
crwdns2935267:0crwdne2935267:0Tesa 61395 Tape$5.99
-
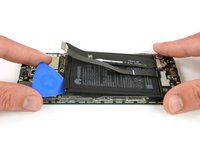
If the battery is not freed, use an opening pick to pry under the battery, freeing it from the remaining adhesive.
-
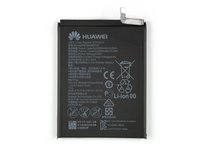
Remove the battery.
Vorsicht bei diesem Schritt!
Der Akku ist in der unteren Hälfte mit sehr gut klebendem Tape gesichert! Ein massives Hebeln zerstört den Akku (Akku knickt und Zellen bekommen einen Kurzschluss)!
Hebelt ihn wie auf dem Bild, oben etwas hoch damit ihr mit einer alten EC oder Kreditkarte o.ä. unter den Akku kommt und damit das Tape langsam wegdrücken könnt.
Der Klebstoff an der Unterseite des Akkus hielt diesen bei meinem Gerät ziemlich fest und ließ sich trotz zweimaligem langen Auflegen des 30 Sekunden in der Mikrowelle erwärmten Opening-Pick-Gel-Kissens nur mühevoll lösen. Ohne Gefahr zu laufen, dabei den Chassis-Rahmen mit dem darunter befindlichen Display zu verbiegen und dieses zu beschädigen, half mir die Kante des Spudgers, den Akku Millimeter um Millimeter vom Klebstoff allmählich zu lösen. Ein stabiler dünner Plastikspachtel könnte dabei besonders hilfreich sein. Das alte Akku-Kissen riss beim lösen aus dem Chassis-Rahmen und entzündetes Gas des Lithium-Ionen-Gemisches entwich unter leichtem Funkensprühen. Es ist also Vorsicht geboten sowohl beim Entfernen, bei der späteren Aufbewahrung und der Entsorgen des alten, in meinem Falle beschädigten Akkus.
Angesichts dieses Umstandes und dass es nicht einfach war, das Gerät zu öffnen (Schritt 2), stufe ich den gesamten Vorgang des Akkutausches eher als moderat bis schwierig ein!
-
-
-
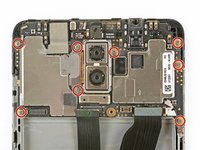
Remove the eight Phillips #00 screws that hold the motherboard in its place.
-
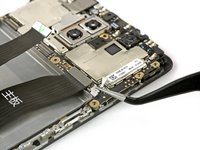
Unplug the antenna cable with a tweezer.
-
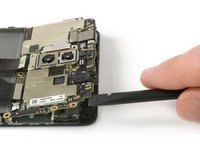
Use a spudger to carefully lift up the motherboard including all components holding onto it and remove it.
“there are still small clamps” since you've been able to pull the motherboard out, maybe you could be a little more specific with where these clamps are and which way they should move to allow mb removal?
-
-
-
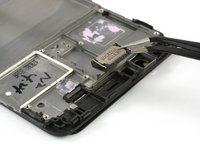
Remove the earpiece speaker by levering it up from the side.
-
Disconnect the antenna cable and remove it carefully.
This picture shows “remove the earpiece speaker” with the speaker already removed. How do you get tweezers under it?
The answer is, wegdge it up from the side of the speaker.
Why is that not included in the instructions?
-
-
-
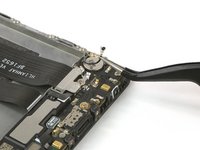
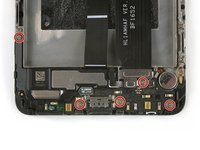
Move down to the bottom part of your phone and remove the five Phillips #00 screws.
-
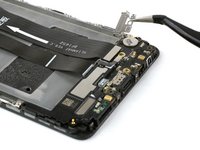
Remove the metal shield that covers the connection of the motherboard flex cable.
-
Use a spudger to unplug the motherboard flex cable and remove it.
-
-
-
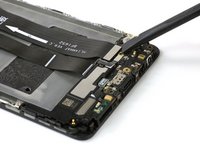
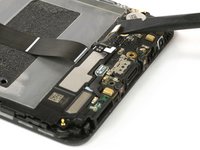
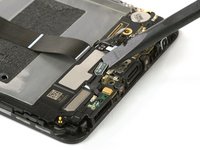
Use a spudger to disconnect the loudspeaker and the charging port flex cable from the daughterboard.
-
-
-
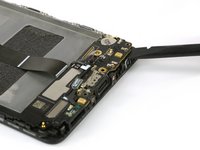
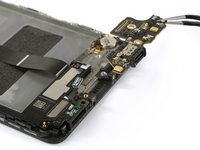
Use a spudger to carefully lever up the daughterboard and remove it. Don't break the small clamps that hold down the daughter board but press them a little bit to the side to make the removal easier.
-
-
crwdns2935267:0crwdne2935267:0iOpener$17.99
-
Use a spudger to remove the loudspeaker and the charging port. There is some adhesive underneath and the unit might be a little bit sticky.
-
Use a tweezer to loosen the glued in vibration motor and remove it.
Nicht die Schraube links an diesem Board vergessen!
Hier fehlt das lösen einer Schraube, links in der Verlängerung der Lautsprecher mit Ladebuchse ist ein Loch zu sehen, dort sitzt noch eine Schraube.
-
To reassemble your device, follow these instructions in reverse order. Before reassembly check your new part for any components that might need to be transferred from the old one.
To reassemble your device, follow these instructions in reverse order. Before reassembly check your new part for any components that might need to be transferred from the old one.
crwdns2935221:0crwdne2935221:0
crwdns2935229:016crwdne2935229:0
crwdns2947412:05crwdne2947412:0
why take out the battery??
Hi JPBrokenIT,
this is a guide for the full display assembly. This means you’ll exchange the display including the whole mid frame for a new one. If you’re going to leave the battery in its place. You need a new one for your spare part. If you don’t want to buy a new battery, you’ll need to transfer it from the old mid frame with display, to the new one. If you want to exchange the display without the mid frame, you need to follow this guide - Huawei Mate 9 Display Replacement
Hi guys, just a small Thing, but you missed to mention one additional screw which holds the Speaker unit on top of the “arm” to the left. Anyway, very good and helpful guide. Christian
Hi Chris V,
thanks for mentioning. I made the correction.
I was stuck at step 2. I could not pry open the case, not even a tiny gap, and the plastic opening tool broke. The assembly and case were attached so tight. I even tried to use a flat metal screw driver to try to get an “entering point”. But the case was so well snugged onto the assembly. Maybe Huawei put some glue during assembling process. I halted the repairing. At least the phone is now still functioning with a broken screen.


