crwdns2933423:0crwdne2933423:0

How to open the Saeco Moltio housing (plastic frame)

crwdns2942213:0crwdne2942213:0

  1. How to open the Saeco Moltio housing (plastic frame), How to open the Saeco Moltio housing (plastic frame): crwdns2935265:01crwdnd2935265:01crwdnd2935265:02crwdne2935265:0 How to open the Saeco Moltio housing (plastic frame), How to open the Saeco Moltio housing (plastic frame): crwdns2935265:01crwdnd2935265:02crwdnd2935265:02crwdne2935265:0
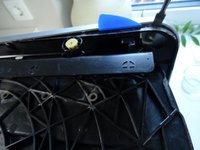
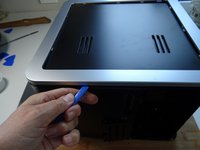
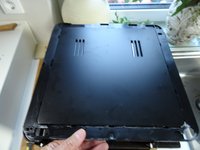
    • First check which model you have in front of you: Is the decorative frame made of chromed metal (picture 1) or of metallized plastic? (picture 2). In the first case follow this guide, in the second case you are in the right place here.

  2. How to open the Saeco Moltio housing (plastic frame): crwdns2935265:02crwdnd2935265:01crwdnd2935265:01crwdne2935265:0
    • Never forget to remove the power!

    • Remove the water reservoir, the brew unit, the milk reservoir, the lid for the bean storage and the drip tray.

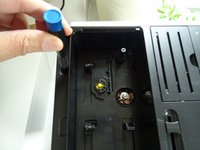
    • Remove the lock on the bean storage container by pushing the button inwards.

    • Lift the bean storage container out.

  3. How to open the Saeco Moltio housing (plastic frame): crwdns2935265:03crwdnd2935265:01crwdnd2935265:03crwdne2935265:0 How to open the Saeco Moltio housing (plastic frame): crwdns2935265:03crwdnd2935265:02crwdnd2935265:03crwdne2935265:0 How to open the Saeco Moltio housing (plastic frame): crwdns2935265:03crwdnd2935265:03crwdnd2935265:03crwdne2935265:0
    • First, the metalized plastic decorative frame on the water tank side must be removed. It is only hold in place by clips, but it often jams so hard that you have to use a lot of force - but not so much that it breaks.

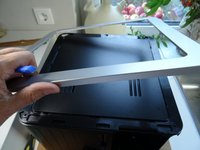
    • Lay the machine on its side so the bottom is facing you. Start using a metal tool at the bottom edge to pry off the trim. Use only plastic tools on the other edges to avoid damaging the frame. The notches gradually release with a loud crack.

    • Lift off the frame.

  4. How to open the Saeco Moltio housing (plastic frame): crwdns2935265:04crwdnd2935265:01crwdnd2935265:03crwdne2935265:0 How to open the Saeco Moltio housing (plastic frame): crwdns2935265:04crwdnd2935265:02crwdnd2935265:03crwdne2935265:0 How to open the Saeco Moltio housing (plastic frame): crwdns2935265:04crwdnd2935265:03crwdnd2935265:03crwdne2935265:0
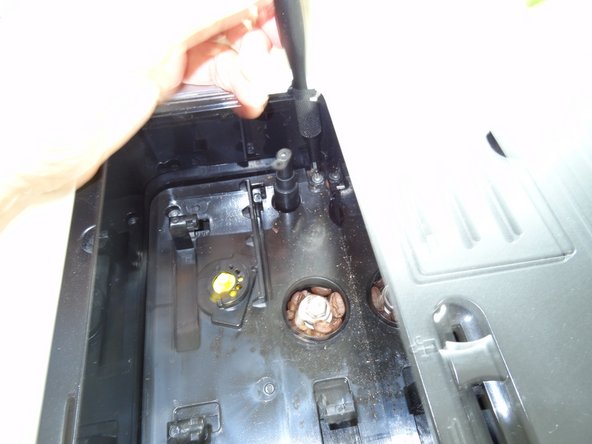
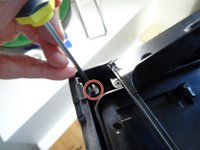
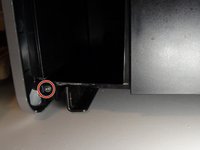
    • Now start dismantling the top panel. First remove the two Torx T10 screws at the top of the back.

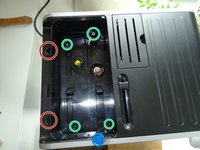
    • Remove the four Torx T10 screws from under the bean container.

  5. How to open the Saeco Moltio housing (plastic frame): crwdns2935265:05crwdnd2935265:01crwdnd2935265:01crwdne2935265:0
    • Using a plastic pry tool gently disengage the top panel and lift it up and out. It might jam a little, especially under the decorative frame on the side with the service flap.

    • When assembling, make sure that the slide for unlocking the bean container engages correctly in the mechanism.

  6. How to open the Saeco Moltio housing (plastic frame): crwdns2935265:06crwdnd2935265:01crwdnd2935265:03crwdne2935265:0 How to open the Saeco Moltio housing (plastic frame): crwdns2935265:06crwdnd2935265:02crwdnd2935265:03crwdne2935265:0 How to open the Saeco Moltio housing (plastic frame): crwdns2935265:06crwdnd2935265:03crwdnd2935265:03crwdne2935265:0
    • Now the side part on the water tank side can be removed. It is still attached with three screws.

    • The first Torx T10 screw is in the top rear corner, the second is in the middle of the upper edge . Twist them out.

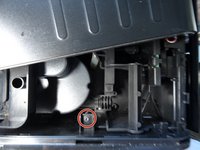
    • Remove the Torx T10 screw on the left under the slot for the water tank.

  7. How to open the Saeco Moltio housing (plastic frame): crwdns2935265:07crwdnd2935265:01crwdnd2935265:02crwdne2935265:0 How to open the Saeco Moltio housing (plastic frame): crwdns2935265:07crwdnd2935265:02crwdnd2935265:02crwdne2935265:0
    • Lay the machine on its side. Now you can lift off the side panel. There is a small notch in the top right and it is probably still a bit stuck.

    • In principle, the side with the service flap could also be removed in a similar way, but this is not necessary for many repairs.

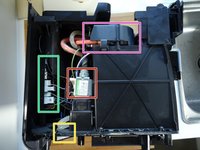
    • Picture 2 shows the Moltio with side panel open:

    • pump

    • flowmeter

    • PCB

    • heater

crwdns2915888:0crwdne2915888:0

To reassemble your device, follow these instructions in reverse order.

crwdns2935229:08crwdne2935229:0

crwdns2934873:0crwdne2934873:0

de en

100%

crwdns2934883:0VauWehcrwdne2934883:0 crwdns2934875:0crwdne2934875:0
crwdns2934877:0crwdne2934877:0 ›

VauWeh

crwdns2935283:010/19/15crwdne2935283:0

203,187 crwdns2915208:0crwdne2915208:0

crwdns2935297:0246crwdne2935297:0

crwdns2915084:0crwdne2915084:0

Repair is War on Entropy crwdns2935289:0Repair is War on Entropycrwdne2935289:0

Community

crwdns2931471:025crwdne2931471:0

crwdns2935297:01,120crwdne2935297:0

crwdns2944067:02crwdne2944067:0

Super Bilderklärung mit den farbigen Hinweisen.

So und nicht anders ist es richtig erklärt.

Peter Nohner - crwdns2934203:0crwdne2934203:0

crwdns2917038:0crwdne2917038:0

crwdns2936625:0crwdne2936625:0:

crwdns2936751:024crwdne2936751:0 8

crwdns2936753:07crwdne2936753:0 29

crwdns2936753:030crwdne2936753:0 90

crwdns2942667:0crwdne2942667:0 6,502