crwdns2915892:0crwdne2915892:0
Follow this guide to replace Microsoft Windows 7, 8, 8.1, 10, or 11 with Linux Mint on a desktop or laptop PC.
The latest version of Linux Mint requires a 64-bit processor. If your device is newer than 2007, it's likely 64-bit. If it's older, do some research or see where it lies on this table.
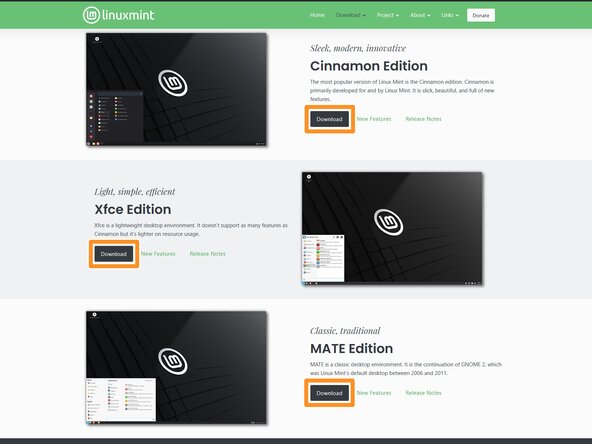
Linux Mint has multiple desktop environment options, which change how it looks and feels. Cinnamon is the most modern, MATE feels more vintage, and Xfce is optimized for slower hardware.
You'll need to pick a desktop environment before starting this guide. If you're unsure, try Cinnamon first.
We highly recommend backing up all important data before beginning this guide. A tool like Clonezilla is useful for creating a full disk image to restore to easily. Download their "stable" .iso file and follow this guide's section on creating a bootable USB to use it.
crwdns2942213:0crwdne2942213:0
-
-
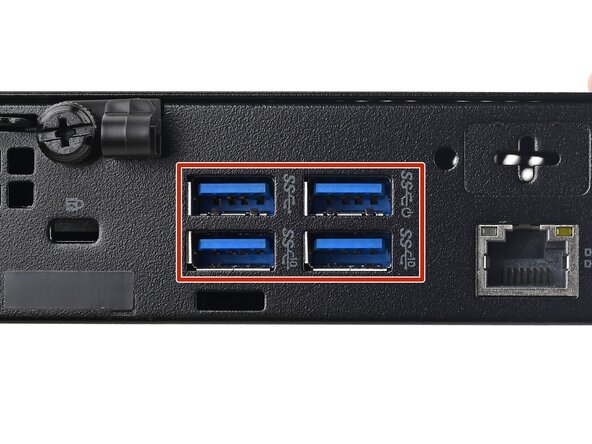
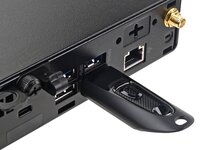
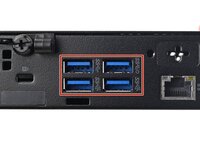
Connect a USB flash drive with at least 4 GB of capacity to the fastest available port on the computer.
-
Use a USB 3 drive connected to a USB 3 port for faster installation. USB 3 ports are usually colored blue and/or labeled SuperSpeed (SS).
-
-
-
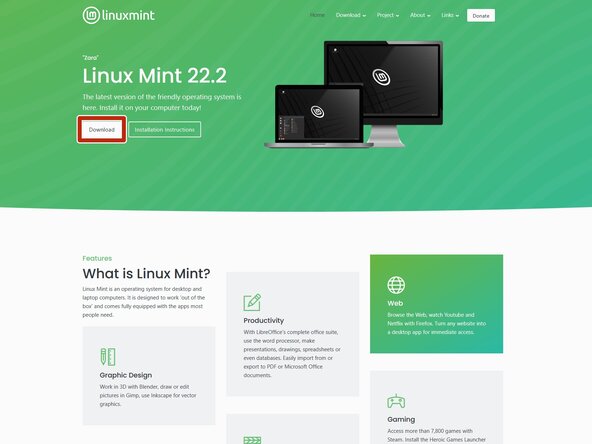
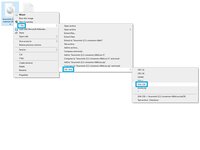
Navigate to the Linux Mint website and click Download.
-
Select a desktop environment (Cinnamon, Xfce, or MATE) based on the description and screenshot. Select Download on the one you choose.
-
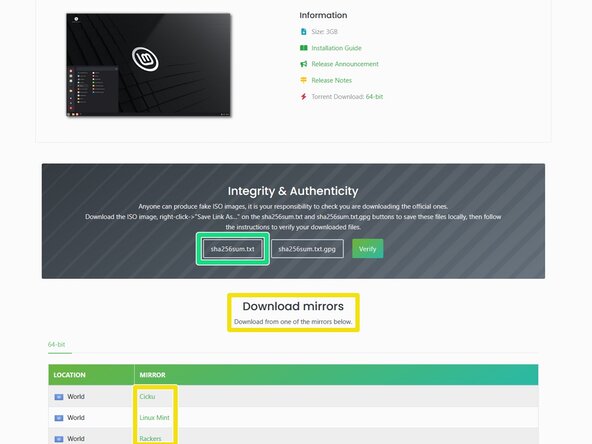
Linux Mint provides regional download mirrors. The file is identical for each. Pick the one that matches your region or preference.
-
Download the SHA‑256 checksum .txt. This will be used to verify the file after downloading.
-
-
-
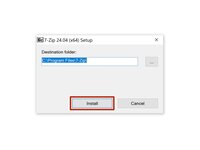
Navigate to 7‑Zip.org and download the compatible version of 7‑Zip.
-
Open the downloaded file and click Install.
-
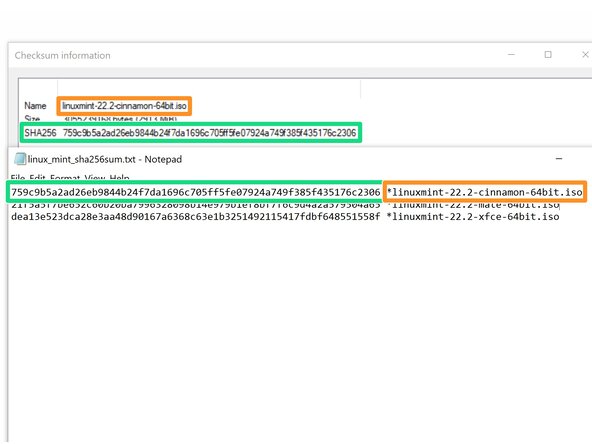
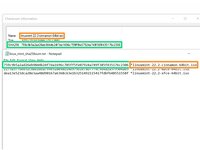
Right-click the .iso file downloaded in the last step and select 7‑Zip → CRC SHA → SHA-256 to calculate its checksum.
-
Validate the file's checksum against the reference on the Linux Mint download page.
-
Compare file names to find which checksum to compare.
-
Ensure the checksums match perfectly.
-
-
-
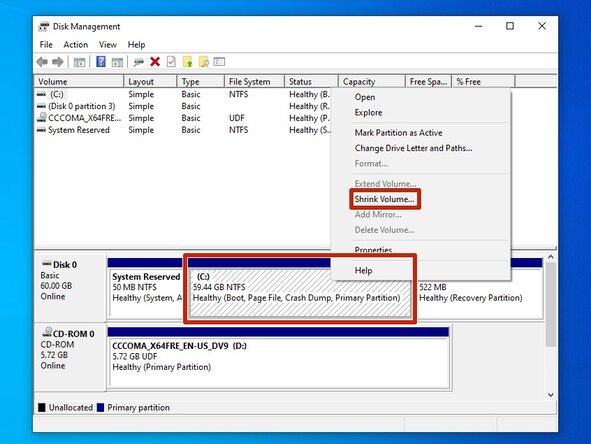
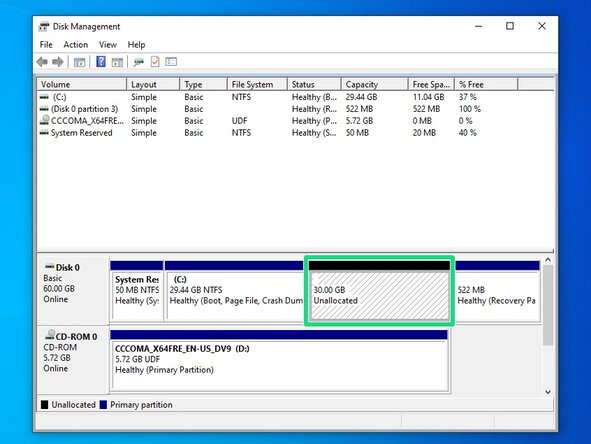
In Windows, open Disk Management. Right click the Start Menu and select it, or type "Create and format hard disk partitions" in the Windows search bar.
-
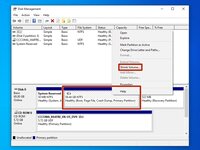
In Disk Management, right‑click the partition labeled C: and select Shrink Volume.
-
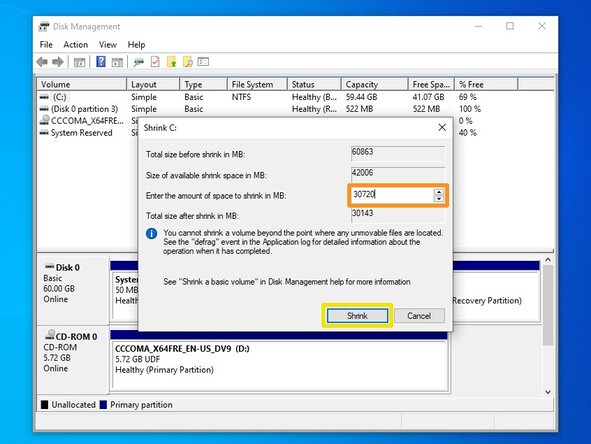
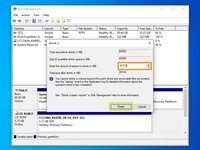
Enter how much you want to shrink the existing Windows installation in MB. To convert GB to MB, multiple by 1,024. For example, 30 GB = 30,720 MB.
-
Select Shrink and wait for it to process.
-
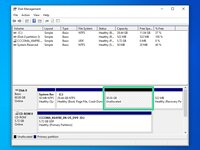
Once complete, a new Unallocated partition will appear on the drive. This is where you'll install Linux Mint.
-
-
-
-
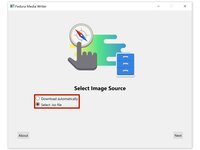
Download and install Fedora Media Writer. Click the file ending in .exe. The ones ending in .dmg are for MacOS.
-
Launch Fedora Media Writer.
-
Click Select .iso file.
-
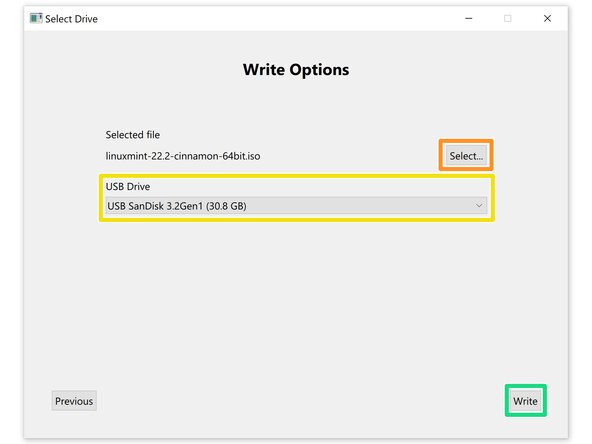
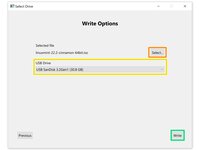
Select the .iso file by clicking the Select... button and clicking it in the File Explorer window that pops up.
-
Select the USB drive you want to be erased and have the Linux Mint installer written to.
-
Double-check everything is correct, then select Write. A window will pop up asking to confirm. Select Write to erase the chosen drive and write the Linux Mint installer to it.
-
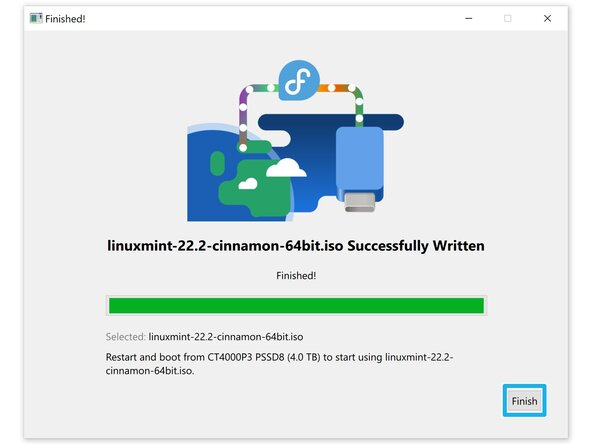
Wait for the installer to be written to the USB drive, then select Finish.
-
-
-
If you're using Windows 7, restart the computer and repeatedly press F12, F2, or the key specific to your device to access the boot options menu. Skip the remainder of this step.
-
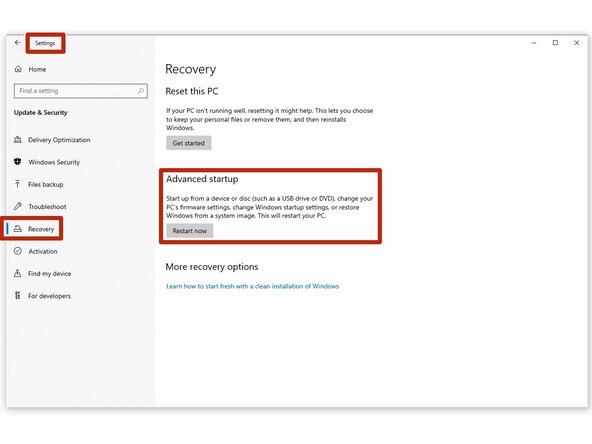
Open the Settings app and navigate to Update & Security → Recovery then select "Restart now" under Advanced startup.
-
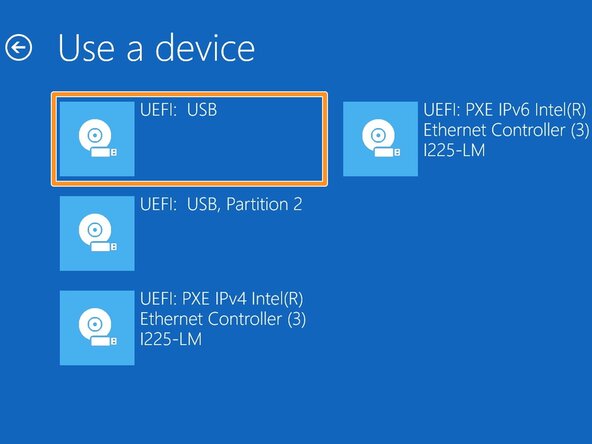
In Advanced startup navigate to Use a device → UEFI: USB. This will boot the computer from the flash drive.
-
-
-
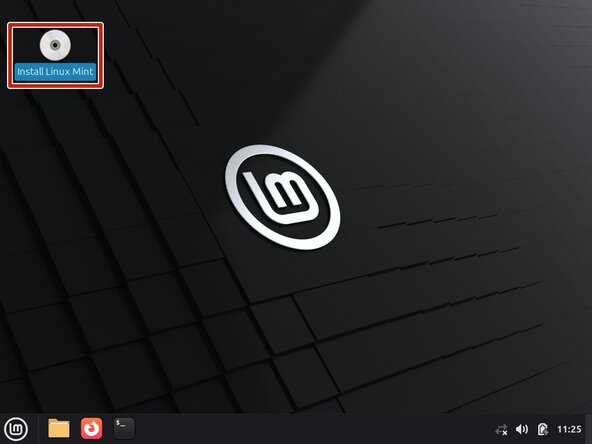
Select Install Linux Mint to begin the installation.
-
Select the language then click Continue.
-
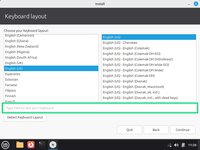
Select the keyboard layout that matches the computer. It should select it automatically, but use the test field to verify the keys you press input correctly. Click Continue once verified.
-
-
-
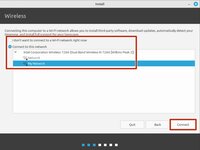
Connect the computer to a Wi-Fi network or wired connection to get it online. When using a wired connection, this menu may be automatically skipped.
-
Check Install multimedia codecs, then click Continue.
-
-
-
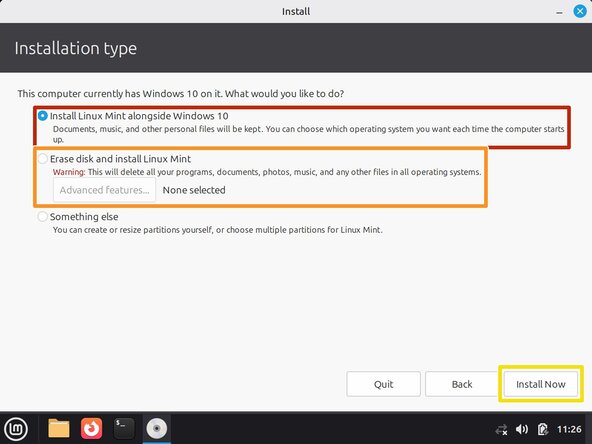
If you shrank the Windows partition in this step, select the Install Linux Mint alongside Windows option.
-
If you didn't shrink Windows and want to wipe the drive entirely, select Erase disk and install Linux Mint.
-
Click Install Now.
-
If prompted, review the changes and click Continue.
-
-
-
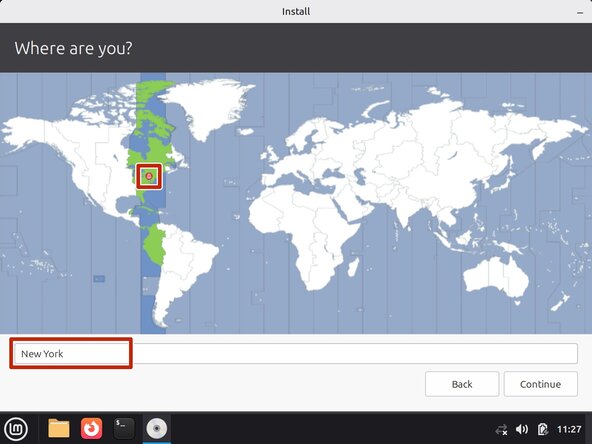
Select your location/time zone using the interactive map or text field beneath it.
-
Enter your name, computer's name, username, and password. Also select whether to require a password to log in or not (you'll still need it to install software).
-
For additional security, check the Encrypt my home folder box.
-
-
-
Press Restart Now to restart the computer and exit the "Live" installer.
-
Remove the USB drive once prompted, then press Enter to continue.
-
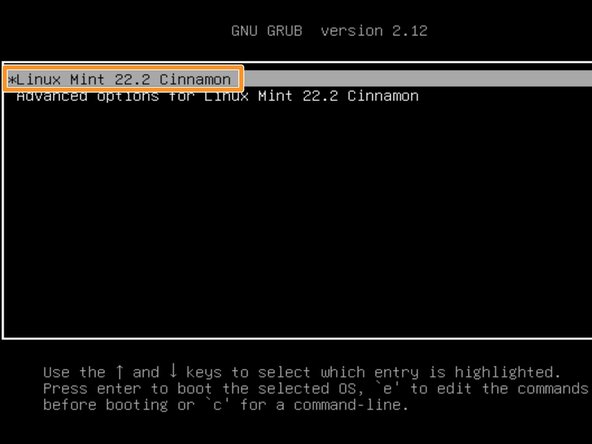
Use the arrow keys to select Linux Mint from the GRUB menu and press Enter.
-
Wait for the computer to boot.
-
-
-
Follow the on-screen prompts to get started with the new operating system.
-
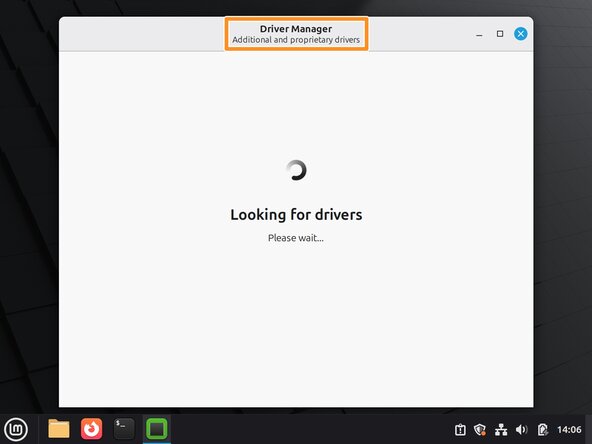
Use the Driver Manager program to find any additional drivers you may need for your hardware to work well.
-
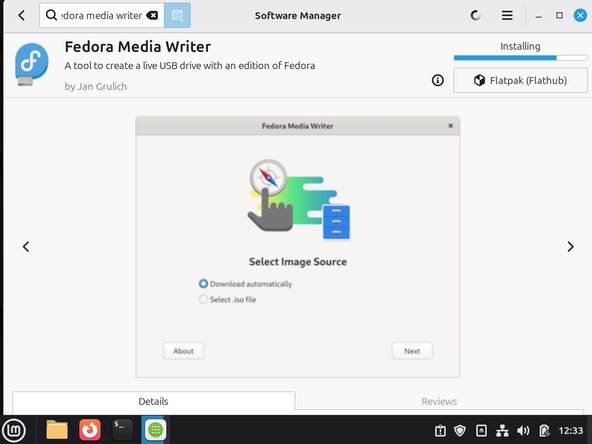
Restore the USB drive used for the installer back to normal with Fedora Media Writer for Linux (available from the Software Manager app).
-


Congratulations! You've successfully installed Linux Mint on a Windows PC.
Didn't go as planned? Try asking our Linux Answers Community for help.
crwdns2935221:0crwdne2935221:0
crwdns2935227:0crwdne2935227:0

crwdns2947412:02crwdne2947412:0
Ich finde diese Anleitung sehr frustrierend weil ich nicht weiter komme als: link nicht vorhanden!
Johannes - crwdns2934203:0crwdne2934203:0 crwdns2950251:0crwdne2950251:0
@johannes75162 ich habe alle Links nochmals probiert. Bei mir gehen alle. Welcher funktioniert denn nicht? Ich habe Mint auf einem sehr alten Asus- Laptop damit problemlos installiert.