crwdns2933423:0crwdne2933423:0

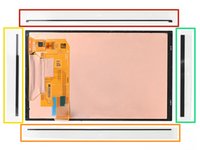
crwdns2942213:0crwdne2942213:0

  1. crwdns2935201:0crwdne2935201:0 crwdns2935203:0crwdne2935203:0

    : crwdns2935265:01crwdnd2935265:01crwdnd2935265:03crwdne2935265:0 : crwdns2935265:01crwdnd2935265:02crwdnd2935265:03crwdne2935265:0 : crwdns2935265:01crwdnd2935265:03crwdnd2935265:03crwdne2935265:0
    crwdns2935267:0crwdne2935267:0
    Microfiber Cleaning Cloths
    $3.99
    • If you're installing a new screen, skip the next two steps. Otherwise, follow the next two steps to clean and reuse your existing screen.

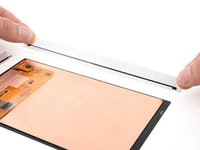
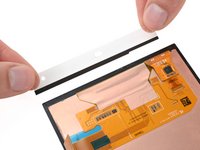
    • Use tweezers or the flat end of a spudger to peel up and remove large pieces of old adhesive from the screen.

    • Apply one or two drops of highly-concentrated isopropyl alcohol (over 90%) to any residual adhesive.

    • Only apply one or two drops at a time, and don't spill any on the screen panel itself to avoid damaging it.

    • Use a lint-free or microfiber cloth to wipe the perimeter of the screen clean.

  2. crwdns2935201:0crwdne2935201:0 crwdns2935203:0crwdne2935203:0

    : crwdns2935265:02crwdnd2935265:01crwdnd2935265:03crwdne2935265:0 : crwdns2935265:02crwdnd2935265:02crwdnd2935265:03crwdne2935265:0 : crwdns2935265:02crwdnd2935265:03crwdnd2935265:03crwdne2935265:0
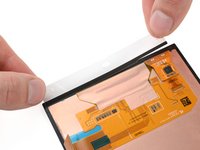
    • Repeat the previous step to clean the perimeter of the screen recess in the frame.

  3. crwdns2935201:0crwdne2935201:0 crwdns2935203:0crwdne2935203:0

    : crwdns2935265:03crwdnd2935265:01crwdnd2935265:03crwdne2935265:0 : crwdns2935265:03crwdnd2935265:02crwdnd2935265:03crwdne2935265:0 : crwdns2935265:03crwdnd2935265:03crwdnd2935265:03crwdne2935265:0
    • Each adhesive strip has a flexible liner on the back, and a stiff liner with hole cutouts on the front. As you orient your adhesives, make sure the stiff liners with holes face upward.

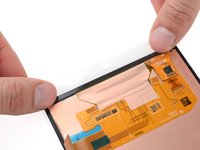
    • Before applying your new adhesives, lay them out over your screen to find their proper orientation:

    • The long piece with curved ends is for the top edge.

    • The other long piece is for the bottom edge.

    • The short piece with a notch cutout is for the edge with the screen cable. The notch should be closest to the top edge.

    • The other short piece is for the edge opposite the screen cable.

  4. crwdns2935201:0crwdne2935201:0 crwdns2935203:0crwdne2935203:0

    : crwdns2935265:04crwdnd2935265:01crwdnd2935265:01crwdne2935265:0
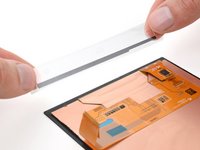
    • Peel the larger flexible adhesive liner from the back of an adhesive strip.

  5. crwdns2935201:0crwdne2935201:0 crwdns2935203:0crwdne2935203:0

    : crwdns2935265:05crwdnd2935265:01crwdnd2935265:03crwdne2935265:0 : crwdns2935265:05crwdnd2935265:02crwdnd2935265:03crwdne2935265:0 : crwdns2935265:05crwdnd2935265:03crwdnd2935265:03crwdne2935265:0
    • Note that the long strips of adhesive take up the entire length of the screen, and the short strips fit in-between the edges of the long strips.

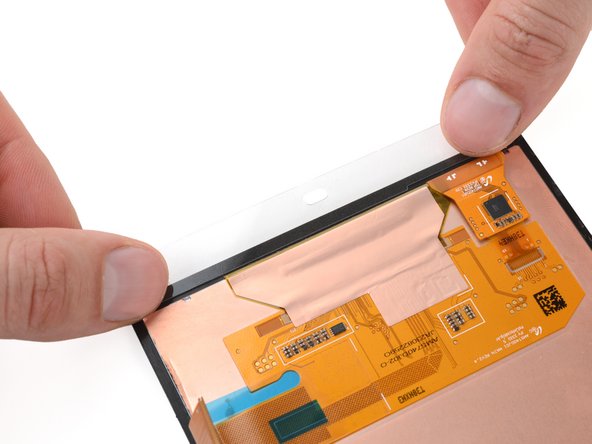
    • Align and place the adhesive strip onto the edge of the screen, making sure it's flush with the outside edge and not overlapping the screen panel.

  6. crwdns2935201:0crwdne2935201:0 crwdns2935203:0crwdne2935203:0

    : crwdns2935265:06crwdnd2935265:01crwdnd2935265:01crwdne2935265:0
    • Repeat the previous two steps to apply the remaining adhesives.

  7. crwdns2935201:0crwdne2935201:0 crwdns2935203:0crwdne2935203:0

    : crwdns2935265:07crwdnd2935265:01crwdnd2935265:01crwdne2935265:0
    • Peel and remove the remaining liner from each of the four adhesive strips.

    • Be careful not to pull the adhesive off the screen. If this happens, press down on the adhesive liners to further secure the adhesives to the screen.

  8. crwdns2935201:0crwdne2935201:0 crwdns2935203:0crwdne2935203:0

    : crwdns2935265:08crwdnd2935265:01crwdnd2935265:03crwdne2935265:0 : crwdns2935265:08crwdnd2935265:02crwdnd2935265:03crwdne2935265:0 : crwdns2935265:08crwdnd2935265:03crwdnd2935265:03crwdne2935265:0
    • Make sure the small locking flap on the screen ZIF connector is flipped up before reconnecting the screen.

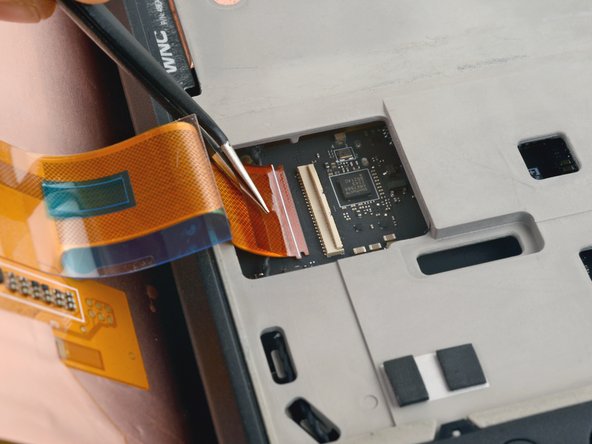
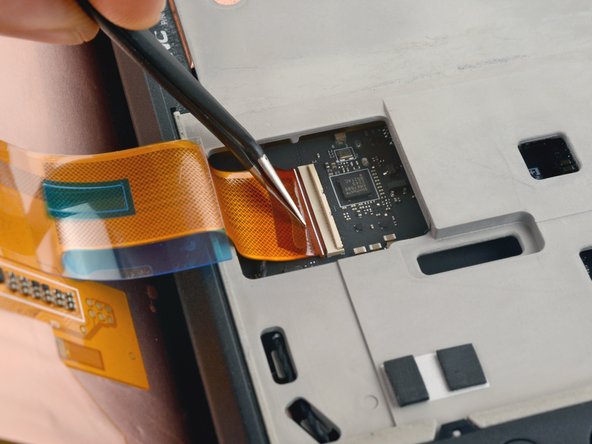
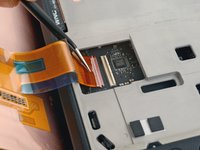
    • Hold the screen slightly below the bottom edge of the frame and align the screen cable with its socket on the motherboard.

    • Use angled tweezers to grip the pull tab on the neck of the screen cable.

    • Angle the cable so it's lined up and parallel to the socket, rotating the tips of the tweezers as necessary to get the right angle.

    • The end of the cable needs to be parallel to the motherboard—not angled downward.

    • Gently insert the connector into the socket until the white line meets the body of the socket.

    • If the connector doesn't smoothly enter the socket, realign it and try again.

    • Use your finger of the flat end of a spudger to flip the locking flap down to secure the cable.

  9. crwdns2935201:0crwdne2935201:0 crwdns2935203:0crwdne2935203:0

    : crwdns2935265:09crwdnd2935265:01crwdnd2935265:03crwdne2935265:0 : crwdns2935265:09crwdnd2935265:02crwdnd2935265:03crwdne2935265:0 : crwdns2935265:09crwdnd2935265:03crwdnd2935265:03crwdne2935265:0
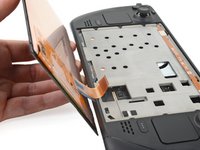
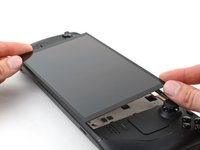
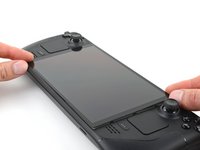
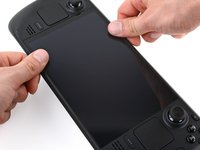
    • Align the screen over its recess in the frame.

    • Press the screen into place.

  10. crwdns2935201:0crwdne2935201:0 crwdns2935203:0crwdne2935203:0

    : crwdns2935265:010crwdnd2935265:01crwdnd2935265:02crwdne2935265:0 : crwdns2935265:010crwdnd2935265:02crwdnd2935265:02crwdne2935265:0
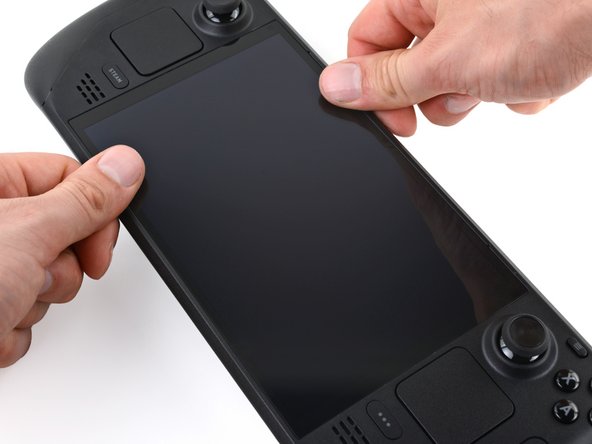
    • Firmly press along the perimeter of the screen to secure the adhesive to the frame.

    • Optionally, you may use a hair dryer or heat gun to lightly heat the screen to strengthen the adhesive bond.

crwdns2935217:0crwdne2935217:0

crwdns2935229:06crwdne2935229:0

Clay Eickemeyer

crwdns2935283:009/19/22crwdne2935283:0

86 043 crwdns2915208:0crwdne2915208:0

crwdns2935297:0455crwdne2935297:0

crwdns2915084:0crwdne2915084:0

Guide Team crwdns2935289:0Guide Teamcrwdne2935289:0

Staff

crwdns2931471:09crwdne2931471:0

crwdns2935297:013 263crwdne2935297:0

crwdns2947410:01crwdne2947410:0

I successfully swapped matte/glossy OLED model screens this way. First boot after swap had a frazzled screen. Hard reset fixed the problem instantly.

keyscameron - crwdns2934203:0crwdne2934203:0

crwdns2917038:0crwdne2917038:0

crwdns2936625:0crwdne2936625:0:

crwdns2936751:024crwdne2936751:0 4

crwdns2936753:07crwdne2936753:0 84

crwdns2936753:030crwdne2936753:0 318

crwdns2942667:0crwdne2942667:0 4,674