crwdns2915892:0crwdne2915892:0
If your photos appear blurry or the camera lens is visibly cracked or scratched, replacing the camera lens on your HTC Touch can restore photo clarity. This guide will show you how to safely remove and replace the rear camera lens using basic tools.
Warning: Make sure you are grounded whenever handling a circuit or logic board.
Before you begin this repair, make sure to power off your phone and disconnect the charger.
crwdns2942213:0crwdne2942213:0
-
-
Slide the back panel upward using the grip at the bottom until it releases.
-
Lift and remove the panel.
-
-
-
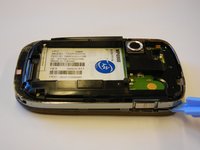
Use your fingers to grip the battery and remove it from its compartment.
-
-
-
Remove the 4 torx-head screws in the corners of the phone using the T5 Torx Screwdriver.
-
-
-
-
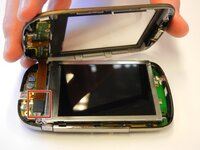
Use the plastic opening tool to remove the front panel from the phone.
-
Place a spudger or an opening tool under the edge of the press connector and pry straight up to disconnect it.
-
-
-
Unscrew the torx-head screws at the base of the LCD screen using the T5 Torx Screwdriver.
-
-
-
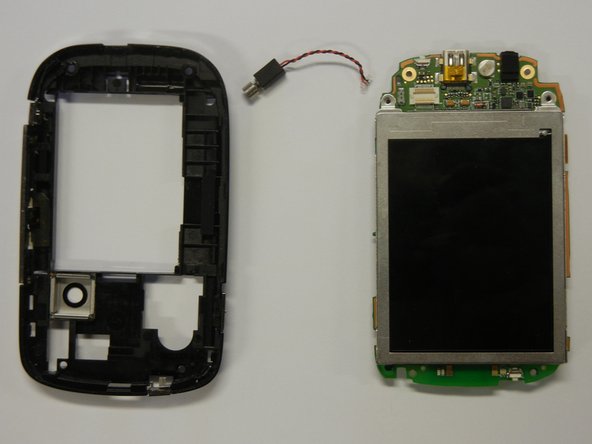
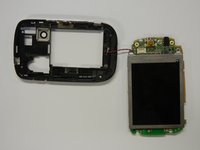
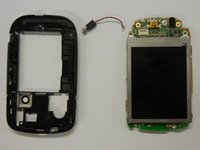
Seperate the motherboard from the black plastic casing.
-
Unplug the black and red wire from the motherboard.
-
Unplug the black and red wire from the black plastic casing.
-
-
-
Use a spudger to lift the black flap lock next to the orange ribbon cable and slide the cable from the socket.
-
Remove the LCD screen.
-
-
-
Place a spudger or an opening tool under the edge of the press connector and pry straight up to disconnect it.
-
Remove the camera lens from the motherboard using the plastic opening tool.
-


You've successfully replaced your HTC Touch's camera lens! Test your camera to ensure the new lens works properly and your images are clear. To reassemble your device, follow these instructions in reverse order.
Take your e-waste to an R2 or e-Stewards certified recycler.
You've successfully replaced your HTC Touch's camera lens! Test your camera to ensure the new lens works properly and your images are clear. To reassemble your device, follow these instructions in reverse order.
Take your e-waste to an R2 or e-Stewards certified recycler.
crwdns2935221:0crwdne2935221:0
crwdns2935229:02crwdne2935229:0
crwdns2915084:0crwdne2915084:0

Cal Poly, Team 15-12, Regan Spring 2011 crwdns2935289:0Cal Poly, Team 15-12, Regan Spring 2011crwdne2935289:0
CPSU-REGAN-S11S15G12
crwdns2931471:04crwdne2931471:0
crwdns2935297:010crwdne2935297:0