crwdns2915892:0crwdne2915892:0
This guide is to help you get into your device to replace the power and volume buttons. This is for replacing the actual component, not the outer plastic pieces.
crwdns2942213:0crwdne2942213:0
-
-
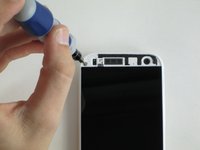
Insert the end of a paper clip into the holes on each side of the phone to eject the SIM card and Micro SD card.
-
Set the cardholders aside.
-
-
-
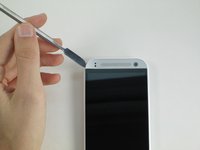
Heat up the top grey speaker plate with the iFixit iOpener for two minutes.
-
-
-
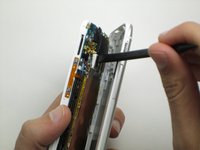
Use a metal spudger to pry up the left edge of the upper grey front plate.
-
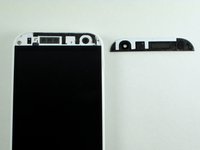
Use the narrow plastic pry tool to carefully separate the black ribbon antenna from the grey plate.
It’s not necessary to remove the grey plate all the way, just enough to get access to the screw on the left side for step 4.
-
-
-
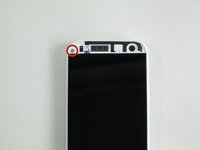
Remove the 2mm screw with a T5 torx screwdriver head from the iFixit tool kit.
-
-
-
-
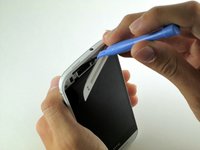
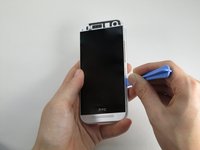
Use the plastic pry tool to pry around the edge of the phone.
-
Slowly pull up from the right side of the screen like opening a book.
-
Use the plastic spudger to peel the foam adhesive around the camera away from the back plate.
Only open the back enough to gain access to the foam adhesive around the camera. If you open too much before separating the camera, you will rip the ribbon connector apart & the camera will never work again. Thank you !!!
Is there anything else that can destroy the camera?
I was careful and did not think that I destroyed anything, also there is no damage visible. But the camera doesn’t work, I cannot even switch from front to main camera. Any idea or hopeless?
If the plastic power button falls out of the case, ensure that it is replaced the same way round. The small circular part which actually operates the switch is slightly offset & nearer the middle of the phone.
Once the back is pried enough to reach inside, you can use the plastic spudger tool to reach in and pry the sides of the square camera body away from the back of the case. You are trying to protect the camera body, and the ribbon cable that connects it to the main board, by carefully separating the adhesive around the sides that fasten the camera body to the hole in the back cover of the phone.
There are several plastic clips around the perimeter of the phone. I found it easiest to unclip the one right blow the volume button first, then work down the right side of the phone (two more on the side, one at the corner) then work up the right side (one at the upper right corner) then along the top and bottom.
To help remove camera adhesive, I found heat useful.
Hi all ,I didn’t apply enough heat removing the grey front panel and the ribbon anntena is ripped.
I should have left it double time as its cold here .Is there a replacement for sale somewhere ?
Is this easy to replace is my next question.
-
-
-
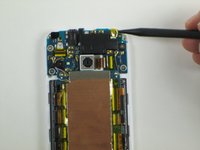
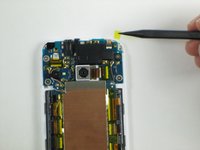
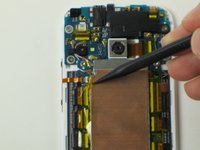
Use the pointed end of a spudger to peel the yellow tape off of the power button connector.
-
-
-
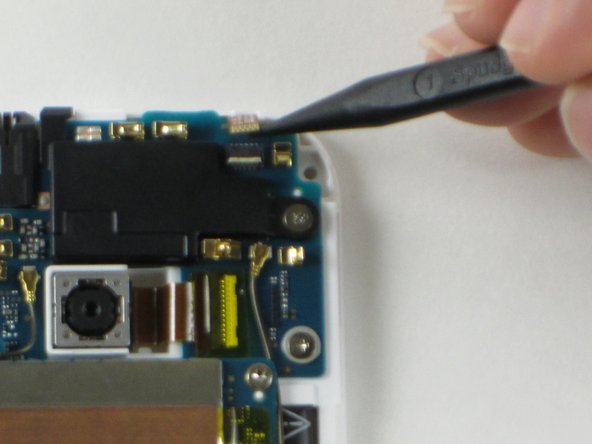
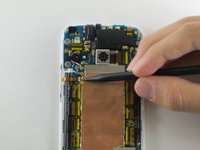
Using the pointed end of the spudger, pop up the small white tab on the power button connector.
-
Gently pull the ribbon cable out of the connector.
-
-
-
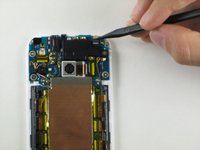
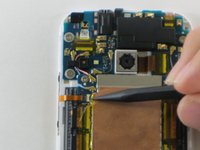
Use a plastic opening tool to pry under the green mini circuit board to peel off the power button.
-
-
-
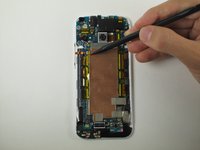
Use the pointed end of a spudger to peel off the yellow tape from the volume button connector.
-
-
-
Use the pointed end of the spudger to pop up the white tab to the left.
-
-
-
Gently pull the ribbon cable for the volume buttons out of the connector.
-
-
-
Use a plastic opening tool to peel off the volume buttons.
-


To reassemble your device, follow these instructions in reverse order.
To reassemble your device, follow these instructions in reverse order.
crwdns2935221:0crwdne2935221:0
crwdns2935229:06crwdne2935229:0
crwdns2915084:0crwdne2915084:0

Cal Poly, Team 4-48, Amido Fall 2014 crwdns2935289:0Cal Poly, Team 4-48, Amido Fall 2014crwdne2935289:0
CPSU-AMIDO-F14S4G48
crwdns2931471:05crwdne2931471:0
crwdns2935297:017crwdne2935297:0
crwdns2947410:01crwdne2947410:0
HTC One Mini (not Mini 2) doesn't have the zif connector for its power and volume flex cables but directly connected to board. can you suggest an easy way to replace them? I have found the replacement parts but don't know if I could do it in home or not. thanks