crwdns2915892:0crwdne2915892:0
Replace RAM
- If you are experiencing a sudden performance decrease in your device with additional crashes in your system device or crashes during set-up and lastly a blue screen of death this indicates you need to replace your RAM.
- Follow the steps on this guide to help replace your RAM without any struggles. Before, you initiate these steps it is important you save any prior data if possible.
- Make sure you power off your device completely and disconnect any external power source.
- Gather your tools and new RAM to start making the changes instructed below.
crwdns2942213:0crwdne2942213:0
-
-
Remove battery by pushing slide tabs to the left.
-
Remove residual power by holding the power button down for 5 seconds.
-
-
-
Use a Phillips #1 screwdriver to remove the two 12.5 mm screws, four 5.5 mm screws, and six 7.25 mm screws.
-
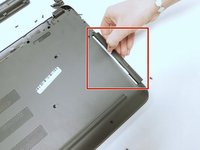
Remove the two corner panels along the ends of the battery slot and this will expose another set of screws (1 under each panel).
-
Remove the remaining six 7.2 mm Phillips #1 screws hidden in the battery area and underneath the covers.
-
-
-
-
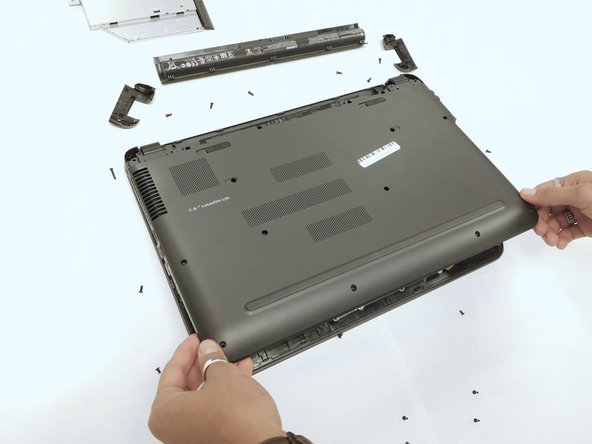
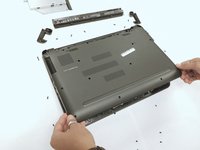
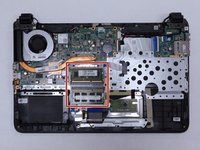
Remove the optical drive by pulling on the plastic cover panel.
-
With a prying tool, gently pry the back panel off.
-
-
-
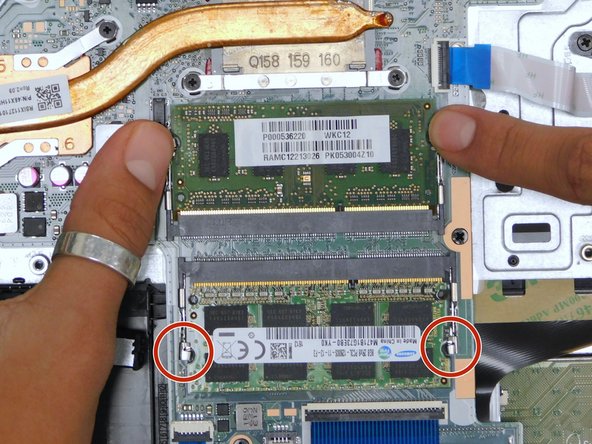
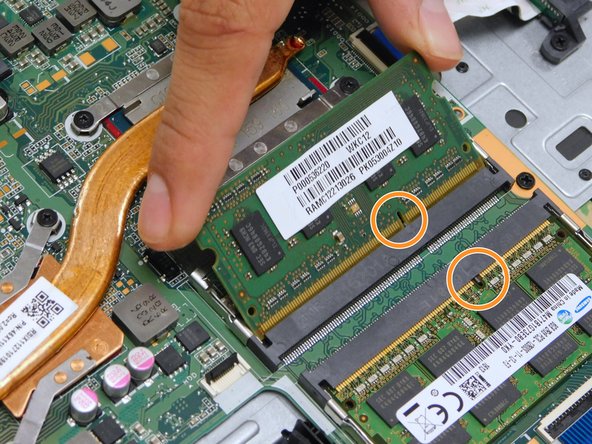
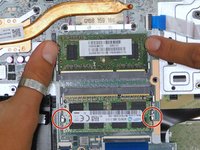
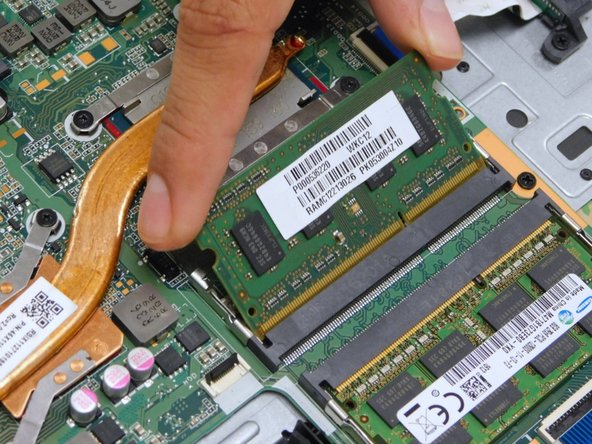
You will need to spread the two silver clips that hold the RAM down on its slot.
-
Pull the RAM away in the same orientation.
-
Keep in mind the notch on the RAM that connects on to the DIMM slot.
-
-
-
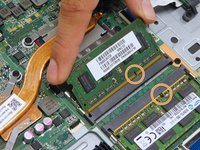
Match the notch on new/replacement RAM and gently install it in the same angled orientation.
-
Once the new RAM is installed, gently press and lay the RAM down on its side until it reaches the clips on the side notches and locks in.
If you could post another guide on how to clean the fans and heatsink and rethemopasting. I will look at it give you 30 more points. Thanks
-


To reassemble your device, follow these instructions in reverse order.
To reassemble your device, follow these instructions in reverse order.
crwdns2935221:0crwdne2935221:0
crwdns2935229:02crwdne2935229:0

crwdns2915084:0crwdne2915084:0

Gateway, Team 1-2, Pee Fall 2022 crwdns2935289:0Gateway, Team 1-2, Pee Fall 2022crwdne2935289:0
GCC-PEE-F22S1G2
crwdns2931471:04crwdne2931471:0
crwdns2935297:05crwdne2935297:0
crwdns2947412:02crwdne2947412:0
Awesome job. this is a nice guide
If you could post another guide on how to clean the fans and heatsink and rethemopasting. I will look at it give you 30 more points. Thanks