crwdns2915892:0crwdne2915892:0
If your HP Pavilion x360 Convertible 14-dw1025nr is not displaying graphics or is not distributing audio, the laptop's motherboard may be damaged. Use this guide to replace it.
The motherboard is the backbone of a laptop and controls multiple parts within the laptop.
Replacing the motherboard of a laptop is not a common procedure. Most replacements within a laptop are for components that are attached to the motherboard. The motherboard should only need to be replaced in extreme situations where a separate component attached to the motherboard cannot be replaced.
Replacing the motherboard is not a difficult task, but it does require a lot of steps and there will be many small pieces to keep track of. There are various screws and a few loose plastic parts that will come out when exposing the motherboard. This replacement will not require any difficult tasks such as soldering or rewiring.
crwdns2942213:0crwdne2942213:0
-
-
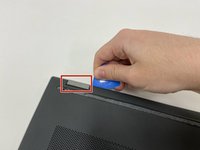
Turn off the device and set it upside down. Orient the hinges away from you.
-
Wedge the opening pick under the grip. Lift the end of the grip.
-
Pull the grip off all the way. Repeat for the second grip.
-
-
-
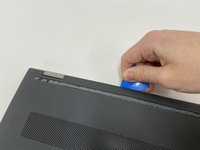
Use a Phillips #0 screwdriver to remove the 3 mm screw from the center bottom.
-
Use a Phillips #1 screwdriver to remove the 6 mm screw from all four corners of the bottom cover.
-
-
-
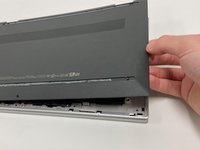
Use the opening pick to separate the back panel from the device.
-
Begin near the hinge and carefully follow the perimeter until you have taken the pick around all four sides.
-
Lift the panel off.
-
-
-
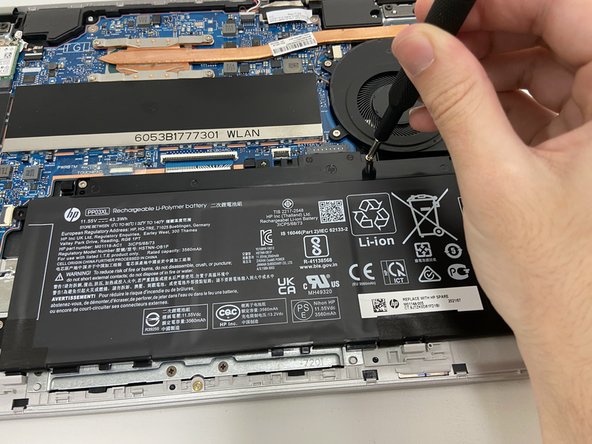
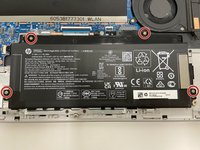
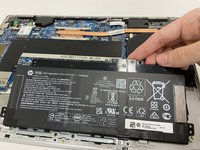
Use a Phillips #1 screwdriver to remove all four of the 4 mm screws that secure each corner of the battery.
-
-
-
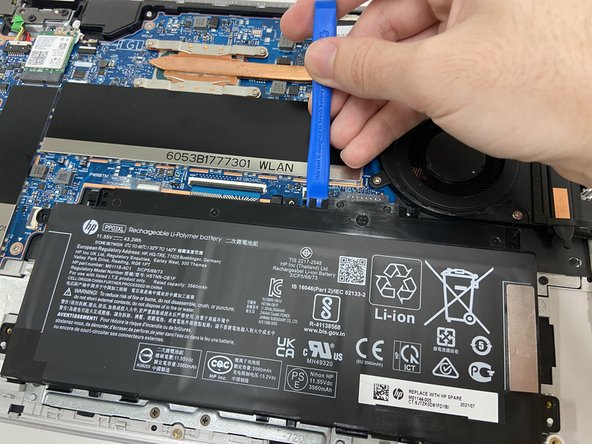
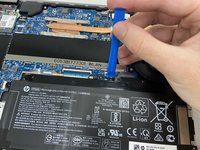
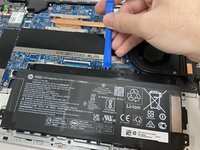
Use the opening tool near the connector to gently apply pressure and lift the battery away from the device.
-
Once loose, lift the battery from the connector side to separate it from the device.
-
-
-
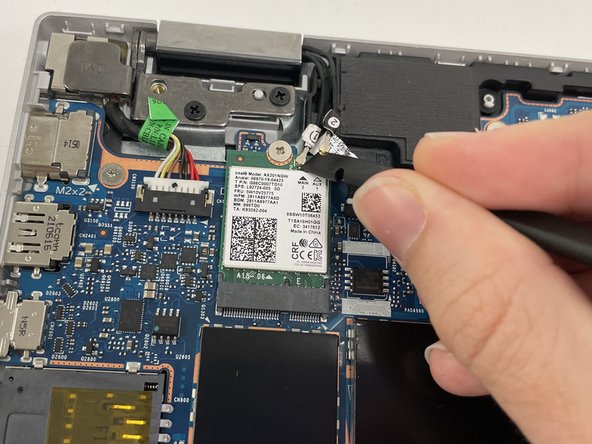
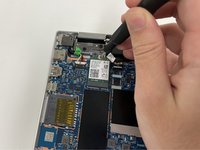
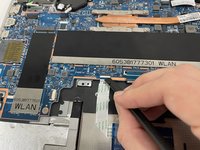
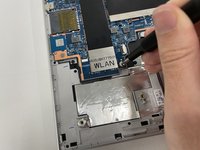
Disconnect connectors 1 and 2 of the wireless card using the spudger.
-
-
-
-
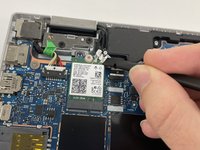
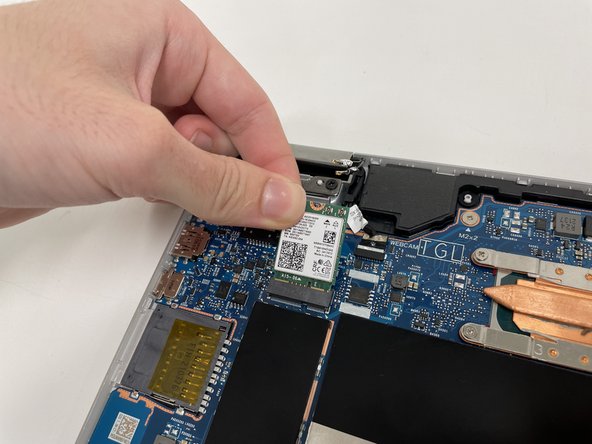
Use PH1 to remove the 2.5mm holding screw.
-
Lift the card up and out.
-
-
-
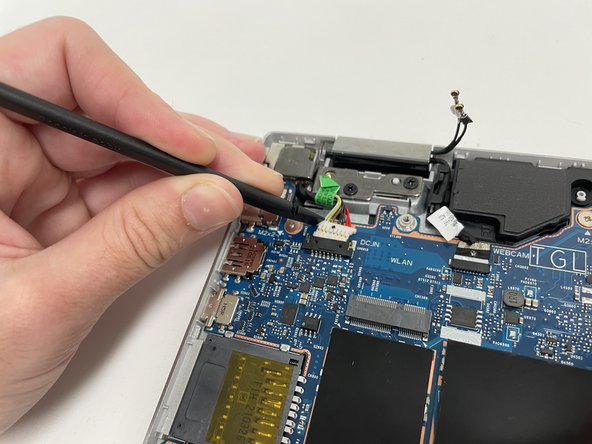
Use the spudger to disconnect the power connector.
-
-
-
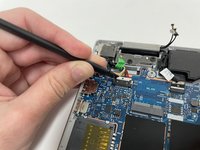
Use the pointy end of the spudger to disconnect the webcam.
-
-
crwdns2935267:0crwdne2935267:0Tweezers$3.99
-
Remove the sticker covering the touch sensor connector using the angled tweezers.
-
Firmly pinch the plastic loop and pull straight up to disconnect the touch sensor.
-
-
-
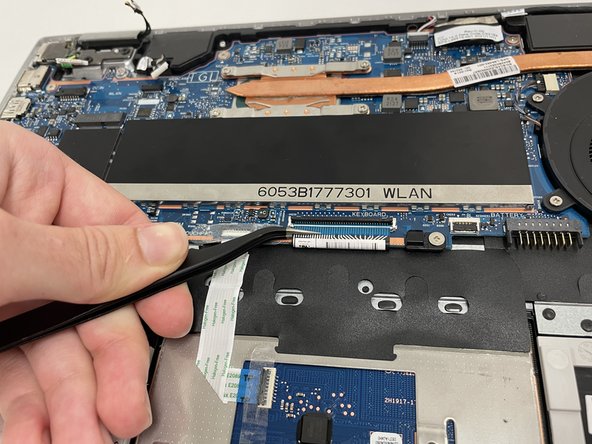
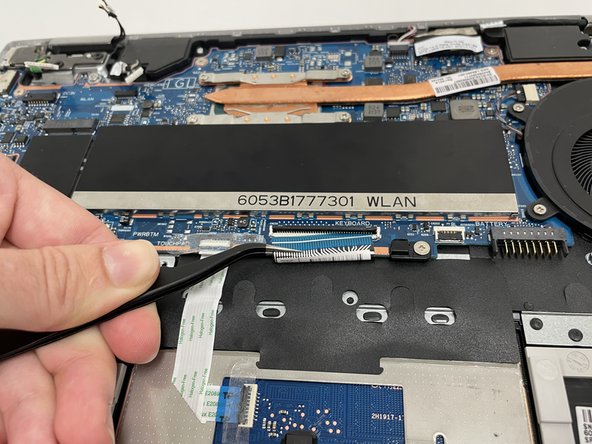
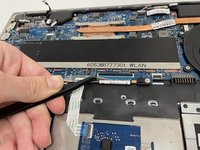
Use the spudger to disconnect the cable to the left of the touch sensor connector.
-
-
-
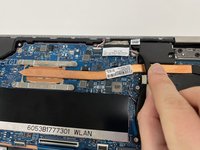
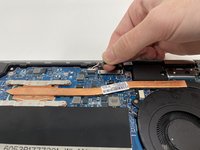
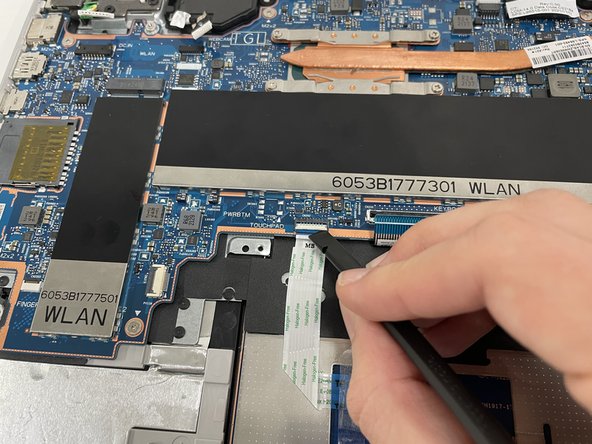
Use the spudger to lift the black flap of the keyboard connector.
-
Use the angled tweezers to carefully grip and pull out the ribbon cable.
-
-
-
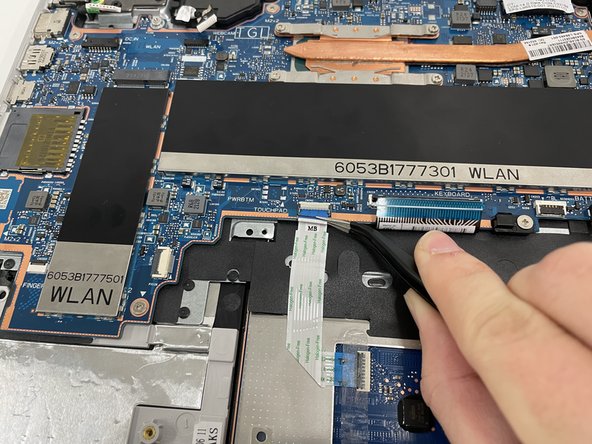
Use the angled tweezers to remove the clear sticker covering the trackpad connector.
-
Use the spudger to lift the white flap of the connector.
-
Use the angled tweezers to pull out the ribbon cable.
-
-
-
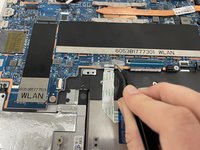
Use the spudger to disconnect the fan cable.
-
-
-
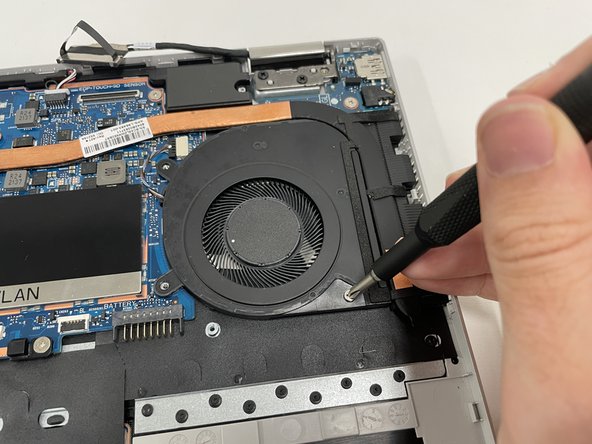
Use PH1 to remove the 3 4mm screws holding the fan.
-
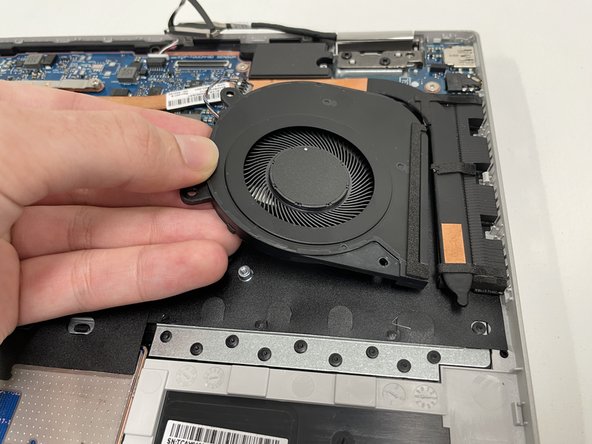
Lift the fan up and away from the heat pipe.
-
-
-
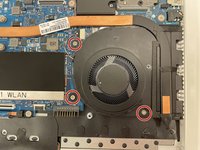
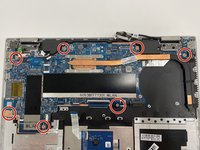
Use PH1 to remove the 7 2.5mm screws holding down the motherboard
-
-
-
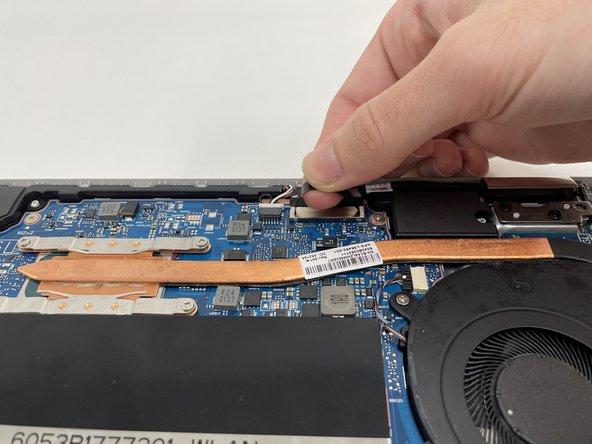
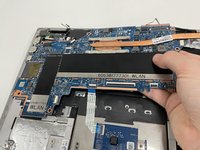
Slightly lift the heat pipe with one hand.
-
Using your other hand, lift the small part of the motherboard up and away from the laptop frame.
-
-
-
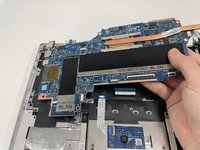
Lift the right side of the large portion of the motherboard up and away from the frame of the laptop.
-


To reassemble your device, follow these instructions in reverse order.

crwdns2935287:0crwdne2935287:0

Western Carolina University, Team 1-3, Virtue Fall 2022 crwdns2935289:0Western Carolina University, Team 1-3, Virtue Fall 2022crwdne2935289:0
WCU-VIRTUE-F22S1G3
crwdns2931471:04crwdne2931471:0
crwdns2935297:05crwdne2935297:0