crwdns2915892:0crwdne2915892:0
This is for if you need to get into the guts of the HP Pavilion dv6700. Be sure to have the anti-static strap on, as you will be coming into contact with circuitry and could permanently damage the pieces with static electricity.
crwdns2942213:0crwdne2942213:0
-
-
Flip over the device so that the bottom is facing you.
-
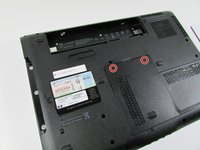
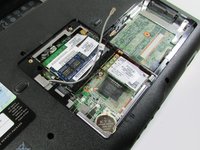
Locate the battery on the bottom of your laptop.
-
-
-
Slide the tab all the way over to the left until battery pops out. Lift out and remove battery.
-
-
-
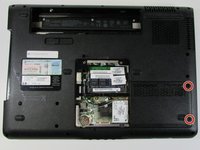
Remove the RAM port cover by unscrewing the two screws.
-
-
-
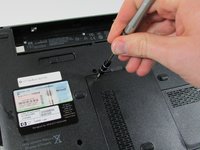
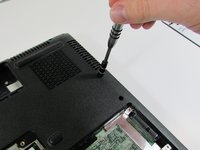
Use a Phillips #00 screwdriver to remove the two screws securing Hard Disk Drive (HDD) cover.
-
-
-
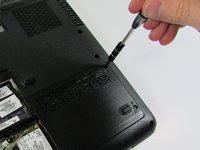
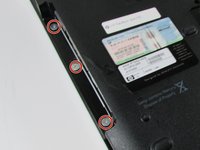
Use a Phillips #00 screwdriver to remove the 25 screws securing the bottom of the computer.
-
-
-
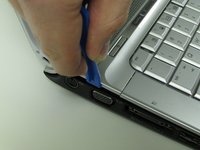
Using the Phillips #0 screwdriver remove the 2 screws.
-
-
-
Flip over HP Pavilion dv6700 so that the top is facing you.
-
Open up HP Pavilion dv6700.
-
-
-
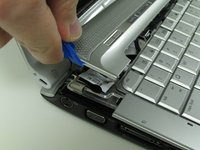
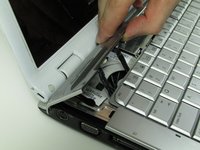
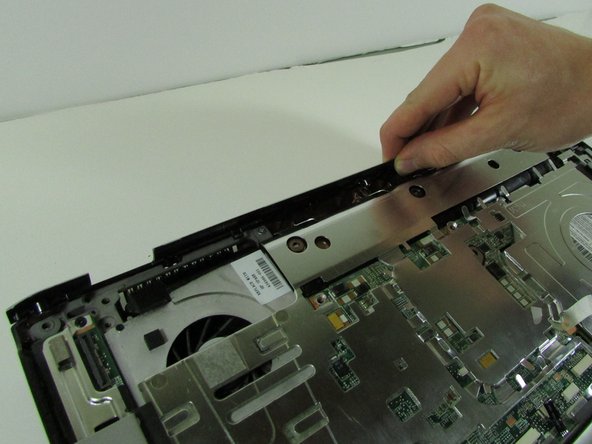
Use an iFixit opening tool to pry open the plastic bar above the keyboard.
-
-
-
-
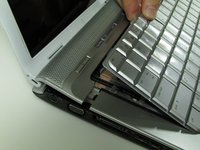
Pull out and up on keyboard to remove it.
-
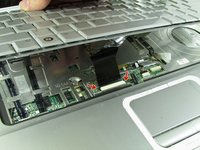
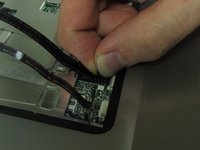
Slide the two black locks on the side of the keyboard cable connection port up to release the cable.
-
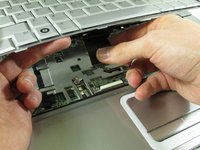
Grip the ribbon cable near the connection point and gently but firmly pull it out.
-
-
-
Flip over the plastic bar.
-
Detach the display connector.
-
-
-
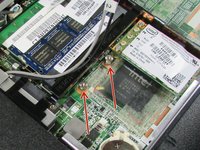
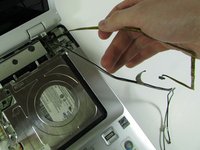
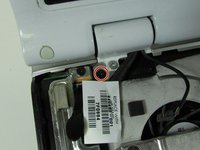
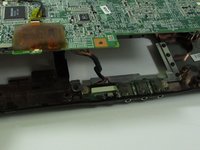
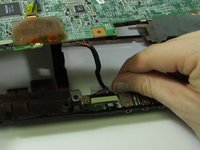
Pull up on the WiFi wires and out from under the metal tabs.
-
-
-
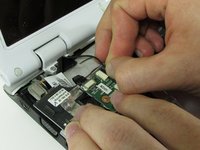
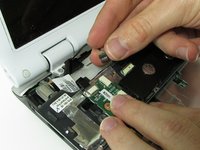
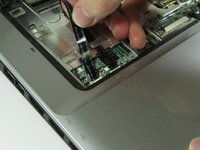
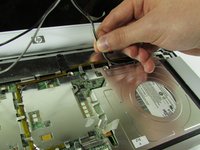
Disconnect the connector from the port.
-
Remove the wire from under the metal tabs.
-
Let wire hang loose after removing under the tabs.
-
-
-
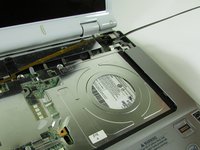
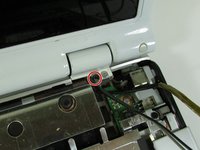
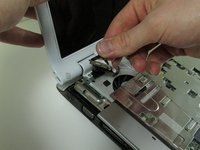
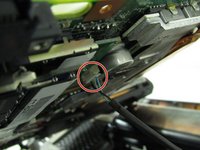
Use a Phillips #00 screwdriver to remove the black screw located in the top right corner near the display.
-
-
-
Pull upward on the screen connector tab.
-
-
-
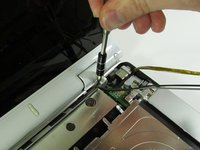
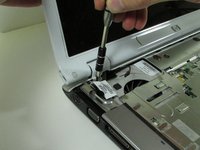
Use a Phillips #00 screwdriver to remove the black screw securing the screen.
-
Lift the screen off and set it aside.
-
-
-
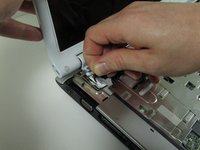
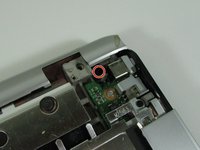
Unscrew the black screw in the top right corner using the Phillips #00 screwdriver.
-
Pull up on the top piece and remove it.
-
-
-
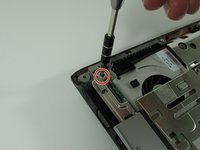
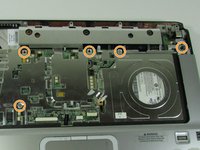
Remove the screw in top left corner using the Phillips #00 screwdriver
-
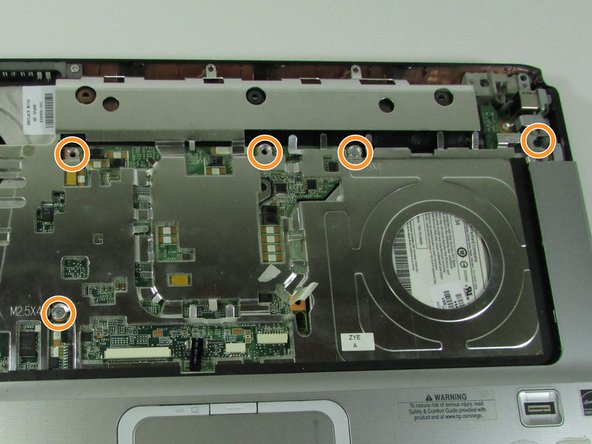
Remove the five screws that are located on the motherboard cover.
-
Pull up on the cover to remove it.
-
-
-
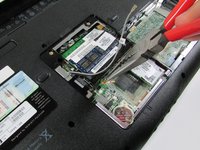
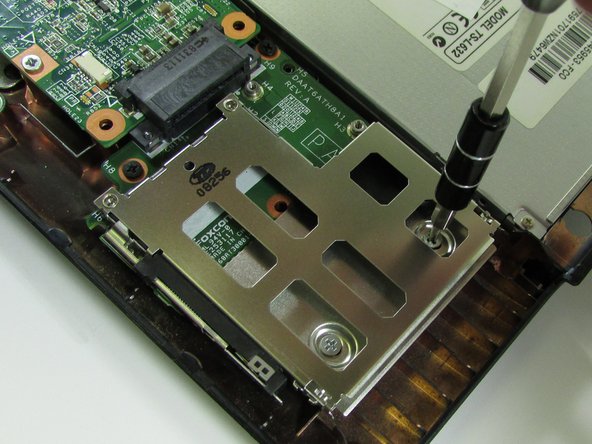
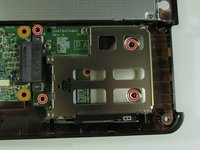
Remove the four screws from the ExpressCard component using the Phillips #00 screwdriver.
-
-
-
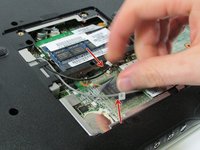
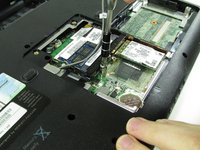
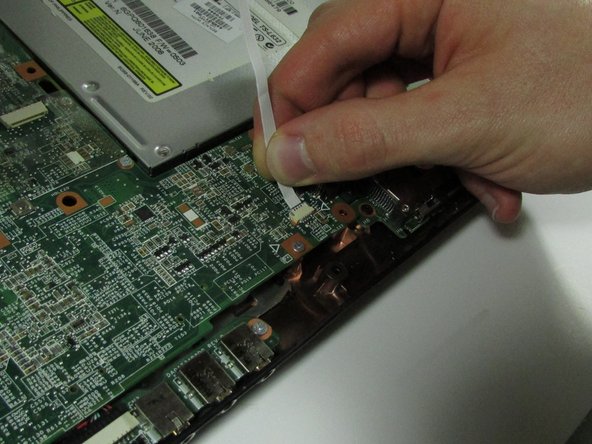
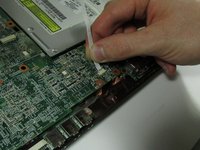
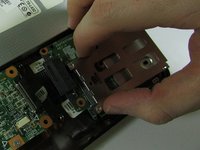
Remove ExpressCard component by sliding it out.
-
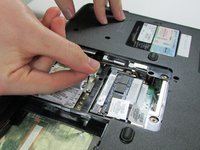
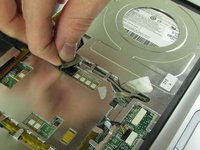
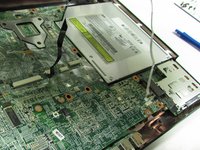
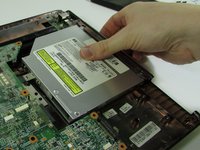
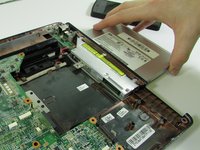
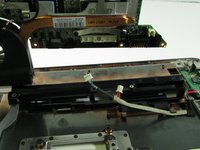
Remove Optical Drive by sliding it out.
-
-
-
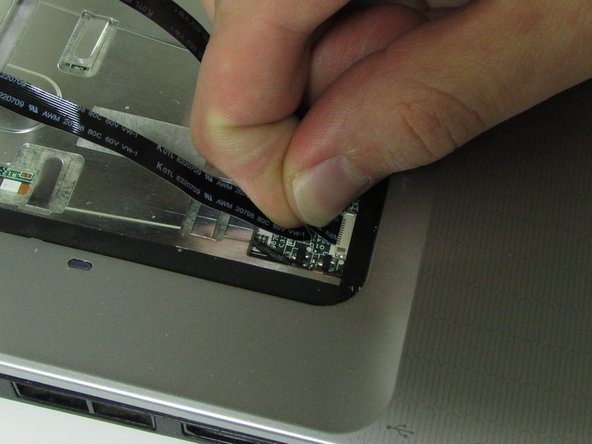
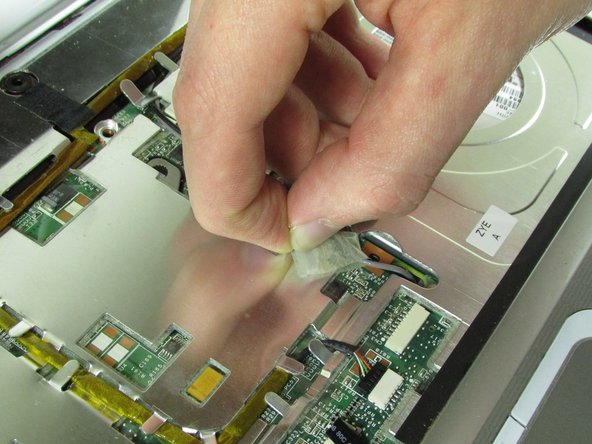
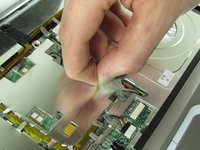
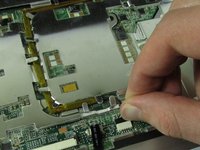
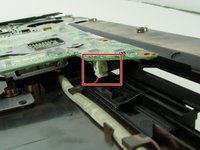
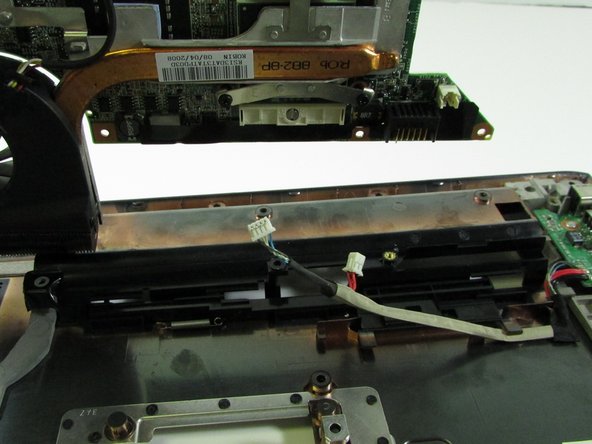
Detach connector from the motherboard.
-
-
-
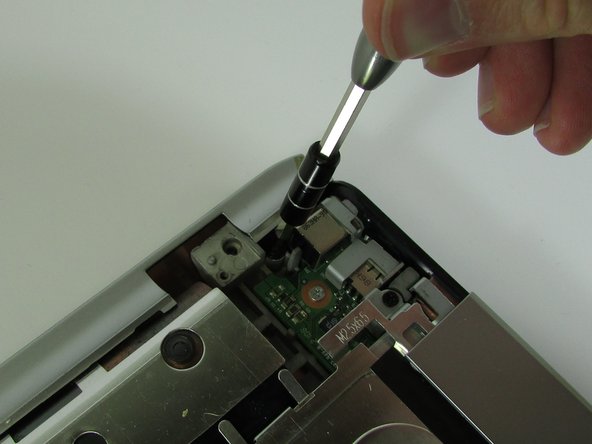
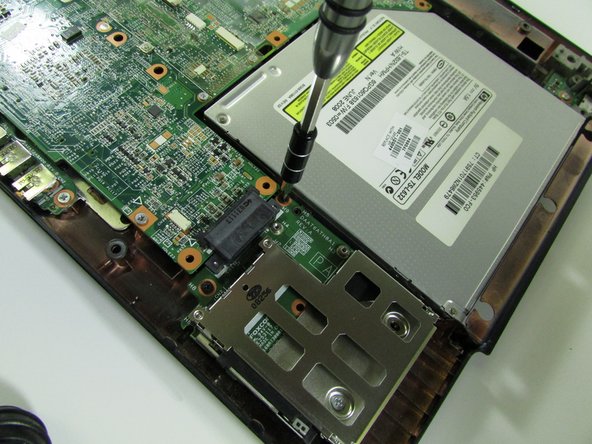
Using the Phillips #00 screwdriver, remove the one screw near where the ExpressCard component was.
-
-
-
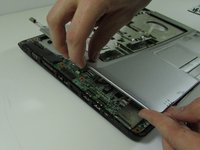
Lift up motherboard.
-
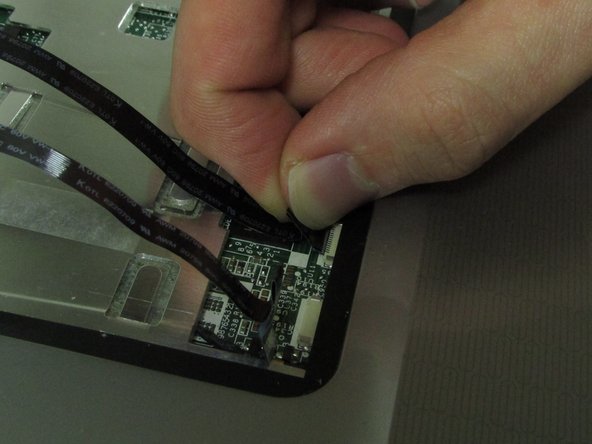
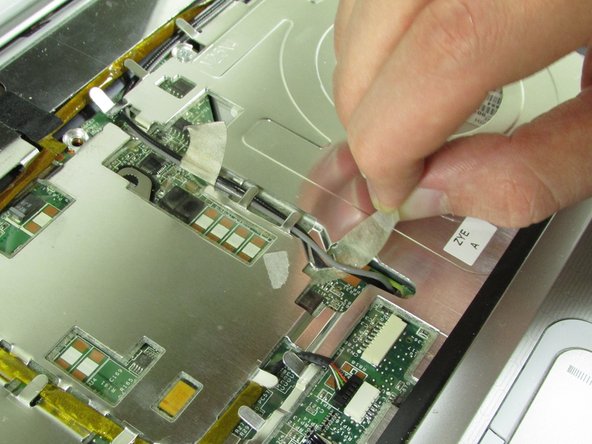
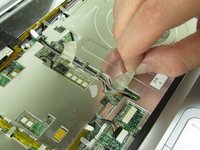
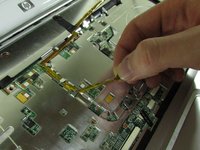
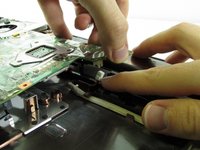
Detach the motherboard connector at the front under the motherboard.
-
-
-
Lift up and out the motherboard.
-
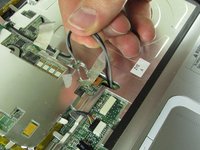
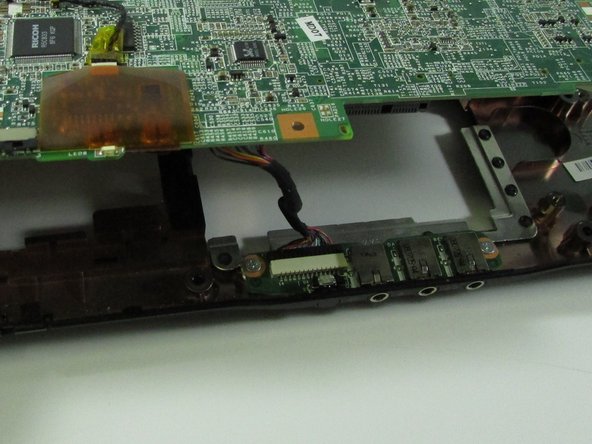
Detach the connector under the motherboard.
-
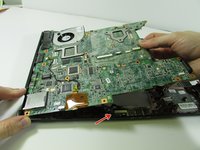
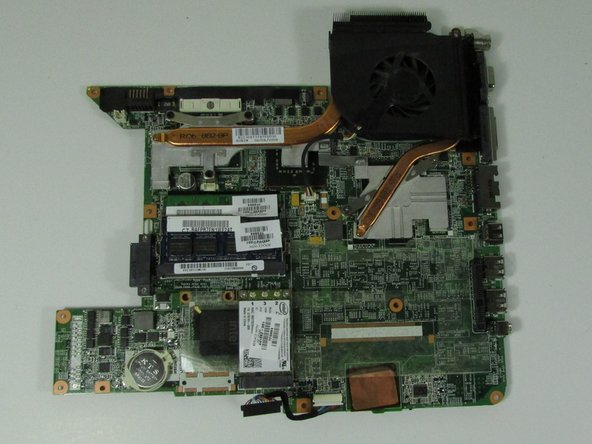
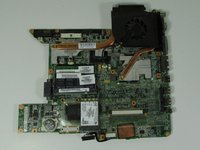
Remove the motherboard.
come si fà a pulire o stappare le canaline in rame di raffreddamento del processore?
To clean, use cotton or cotton swabs with isopropyl alcohol. Be sure to let it fully dry before putting back together.
Google translate English to Italian: Per pulire, utilizzare cotton o cotton fioc con alcol isopropilico. Assicurati di lasciarlo asciugare completamente prima di rimontarlo.
Sir mother board of a dv 6000 and dv 6700 the same?
I do not believe that they are.
-


To reassemble your device, follow these instructions in reverse order.
To reassemble your device, follow these instructions in reverse order.
crwdns2935221:0crwdne2935221:0
crwdns2935229:08crwdne2935229:0
crwdns2915084:0crwdne2915084:0

University of Illinois Urbana-Champaign, Team 1-118, Wolske Fall 2015 crwdns2935289:0University of Illinois Urbana-Champaign, Team 1-118, Wolske Fall 2015crwdne2935289:0
UICU-WOLSKE-F15S1G118
crwdns2934841:01crwdne2934841:0
crwdns2935297:06crwdne2935297:0
crwdns2947412:02crwdne2947412:0
Brilliant presentation.
Great Help
Thanks
Thank you for all your help . Very decent of you.
Spot on guide and detail.
Ian, Poynton< Cheshire
UK.