crwdns2915892:0crwdne2915892:0
PITA WARNING: THIS LAPTOP IS A MAJOR PITA TO WORK ON DUE TO THE AMOUNT OF DISASSEMBLY REQUIRED TO ACCESS THE HARD DRIVE. Plan on spending a lot of time sorting screws, and taking multiple parts off (which would not have been an issue if the laptop was designed with repair in mind). If you break the palmrest in a way requiring replacement, this will be a very expensive mistake! Take your time and know your skills before opening this laptop!
AUTHOR'S NOTE (added for transparency): Personally, I do not consider this a difficult repair; however, I know how to make these awful machines more workable to open for beginners.
If the hard drive in your system has failed or you just want to replace the existing drive in your system with an SSD or larger spinning drive, this guide will show you how to access the hard drive for replacement.
Guide notes
- Sorting your screws is paramount. This laptop uses lots of screws and multiple lengths. The screws cannot be interchanged.
- Consider taking this laptop series to a repair shop if the process is too complex. If you want to try and are less experienced, READ THROUGH THE GUIDE BEFORE OPENING IT.
- This laptop accepts 7mm and 9.5mm drives. Both drives use the same bumpers.
- Test the computer partially disassembled BEFORE reassembly. Complete disassembly is required to correct any issues.
crwdns2942213:0crwdne2942213:0
-
crwdns2935267:0crwdne2935267:0Essential Electronics Toolkit$29.95
-
-
Shut the laptop down until it is hibernated or shut off. Do not remove power until both lights turn off.
-
-
-
Once the computer is off, remove the battery. Switch the locking tab to the unlocked position.
-
-
-
Remove the battery. Pull the battery forward and remove it from the laptop.
-
-
-
-
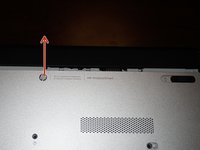
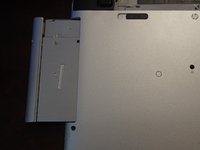
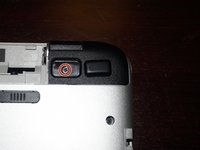
Remove the screw that holds the optical drive in. To do this, use a Phillips #0 screwdriver. Slide the optical drive out once the screw is removed.
-
-
-
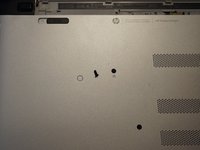
With the palmrest screws removed, remove the screws under the optical drive. Use a Phillips #000 screwdriver.
-
-
-
Once the battery and optical drive are removed, remove the 11 Phillips #0 screws that secure the palmrest.
-
This screw is hidden by a sticker. If lost/damaged, it is cosmetic.
-
Not found on all models. On some models, there are screws in this area. If you see screws here, they must be removed.
-
-
-
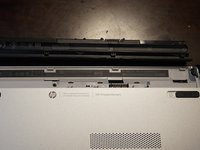
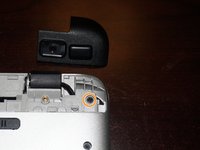
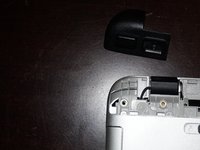
Remove the hinge caps. To do this, remove the rubber pads. Use a Phillps #0 screwdriver.
-
Remove the screws under the hinge caps. To do this, use a Phillps #0 screwdriver.
-
-
-
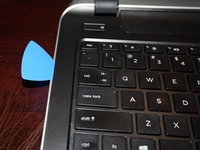
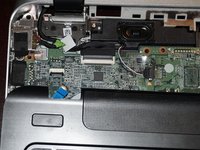
Run a plastic tool around all 3 sides of the palmrest. Once they are loose, disconnect the keyboard and trackpad. Flip the black plastic tabs on the connectors up and disconnect the cables.
-
Once the keyboard and trackpad are disconnected, the palmrest can be lifted up. In some cases, further prying may be needed.
-
-
-
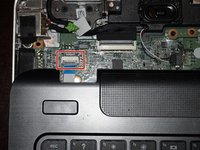
With the keyboard and trackpad disconnected, disconnect the power button. Flip the black tab up and remove the palmrest.
-
-
-
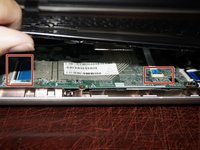
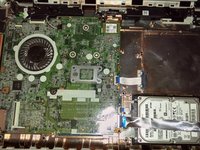
Disconnect the flat flex cable over the hard drive. To do this, lift the black locking tab up and remove the cable from the ZIF socket.
-
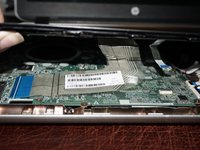
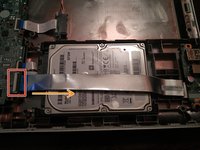
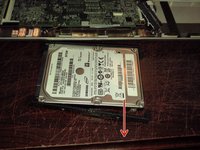
To remove the hard drive, tilt it forward starting with the SATA interface. Once it is removed, set it aside as shown.
-
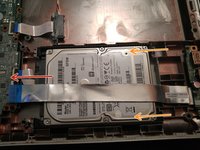
Disconnnect the drive cable. Wiggle the cable off until it is released. Do not forcefully remove the cable. Unserviced "virgin" systems may require more force.
-
-
-
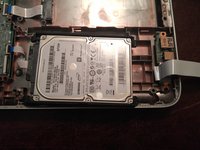
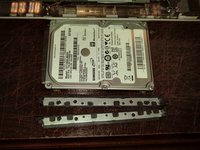
Remove the drive bumpers from the old drive. Transfer these to the new hard drive.
-


To reassemble your device, follow these instructions in reverse order.
Once tested and reassembled, you will need to install an operating system. Install whatever OS you like.
crwdns2935221:0crwdne2935221:0
crwdns2935229:071crwdne2935229:0

crwdns2947412:039crwdne2947412:0
Some hp pavilions you need to detach the keyboard first, then, and only then, can you access the screws that hold the palmrest!
This isn't the case on the P series. The keyboard is welded in with plastic so the top piece and keyboard is a singular component.
Nick -
Thanks, Nick. Great guide, took me about 20 mins to get this done.
That’s good to know. I said 2 hours to cover for users who will take a little longer to complete the repair. The difficulty also reflects on that.
Nick -
Dear Nick,
Thank you for the info. My Wife’s laptop is a slightly different version but I was able to install a SSD today. What a nightmare! I’ve never known a laptop to be so difficult to upgrade.
Cheers!
Andy