crwdns2915892:0crwdne2915892:0
If you have noticed that your computer is no longer booting up and you have come to the conclusion that the hard drive is the problem, this guide will walk you through the sets to replace the hard drive. You will first remove the battery and then the hard drive. Using the tools suggested, you should have no problem removing the hard drive.
crwdns2942213:0crwdne2942213:0
-
-
Using the plastic opening tool, remove the top rubber feet on the back panel as it hides one of the screws we will be removing.
-
-
-
Using a PH0 screwdriver, unscrew the ten 4.4mm Phillips head screws located on the back panel.
Correction. Top two screen pivot screws are bigger than the 8, 4mm.
-
-
-
Using the plastic opening tool, remove the back cover of the laptop.
What? I think you have have neglected to mention the DVD drawer. I believe it needs to be pulled out after removing the center screw and before removing the cover.
Yes, best to remove the drawer as recommended. Also there are 3 screws holding the battery, not 2.
Lastly, pay careful attention to the orientation photo when removing the back.
I did not have the plastic tool but used a small Teflon type kitchen spatula and it did the trick. Do not use a metal screw driver or other such tool.
-
-
-
-
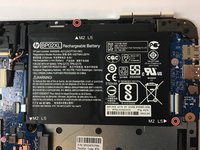
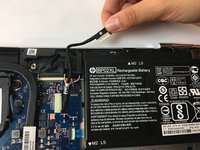
Using a PH0 screwdriver, unscrew the two 3.8mm PH0 Phillips head screws that hold the battery in place.
there is a third screw on bottom left of battery (in picture above)
-
-
-
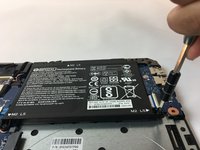
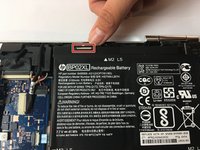
Carefully disconnect the cable connecting the top of the battery and remove the battery.
-
-
-
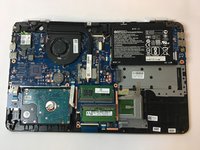
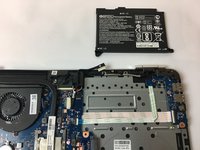
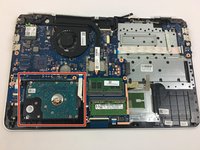
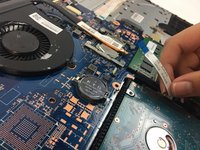
The hard drive is located at the lower left area of the motherboard.
-
Using the spudger, lift the white latch holding the hard drive cable in place.
-
-
-
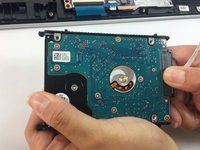
Using the opening tool, lift the hard drive out of the motherboard.
-
-
-
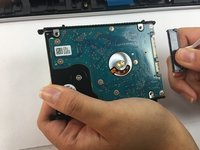
Remove the hard drive cable from the hard drive.
-
-
-
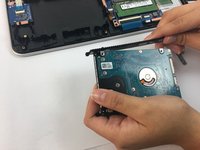
Pull off the plastic wedges on both sides of the hard drive.
-


To reassemble your device, follow these instructions in reverse order.
To reassemble your device, follow these instructions in reverse order.
crwdns2935221:0crwdne2935221:0
crwdns2935229:010crwdne2935229:0
crwdns2915084:0crwdne2915084:0

USF Tampa, Team S13-G3, Cagle Fall 2017 crwdns2935289:0USF Tampa, Team S13-G3, Cagle Fall 2017crwdne2935289:0
USFT-CAGLE-F17S13G3
crwdns2931471:02crwdne2931471:0
crwdns2935297:06crwdne2935297:0
crwdns2947410:01crwdne2947410:0
The latch on mine was black, and the socket on the m/b was white. Guess who ruined his m/b following these instructions?