crwdns2915892:0crwdne2915892:0
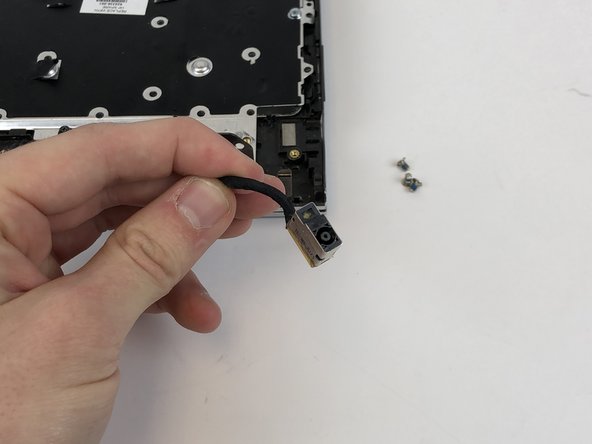
If your HP Envy x360 15m-bq021dx (also known as HP Envy x360 Convertible 15m series) is not charging or only charges intermittently, the power input jack may be damaged or faulty. This guide will show you how to safely replace the power input port to restore the normal charging function.
The power input jack connects your device to an external power source, allowing the battery to charge and the laptop to operate while plugged in. A failing jack may cause your device to lose power, not charge the battery, or only charge when the connector is positioned at a certain angle.
Important Safety Tips:
- Completely power off your device and unplug it from all power sources before beginning the repair.
- Use ESD-safe tools and an anti-static wrist strap to avoid damaging internal components.
- If your battery is swollen or shows signs of damage, follow this guide on what to do with a swollen battery before continuing.
This guide does not require soldering but involves carefully removing several components to access the power jack. Take extra care when disconnecting ribbon cables and handling internal parts.
crwdns2942213:0crwdne2942213:0
-
-
On the back panel of the device, remove the four (4) M2.5xL6 screws at the top of the photo using a Phillips #0 screwdriver.
-
Unscrew the three (3) screws at the bottom of the photo using a T5 Torx screwdriver.
-
-
-
To remove the back cover, use the black spudger to lift up on the edges of the cover.
-
Use a suction cup to assist in lifting the back cover
-
-
-
Use the Philips #0 screwdriver to remove six (6) M2.0x3.2 screws from battery.
-
-
-
Using the Philips #0 screwdriver, remove the final screw from the battery connected to the SSD storage unit.
-
-
-
Lift and pull the front of the battery up and out (away from the connector) to remove.
-
-
-
-
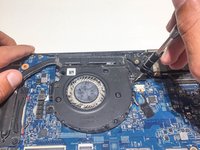
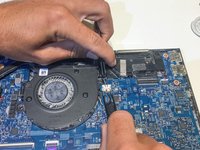
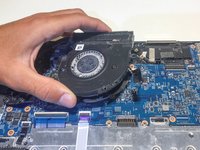
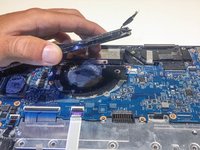
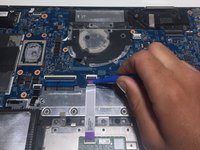
Using a Philips #0 screwdriver, remove the three M2x4 screws located around the cooling fan as shown in this picture.
-
-
crwdns2935267:0crwdne2935267:0Tweezers$4.99
-
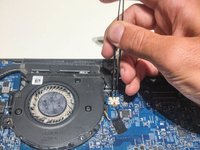
Remove the connector clip with the tweezers.
-
-
-
Remove the four spring loaded screws with a Philips #1 screwdriver.
-
-
-
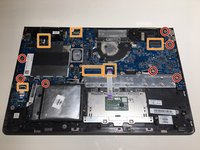
Using a Phillips #1, remove the seven M2.0x3.2 screws.
-
Undo the six connections using the blue opening tool.
-
-
-
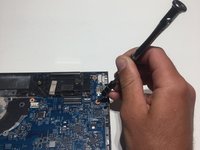
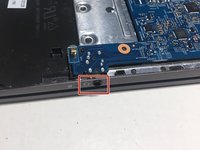
Carefully remove the aux port from the frame of the computer as shown.
-
-
-
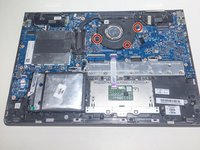
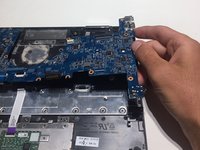
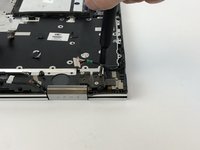
Pull the mother board up and away from frame of the computer.
-
-
crwdns2935267:0crwdne2935267:0Tweezers$4.99
-
Use the tweezers to remove the cords from their restraints.
-
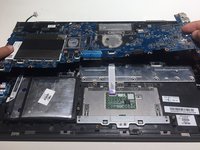
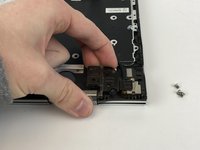
Lift the speakers out of the laptop.
-
-
-
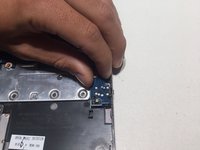
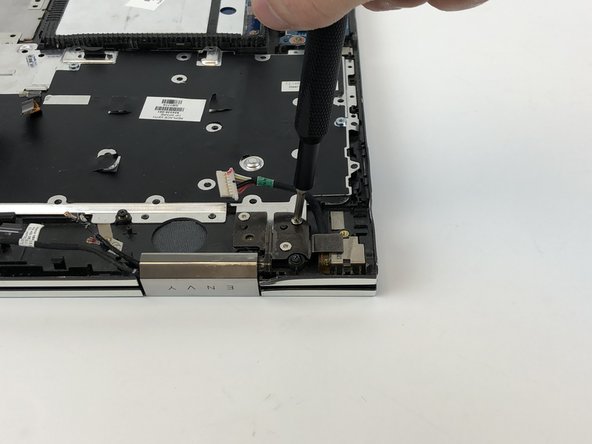
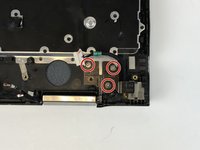
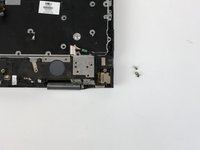
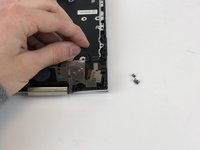
Remove the three M2.0x3.2 hinge screws next to the power input cord using a Philips #0 screwdriver.
-
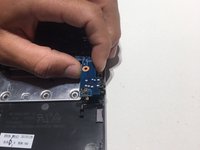
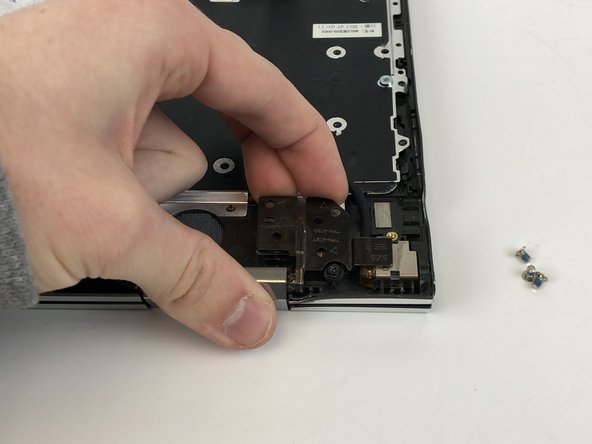
Pry the hinge up so that it is out of the way.
-


To reassemble your device, follow these instructions in reverse order. Take your e-waste to an R2 or e-Stewards certified recycler.
To reassemble your device, follow these instructions in reverse order. Take your e-waste to an R2 or e-Stewards certified recycler.

crwdns2915084:0crwdne2915084:0

Embry-Riddle Aeronautical University, Team 2-3, Rauch Spring 2022 crwdns2935289:0Embry-Riddle Aeronautical University, Team 2-3, Rauch Spring 2022crwdne2935289:0
ERAU-RAUCH-S22S2G3
crwdns2931471:03crwdne2931471:0
crwdns2935297:03crwdne2935297:0