crwdns2915892:0crwdne2915892:0
Without the scanner glass pane, your printer cannot complete two of its three major functions. Replace a broken one to keep your printer fully-functional.
crwdns2942213:0crwdne2942213:0
-
-
Take all paper out of the paper tray. Unplug the printer.
-
Remove the plastic printer-control panel on the top left.
-
Then, forcefully lift up the bottom of the panel while applying downward pressure with your thumb-as shown.
-
-
-
With your other hand, slide the top of the panel towards the back of the printer.
-
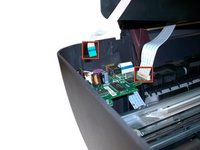
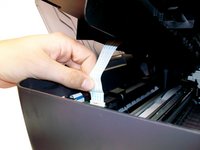
Disconnect the ribbon by pinching the blue tab and pulling away from the green circuit board.
-
Lift the panel free and set to the side.
-
-
-
Place the plastic opening tool between the plastic cover and the mount on the printer.
-
Pry the plastic cover towards the center of the printer.
-
Pull up on the cover to remove it from the printer-as shown.
-
Repeat the process on the other side.
-
-
-
-
To remove the glass panel, take out the four 14 mm (1/2 inch) screws with a T10 Torx screwdriver.
-
-
-
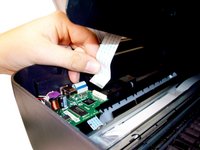
Disconnect the white cables from the green motherboard by pinching the cable where it connects to the green motherboard. Pull up, lightly.
-
Set the lower part of the printer aside.
-
-
-
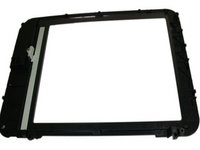
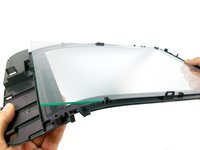
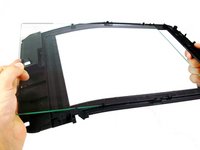
Place the glass panel, face down, on a smooth surface.
-
Remove the 14 mm (1/2 in.) screw from the white plastic tab on the side of the panel with a T10 Torx screwdriver.
-
-
-
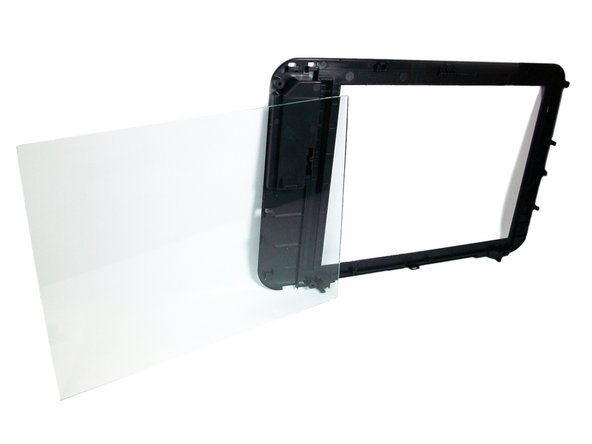
Remove the glass pane by carefully bending the plastic frame down from the side and sliding the glass pane out from the side.
-


To reassemble your device, follow these instructions in reverse order.
crwdns2935221:0crwdne2935221:0
crwdns2935227:0crwdne2935227:0
crwdns2935287:0crwdne2935287:0

Cal Poly, Team 9-18, Amido Fall 2012 crwdns2935289:0Cal Poly, Team 9-18, Amido Fall 2012crwdne2935289:0
CPSU-AMIDO-F12S9G18
crwdns2931471:04crwdne2931471:0
crwdns2935297:010crwdne2935297:0
crwdns2947410:01crwdne2947410:0
Which dimensions is the glass pane?