crwdns2933423:0crwdne2933423:0

HP Deskjet 1055 Power and Various Buttons Replacement

crwdns2942213:0crwdne2942213:0

  1. HP Deskjet 1055 Power and Various Buttons Replacement, Power and Various Buttons: crwdns2935265:01crwdnd2935265:01crwdnd2935265:01crwdne2935265:0
    • Press your thumb firmly on the center of the button plate on the left side of the printer.

    • Hook your fingers under the front edge of the button plate and pull upward while maintaining pressure in the center with your thumb.

    • To avoid breaking the rear tab, keep your thumb pressed firmly on the plate and lift the front edge carefully as you pull up.

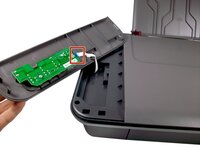
  2. HP Deskjet 1055 Power and Various Buttons Replacement: crwdns2935265:02crwdnd2935265:01crwdnd2935265:03crwdne2935265:0 HP Deskjet 1055 Power and Various Buttons Replacement: crwdns2935265:02crwdnd2935265:02crwdnd2935265:03crwdne2935265:0 HP Deskjet 1055 Power and Various Buttons Replacement: crwdns2935265:02crwdnd2935265:03crwdnd2935265:03crwdne2935265:0
    • Once the front of the plate is loose, lift it up a few inches making sure to hold the back (paper feeding side) of the plate down.

    • Slide the plate towards the back of the printer and then lift up on the back of the plate.

    • The plate should now be disconnected from the tabs on the printer.

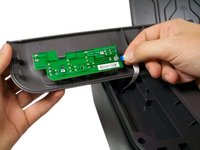
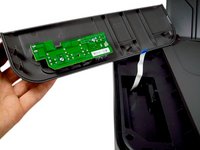
  3. HP Deskjet 1055 Power and Various Buttons Replacement: crwdns2935265:03crwdnd2935265:01crwdnd2935265:03crwdne2935265:0 HP Deskjet 1055 Power and Various Buttons Replacement: crwdns2935265:03crwdnd2935265:02crwdnd2935265:03crwdne2935265:0 HP Deskjet 1055 Power and Various Buttons Replacement: crwdns2935265:03crwdnd2935265:03crwdnd2935265:03crwdne2935265:0
    • Flip the plate over to reveal the white ribbon cable that connects it to the printer.

    • Hold the ribbon cable near the connection point and gently pull it straight out from the circuit board to avoid damage.

  4. HP Deskjet 1055 Power and Various Buttons Replacement: crwdns2935265:04crwdnd2935265:01crwdnd2935265:01crwdne2935265:0
    • Place the cover down on a flat surface with the button circuit board facing up.

    • Remove the three T-10 Torx screws from the circuit board.

  5. HP Deskjet 1055 Power and Various Buttons Replacement: crwdns2935265:05crwdnd2935265:01crwdnd2935265:01crwdne2935265:0
    • Lift the button circuit board up from the plastic cover to remove it.

crwdns2915888:0crwdne2915888:0

To reassemble your device, follow these instructions in reverse order. Take your e-waste to an R2 or e-Stewards certified recycler.

crwdns2935229:02crwdne2935229:0

Matt

crwdns2935283:010/09/12crwdne2935283:0

88 crwdns2915208:0crwdne2915208:0

crwdns2935297:02crwdne2935297:0

crwdns2915084:0crwdne2915084:0

Cal Poly, Team 9-18, Amido Fall 2012 crwdns2935289:0Cal Poly, Team 9-18, Amido Fall 2012crwdne2935289:0

CPSU-AMIDO-F12S9G18

crwdns2931471:04crwdne2931471:0

crwdns2935297:010crwdne2935297:0

crwdns2947412:00crwdne2947412:0

crwdns2917038:0crwdne2917038:0

crwdns2936625:0crwdne2936625:0:

crwdns2936751:024crwdne2936751:0 0

crwdns2936753:07crwdne2936753:0 2

crwdns2936753:030crwdne2936753:0 4

crwdns2942667:0crwdne2942667:0 1,861