crwdns2915892:0crwdne2915892:0
Follow this guide to replace a cracked or damaged back cover on your HMD Pulse Pro smartphone.
crwdns2942213:0crwdne2942213:0
-
-
Unplug all cables from your phone and completely power it down.
-
-
-
Firmly press a SIM eject tool, bit, or straightened paper clip into the SIM card tray hole on the left edge of your phone until the tray ejects.
-
Remove the SIM card tray.
-
-
-
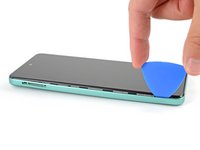
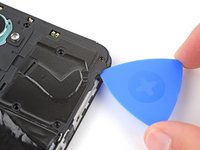
Insert the tip of an opening pick between the back cover and frame, at the SIM card tray cutout.
-
-
-
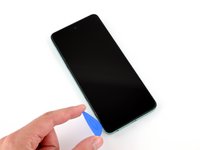
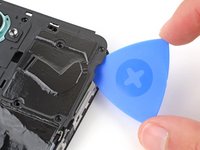
Position the opening pick straight down and slide it along the left edge to begin unclipping the back cover.
-
-
-
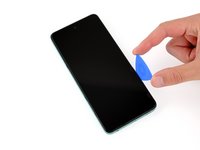
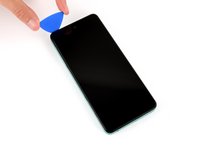
Continue sliding the pick around the perimeter of your phone until the back cover is fully unclipped.
-
-
-
-
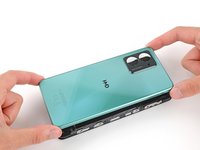
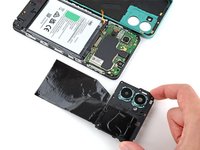
Carefully flip your phone over so the back cover is facing up.
-
Lift the back cover off the frame and flip it over the left edge of your phone, laying the cover flat on your work surface.
-
-
crwdns2935267:0crwdne2935267:0Tweezers$4.99
-
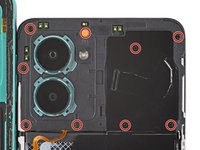
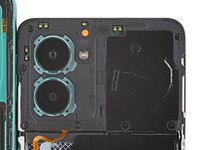
Use a Phillips screwdriver to remove the nine 3.6 mm‑long screws securing the motherboard cover.
-
-
-
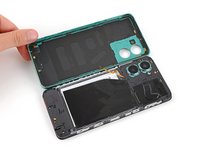
Insert an opening pick between the right edge of the motherboard cover and frame.
-
Twist the pick to fully unclip the cover.
-
-
-
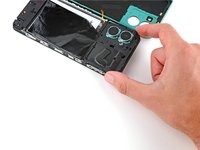
Remove the motherboard shield and its connected graphite sheet.
-
-
-
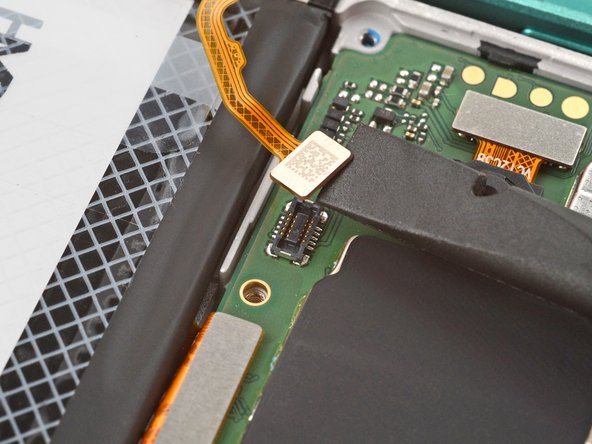
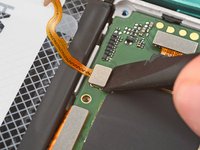
Use the flat end of a spudger to pry up and disconnect the battery press connector from the bottom edge of the motherboard.
-
-
-
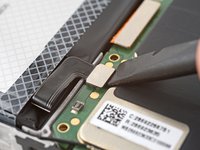
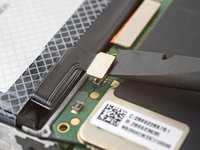
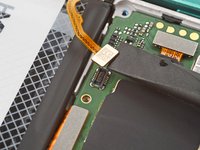
Use the flat end of a spudger to pry up and disconnect the back cover press connector from the bottom edge of the motherboard.
-
-
crwdns2935267:0crwdne2935267:0Tweezers$4.99
-
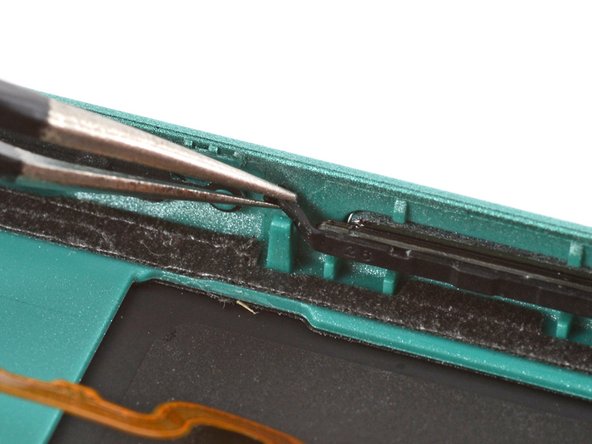
Use a pair of tweezers to gently grip the power button's top rubber arm and lift it out of its slot.
-
-
-
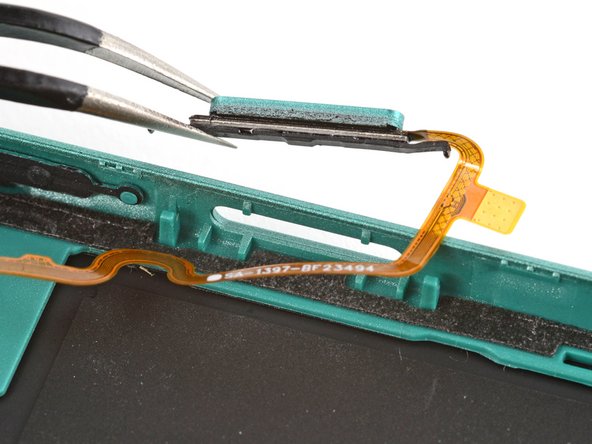
Use tweezers to lift and remove the power button.
-


To reassemble your device, follow these instructions in reverse order.
Take your e-waste to an R2 or e-Stewards certified recycler.
Repair didn’t go as planned? Try some basic troubleshooting, or ask our Answers community for help.
To reassemble your device, follow these instructions in reverse order.
Take your e-waste to an R2 or e-Stewards certified recycler.
Repair didn’t go as planned? Try some basic troubleshooting, or ask our Answers community for help.
crwdns2935221:0crwdne2935221:0
crwdns2935229:04crwdne2935229:0

