crwdns2933423:0crwdne2933423:0

crwdns2862623:0crwdne2862623:0
crwdns2942641:0crwdne2942641:0

crwdns2942213:0crwdne2942213:0

  1. crwdns2935201:0crwdne2935201:0 crwdns2935203:0crwdne2935203:0

    : crwdns2935265:01crwdnd2935265:01crwdnd2935265:02crwdne2935265:0 : crwdns2935265:01crwdnd2935265:02crwdnd2935265:02crwdne2935265:0
    • Let your Pixel's battery drain below 25% before starting this repair. A charged lithium‑ion battery may catch fire if damaged.

    • Unplug all cables and completely power down your phone.

  2. crwdns2935201:0crwdne2935201:0 crwdns2935203:0crwdne2935203:0

    : crwdns2935265:02crwdnd2935265:01crwdnd2935265:03crwdne2935265:0 : crwdns2935265:02crwdnd2935265:02crwdnd2935265:03crwdne2935265:0 : crwdns2935265:02crwdnd2935265:03crwdnd2935265:03crwdne2935265:0
    • Adhesive secures the rear cover to the frame. Heating the cover softens the adhesive, making it easier to separate.

    • Use a hair dryer to heat the entire rear cover.

    • Only heat your phone so it's just hot to the touch. Extreme heat can damage the rear cover, screen, or battery.

  3. crwdns2935201:0crwdne2935201:0 crwdns2935203:0crwdne2935203:0

    : crwdns2935265:03crwdnd2935265:01crwdnd2935265:02crwdne2935265:0 : crwdns2935265:03crwdnd2935265:02crwdnd2935265:02crwdne2935265:0
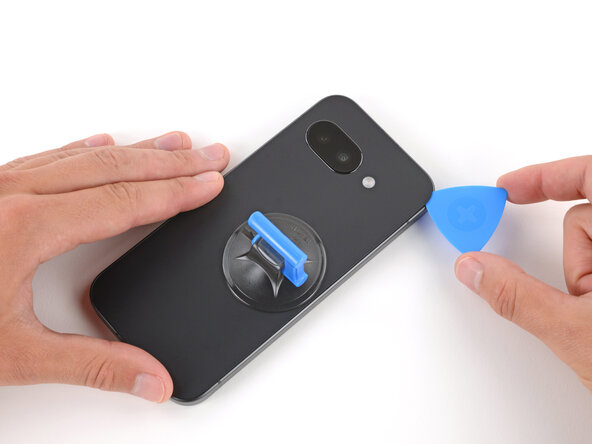
    • Apply a suction handle near the center of the rear cover's right edge, as close to the edge as possible.

  4. crwdns2935201:0crwdne2935201:0 crwdns2935203:0crwdne2935203:0

    : crwdns2935265:04crwdnd2935265:01crwdnd2935265:03crwdne2935265:0 : crwdns2935265:04crwdnd2935265:02crwdnd2935265:03crwdne2935265:0 : crwdns2935265:04crwdnd2935265:03crwdnd2935265:03crwdne2935265:0
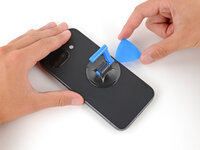
    • Pull up on the suction handle with strong, steady force until a gap forms between the cover and frame.

    • Insert the tip of an opening pick into the gap.

  5. crwdns2935201:0crwdne2935201:0 crwdns2935203:0crwdne2935203:0

    : crwdns2935265:05crwdnd2935265:01crwdnd2935265:03crwdne2935265:0 : crwdns2935265:05crwdnd2935265:02crwdnd2935265:03crwdne2935265:0 : crwdns2935265:05crwdnd2935265:03crwdnd2935265:03crwdne2935265:0
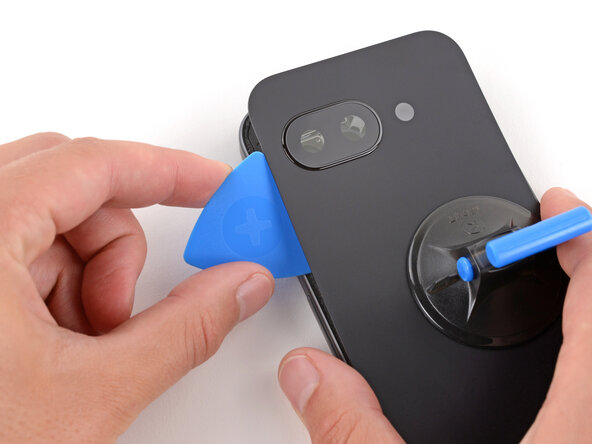
    • The rear cover is secured with adhesive around the perimeter of the frame and near the cameras. Use this picture as a reference while you separate the adhesive.

    • When separating the left and right edge adhesive, don't insert your pick more than 3 mm to avoid damaging the wireless charging coil and its graphite film.

  6. crwdns2935201:0crwdne2935201:0 crwdns2935203:0crwdne2935203:0

    : crwdns2935265:06crwdnd2935265:01crwdnd2935265:03crwdne2935265:0 : crwdns2935265:06crwdnd2935265:02crwdnd2935265:03crwdne2935265:0 : crwdns2935265:06crwdnd2935265:03crwdnd2935265:03crwdne2935265:0
    • If you ever have trouble separating the adhesive, apply more heat and try again.

    • Slide the opening pick up the right edge, around the top right corner, and along the top edge to separate the adhesive securing the rear cover.

  7. crwdns2935201:0crwdne2935201:0 crwdns2935203:0crwdne2935203:0

    : crwdns2935265:07crwdnd2935265:01crwdnd2935265:03crwdne2935265:0 : crwdns2935265:07crwdnd2935265:02crwdnd2935265:03crwdne2935265:0 : crwdns2935265:07crwdnd2935265:03crwdnd2935265:03crwdne2935265:0
    • Insert an opening pick in the initial gap you created near the center of the rear cover's right edge.

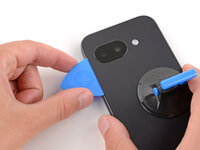
    • Slide the opening pick down the right edge, along the bottom edge, and up the left edge to separate the adhesive securing the cover.

  8. crwdns2935201:0crwdne2935201:0 crwdns2935203:0crwdne2935203:0

    : crwdns2935265:08crwdnd2935265:01crwdnd2935265:03crwdne2935265:0 : crwdns2935265:08crwdnd2935265:02crwdnd2935265:03crwdne2935265:0 : crwdns2935265:08crwdnd2935265:03crwdnd2935265:03crwdne2935265:0
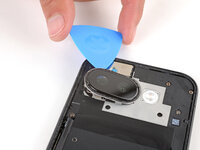
    • Insert the flat edge of an opening pick under the top of the rear cover's left edge, near the camera bezel.

    • Twist the pick and apply constant pressure to separate the adhesive around the camera bezel.

  9. crwdns2935201:0crwdne2935201:0 crwdns2935203:0crwdne2935203:0

    : crwdns2935265:09crwdnd2935265:01crwdnd2935265:02crwdne2935265:0 : crwdns2935265:09crwdnd2935265:02crwdnd2935265:02crwdne2935265:0
    • Remove the rear cover.

    • If you feel resistance, go back around the perimeter of the cover and use a pick to separate any remaining adhesive.

  10. crwdns2935201:0crwdne2935201:0 crwdns2935203:0crwdne2935203:0

    : crwdns2935265:010crwdnd2935265:01crwdnd2935265:03crwdne2935265:0 : crwdns2935265:010crwdnd2935265:02crwdnd2935265:03crwdne2935265:0 : crwdns2935265:010crwdnd2935265:03crwdnd2935265:03crwdne2935265:0
    • If the camera bezel detached from the rear cover and stayed stuck to your phone, follow this step to remove it. Otherwise, skip this step.

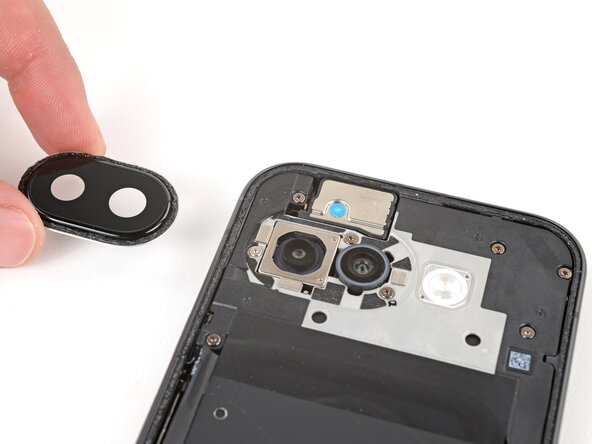
    • Slide an opening pick under the camera bezel and pry up to remove it.

    • Only insert the pick a few millimeters under the bezel, or you risk damaging the cameras.

    • If you're having trouble, lightly heat the camera bezel.

crwdns2935217:0crwdne2935217:0

Spencer Day

crwdns2935283:009/14/22crwdne2935283:0

117,285 crwdns2915208:0crwdne2915208:0

crwdns2935297:0837crwdne2935297:0

crwdns2915084:0crwdne2915084:0

iFixit crwdns2935289:0iFixitcrwdne2935289:0

Staff

crwdns2931471:0119crwdne2931471:0

crwdns2935297:021,006crwdne2935297:0

crwdns2947412:00crwdne2947412:0

crwdns2917038:0crwdne2917038:0

crwdns2936625:0crwdne2936625:0:

crwdns2936751:024crwdne2936751:0 0

crwdns2936753:07crwdne2936753:0 1

crwdns2936753:030crwdne2936753:0 6

crwdns2942667:0crwdne2942667:0 57