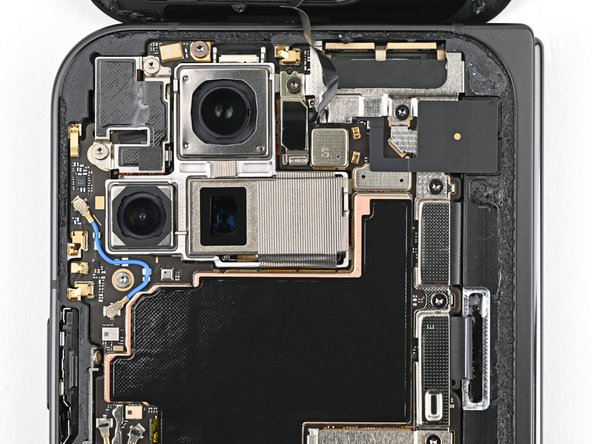
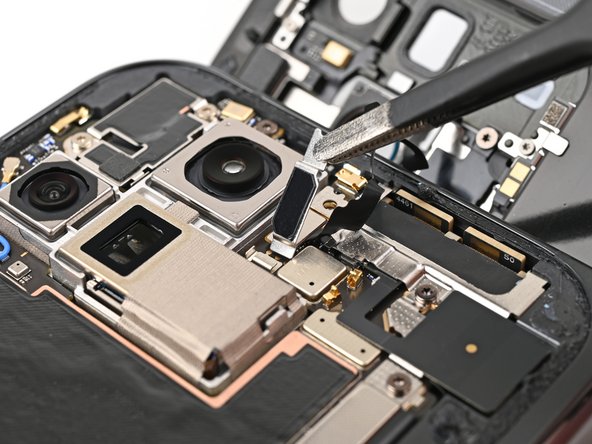
crwdns2933423:0crwdne2933423:0

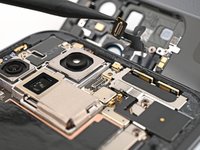
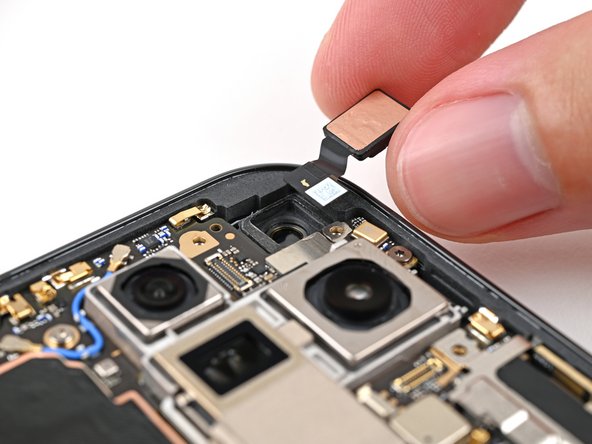
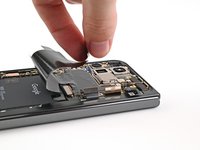
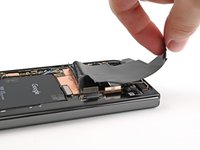
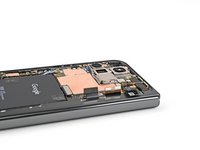
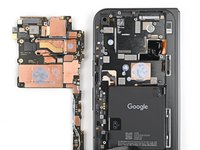
Google Pixel 9 Pro Fold Logic Board Removal

crwdns2862623:0crwdne2862623:0
crwdns2942641:0crwdne2942641:0

crwdns2942213:0crwdne2942213:0

  1. Google Pixel 9 Pro Fold Logic Board Removal, Prepare your phone for disassembly: crwdns2935265:01crwdnd2935265:01crwdnd2935265:01crwdne2935265:0
    • Let your phone's battery drain below 25% before starting this repair. A charged lithium‑ion battery may catch fire if damaged.

    • Unplug all cables from your phone and completely power it down.

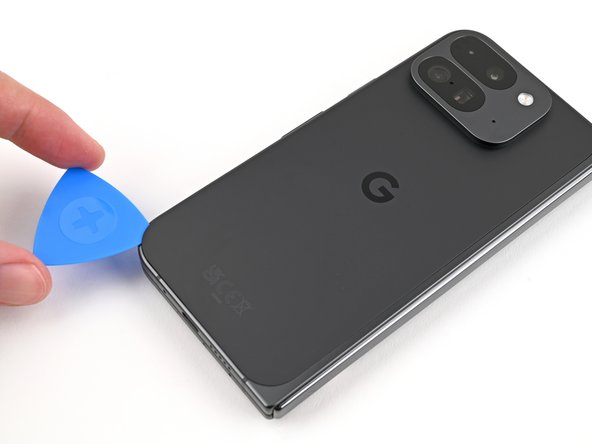
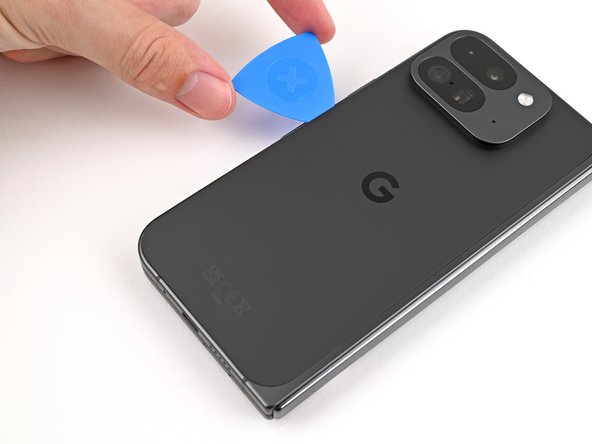
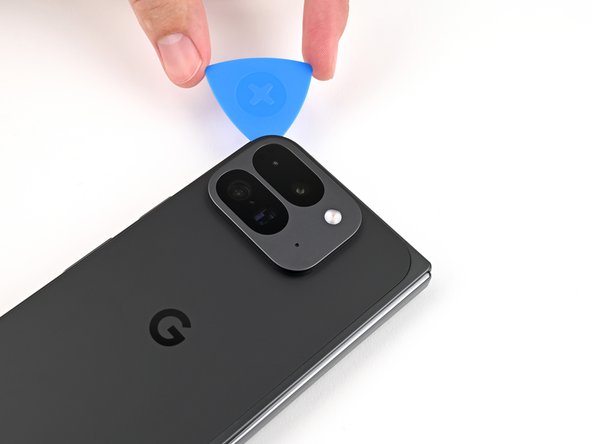
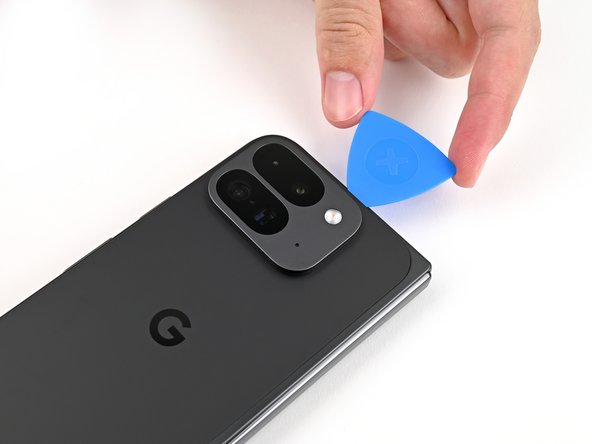
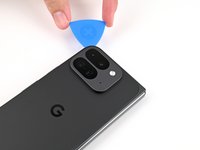
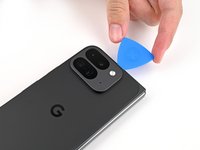
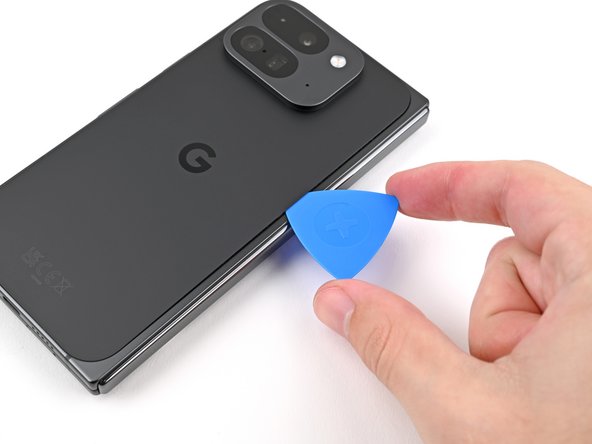
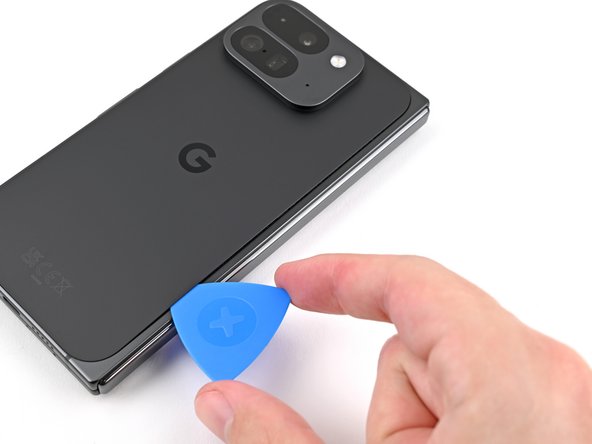
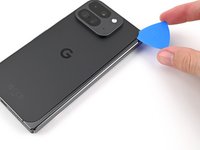
  2. Google Pixel 9 Pro Fold Logic Board Removal, Insert an opening pick: crwdns2935265:02crwdnd2935265:01crwdnd2935265:03crwdne2935265:0 Google Pixel 9 Pro Fold Logic Board Removal, Insert an opening pick: crwdns2935265:02crwdnd2935265:02crwdnd2935265:03crwdne2935265:0 Google Pixel 9 Pro Fold Logic Board Removal, Insert an opening pick: crwdns2935265:02crwdnd2935265:03crwdnd2935265:03crwdne2935265:0
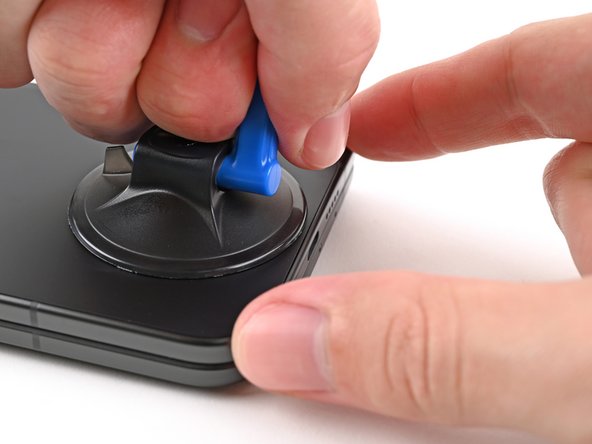
    • Apply a suction cup to the back cover, as close to the center of the bottom edge as possible.

    • While securing the phone with one hand, pull up on the suction cup with strong, steady force to create a gap between the back cover and the frame.

    • Insert an opening pick into the gap.

    • If your back cover is badly cracked, covering it with a layer of clear packing tape may allow the suction cup to adhere. Alternatively, very strong tape may be used instead of the suction cup. If all else fails, you can superglue the suction cup to the broken back cover.

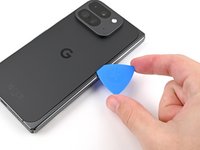
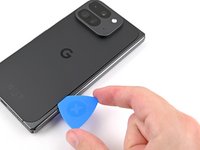
  3. Google Pixel 9 Pro Fold Logic Board Removal, Separate the back cover adhesive: crwdns2935265:03crwdnd2935265:01crwdnd2935265:03crwdne2935265:0 Google Pixel 9 Pro Fold Logic Board Removal, Separate the back cover adhesive: crwdns2935265:03crwdnd2935265:02crwdnd2935265:03crwdne2935265:0 Google Pixel 9 Pro Fold Logic Board Removal, Separate the back cover adhesive: crwdns2935265:03crwdnd2935265:03crwdnd2935265:03crwdne2935265:0
    • During the next two steps, don't insert your opening pick deeper than 3 mm to prevent damaging the metal springs around the frame.

    • Optionally, you can measure and mark your opening pick at 3 mm to help you visualize the length.

    • Remove the suction handle from the back cover.

    • Slide the opening pick around the bottom left corner and up the left edge of the back cover to separate the adhesive.

  4. Google Pixel 9 Pro Fold Logic Board Removal: crwdns2935265:04crwdnd2935265:01crwdnd2935265:03crwdne2935265:0 Google Pixel 9 Pro Fold Logic Board Removal: crwdns2935265:04crwdnd2935265:02crwdnd2935265:03crwdne2935265:0 Google Pixel 9 Pro Fold Logic Board Removal: crwdns2935265:04crwdnd2935265:03crwdnd2935265:03crwdne2935265:0
    • Continue sliding the pick around the top left corner and across the top edge of the back cover.

  5. Google Pixel 9 Pro Fold Logic Board Removal: crwdns2935265:05crwdnd2935265:01crwdnd2935265:03crwdne2935265:0 Google Pixel 9 Pro Fold Logic Board Removal: crwdns2935265:05crwdnd2935265:02crwdnd2935265:03crwdne2935265:0 Google Pixel 9 Pro Fold Logic Board Removal: crwdns2935265:05crwdnd2935265:03crwdnd2935265:03crwdne2935265:0
    • The adhesive along the right edge of the back cover is thicker than the rest. You'll need to insert your opening pick at a minimum of 4 mm to separate the adhesive.

    • Slide your pick down the right edge and around the bottom right corner to separate the remaining adhesive.

  6. Google Pixel 9 Pro Fold Logic Board Removal: crwdns2935265:06crwdnd2935265:01crwdnd2935265:03crwdne2935265:0 Google Pixel 9 Pro Fold Logic Board Removal: crwdns2935265:06crwdnd2935265:02crwdnd2935265:03crwdne2935265:0 Google Pixel 9 Pro Fold Logic Board Removal: crwdns2935265:06crwdnd2935265:03crwdnd2935265:03crwdne2935265:0
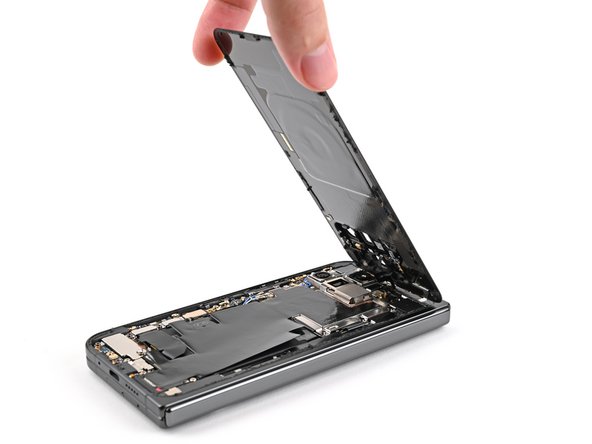
    • Don't fully remove the back cover yet, as it's still connected to the phone by a cable.

    • At this point, the back cover should be free from the frame. If there's still resistance around the edges, use an opening pick to separate any remaining adhesive.

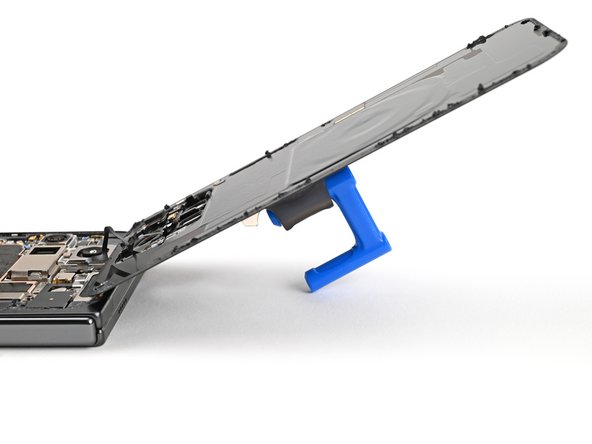
    • Lift the bottom edge of the back cover and swing it over the top edge of the phone.

    • Prop up the back cover with your suction handle or a clean, sturdy object—making sure that the cable isn't strained.

  7. Google Pixel 9 Pro Fold Logic Board Removal, Remove the top bracket screw: crwdns2935265:07crwdnd2935265:01crwdnd2935265:02crwdne2935265:0 Google Pixel 9 Pro Fold Logic Board Removal, Remove the top bracket screw: crwdns2935265:07crwdnd2935265:02crwdnd2935265:02crwdne2935265:0
    crwdns2935267:0crwdne2935267:0
    FixMat
    $36.95
    • Throughout this repair, keep track of each screw and make sure it goes back exactly where it came from.

    • While the Pixel 9 Pro Fold uses Torx Plus screws, standard Torx bits also work. Use the same size or one size larger (T3 or T4 Torx bits with 3IP Torx Plus screws) and apply constant, downward force to prevent stripping.

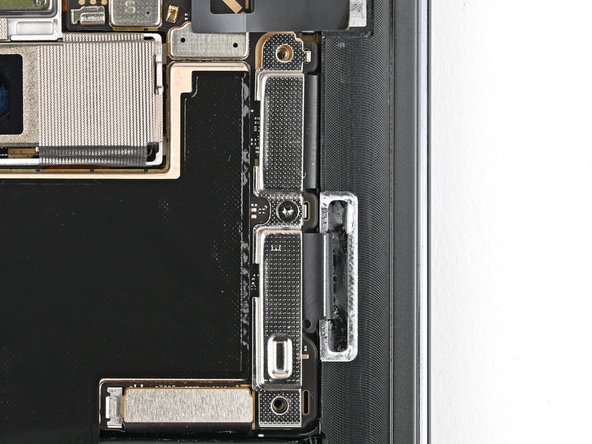
    • Use a Torx Plus 3IP driver to remove the 3.0 mm‑long screw securing the top bracket.

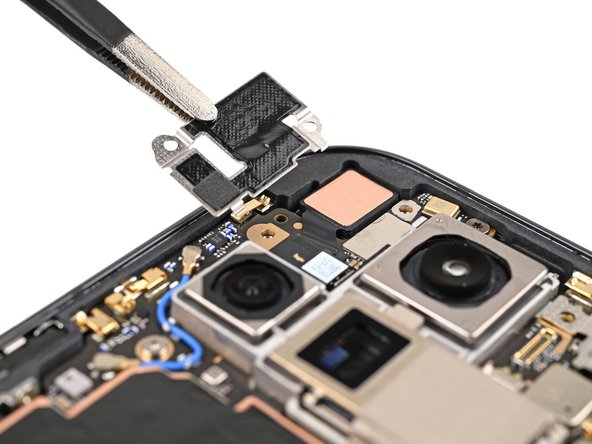
  8. Google Pixel 9 Pro Fold Logic Board Removal, Remove the top bracket: crwdns2935265:08crwdnd2935265:01crwdnd2935265:02crwdne2935265:0 Google Pixel 9 Pro Fold Logic Board Removal, Remove the top bracket: crwdns2935265:08crwdnd2935265:02crwdnd2935265:02crwdne2935265:0
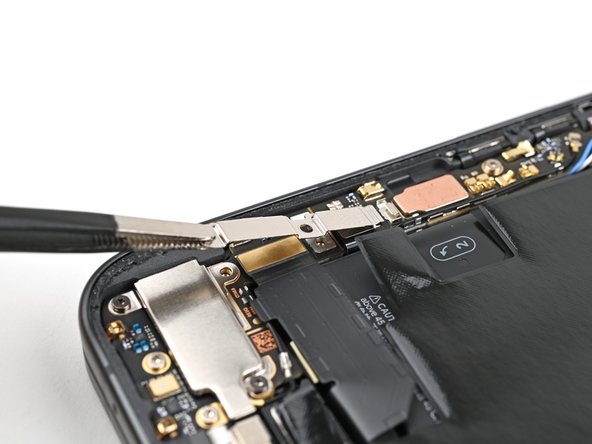
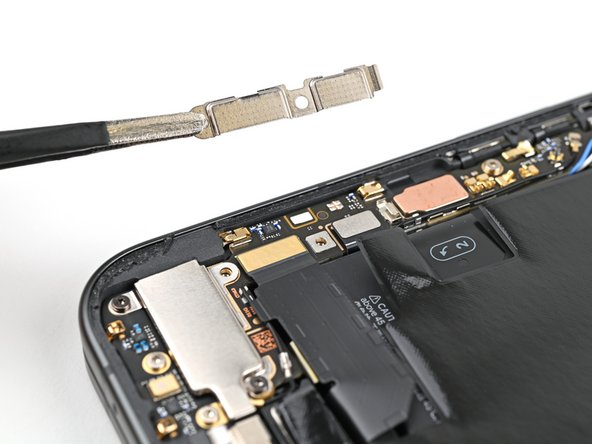
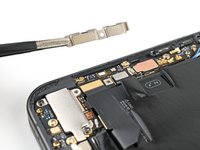
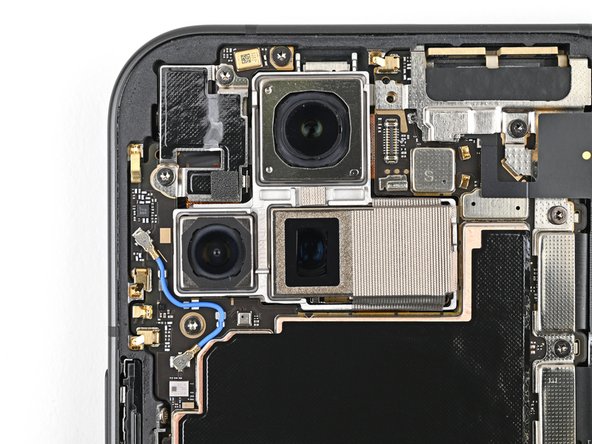
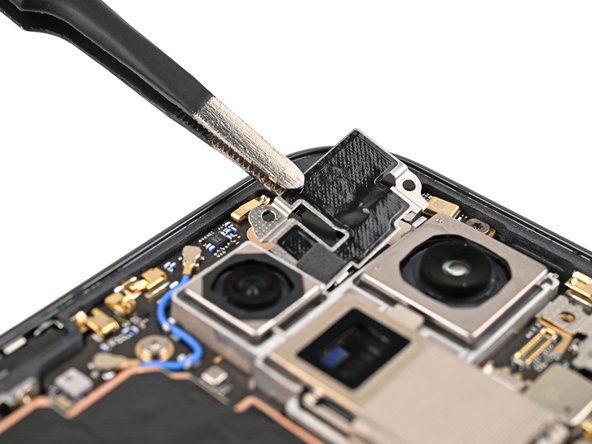
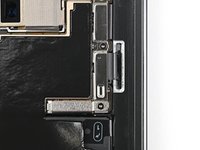
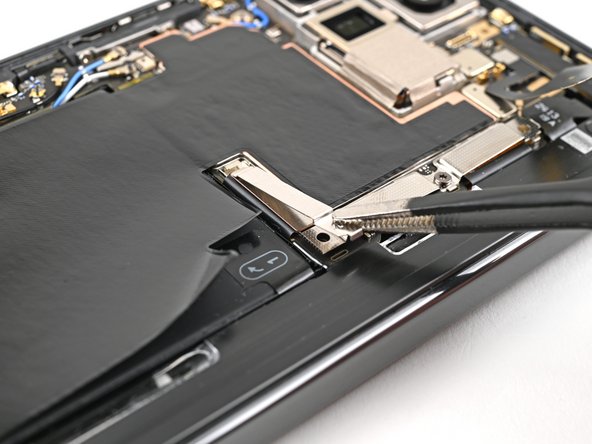
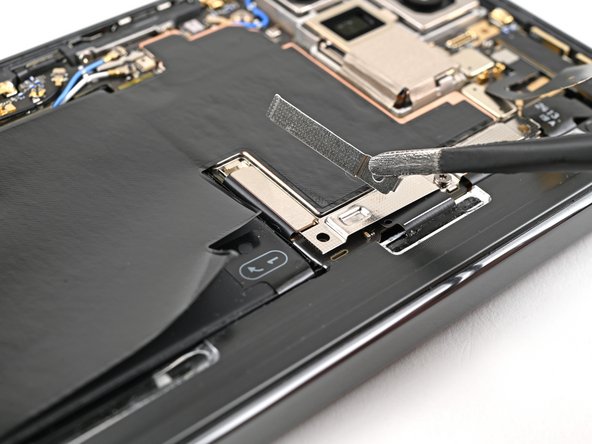
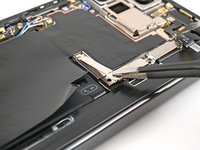
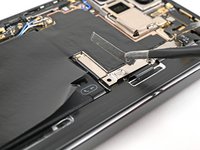
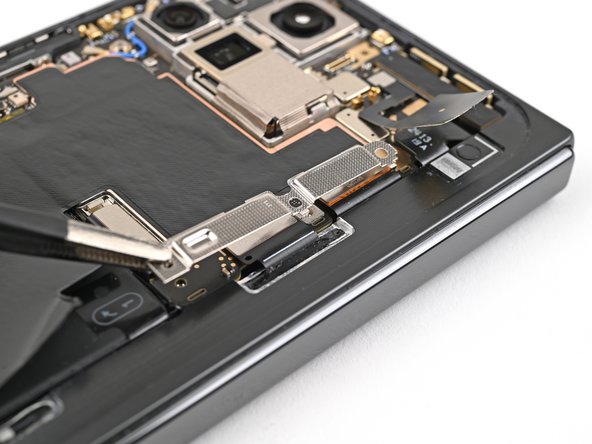
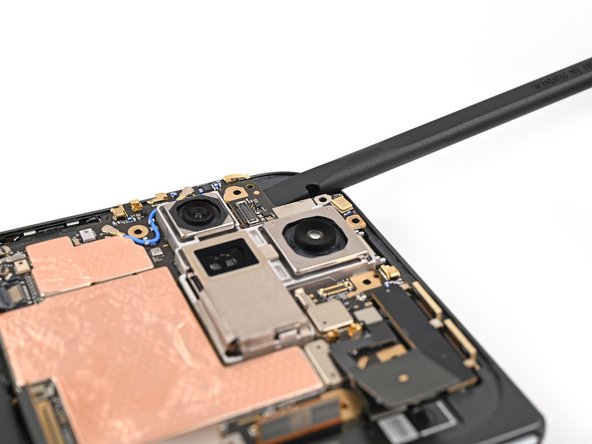
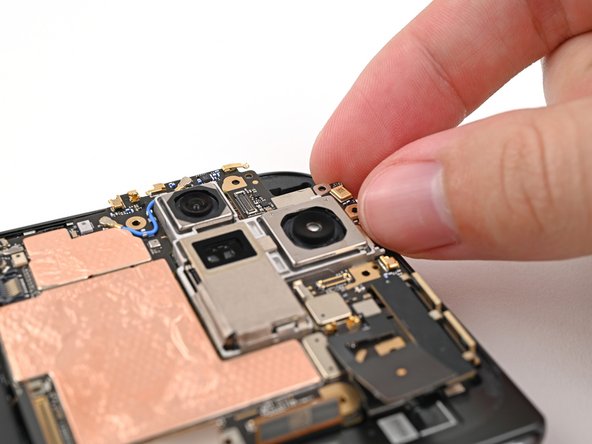
    • Use tweezers, or your fingers, to pull the top bracket towards the top of the phone to release it from its clip.

    • Remove the top bracket.

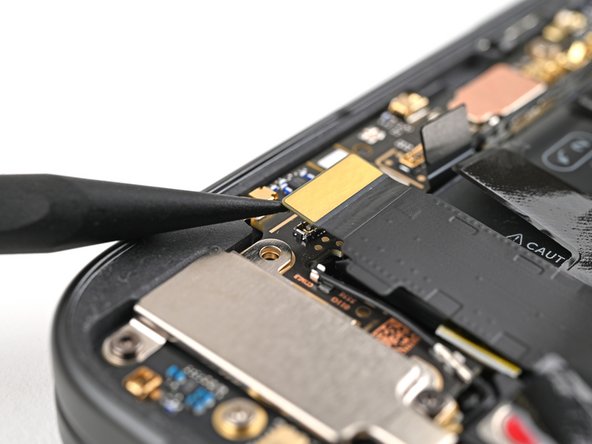
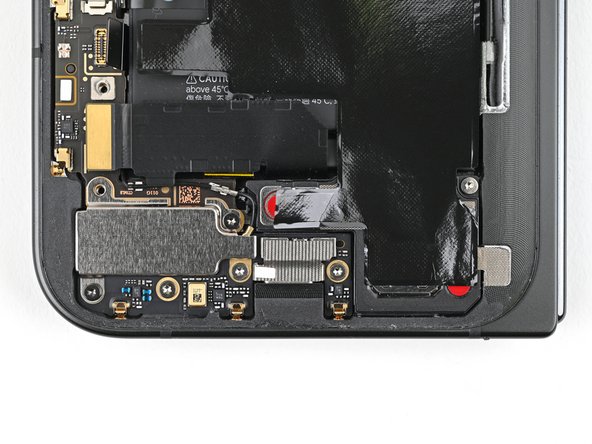
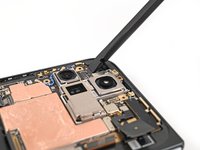
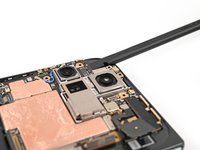
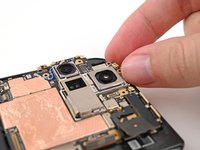
  9. Google Pixel 9 Pro Fold Logic Board Removal, Disconnect the back cover cable: crwdns2935265:09crwdnd2935265:01crwdnd2935265:02crwdne2935265:0 Google Pixel 9 Pro Fold Logic Board Removal, Disconnect the back cover cable: crwdns2935265:09crwdnd2935265:02crwdnd2935265:02crwdne2935265:0
    • Insert the tip of your spudger under the bottom edge of the back cover cable press connector.

    • Don't insert your spudger anywhere else, as you risk dislodging surface‑mounted components.

    • Pry up and disconnect the back cover cable.

  10. Google Pixel 9 Pro Fold Logic Board Removal, Remove the back cover: crwdns2935265:010crwdnd2935265:01crwdnd2935265:01crwdne2935265:0
    • Lift the back cover off the frame and remove it.

  11. Google Pixel 9 Pro Fold Logic Board Removal, Remove the base battery bracket screws: crwdns2935265:011crwdnd2935265:01crwdnd2935265:02crwdne2935265:0 Google Pixel 9 Pro Fold Logic Board Removal, Remove the base battery bracket screws: crwdns2935265:011crwdnd2935265:02crwdnd2935265:02crwdne2935265:0
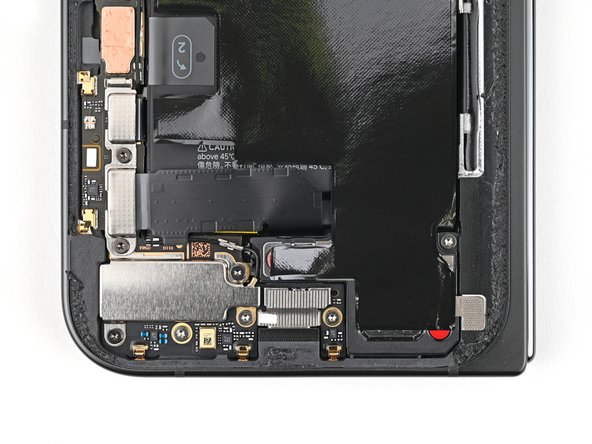
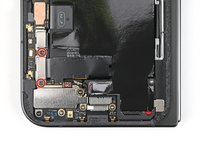
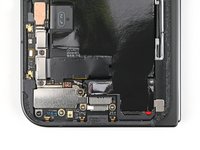
    • Use a Torx Plus 3IP driver to remove the two 3.0 mm‑long screws securing the base battery bracket.

  12. Google Pixel 9 Pro Fold Logic Board Removal, Remove the base battery bracket: crwdns2935265:012crwdnd2935265:01crwdnd2935265:03crwdne2935265:0 Google Pixel 9 Pro Fold Logic Board Removal, Remove the base battery bracket: crwdns2935265:012crwdnd2935265:02crwdnd2935265:03crwdne2935265:0 Google Pixel 9 Pro Fold Logic Board Removal, Remove the base battery bracket: crwdns2935265:012crwdnd2935265:03crwdnd2935265:03crwdne2935265:0
    • Use tweezers, or your fingers, to pull the base battery bracket toward the bottom of the phone to release it from its clip.

    • Remove the base battery bracket.

  13. Google Pixel 9 Pro Fold Logic Board Removal, Disconnect the base battery: crwdns2935265:013crwdnd2935265:01crwdnd2935265:02crwdne2935265:0 Google Pixel 9 Pro Fold Logic Board Removal, Disconnect the base battery: crwdns2935265:013crwdnd2935265:02crwdnd2935265:02crwdne2935265:0
    • Insert the tip of your spudger under the bottom left corner of the base battery press connector, near the gold marker.

    • Don't insert your spudger anywhere else, as you risk dislodging surface‑mounted components.

    • Pry up and disconnect the base battery.

  14. Google Pixel 9 Pro Fold Logic Board Removal, Disconnect the USB-C port board cable: crwdns2935265:014crwdnd2935265:01crwdnd2935265:02crwdne2935265:0 Google Pixel 9 Pro Fold Logic Board Removal, Disconnect the USB-C port board cable: crwdns2935265:014crwdnd2935265:02crwdnd2935265:02crwdne2935265:0
    • Use a spudger to pry up and disconnect the USB-C port board cable press connector.

  15. Google Pixel 9 Pro Fold Logic Board Removal, Remove the vibrator bracket screws: crwdns2935265:015crwdnd2935265:01crwdnd2935265:02crwdne2935265:0 Google Pixel 9 Pro Fold Logic Board Removal, Remove the vibrator bracket screws: crwdns2935265:015crwdnd2935265:02crwdnd2935265:02crwdne2935265:0
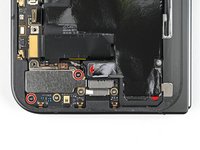
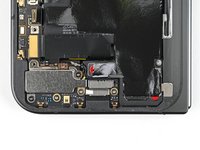
    • Use a Torx Plus 3IP driver to remove the two 3.0 mm‑long screws securing the vibrator bracket.

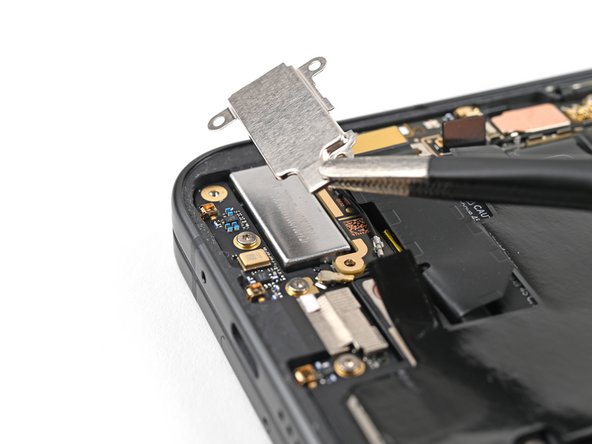
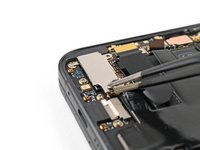
  16. Google Pixel 9 Pro Fold Logic Board Removal, Remove the vibrator bracket: crwdns2935265:016crwdnd2935265:01crwdnd2935265:02crwdne2935265:0 Google Pixel 9 Pro Fold Logic Board Removal, Remove the vibrator bracket: crwdns2935265:016crwdnd2935265:02crwdnd2935265:02crwdne2935265:0
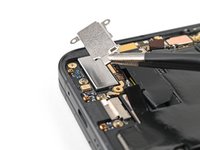
    • Use tweezers, or your fingers, to lift the vibrator bracket off the frame and remove it.

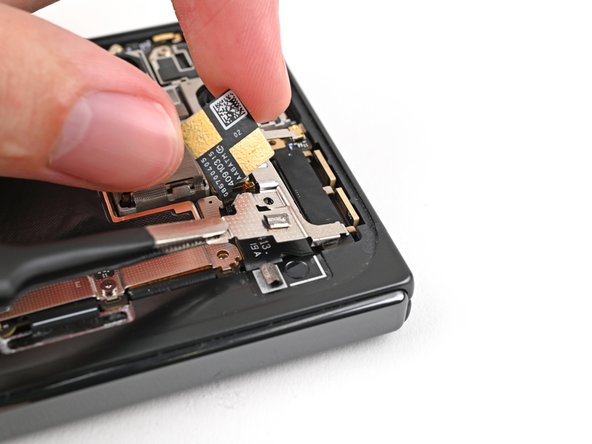
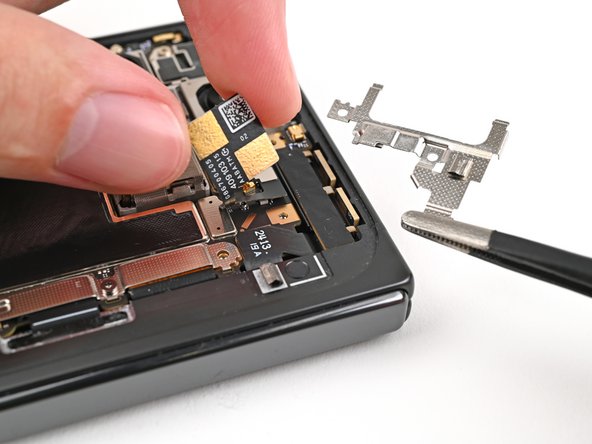
  17. Google Pixel 9 Pro Fold Logic Board Removal, Disconnect the antenna cable: crwdns2935265:017crwdnd2935265:01crwdnd2935265:02crwdne2935265:0 Google Pixel 9 Pro Fold Logic Board Removal, Disconnect the antenna cable: crwdns2935265:017crwdnd2935265:02crwdnd2935265:02crwdne2935265:0
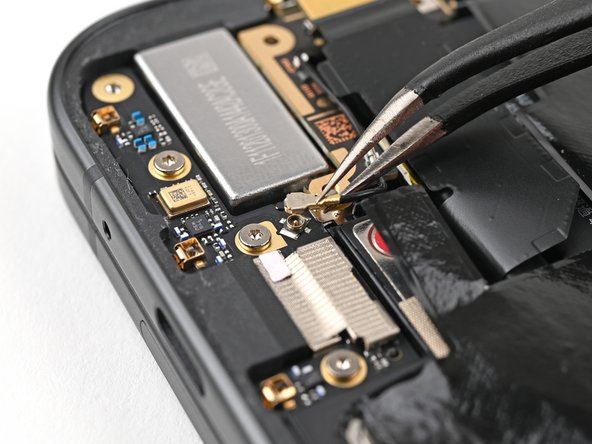
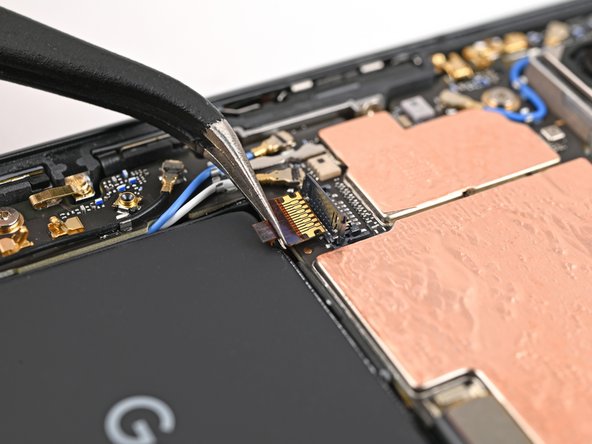
    • Slide one arm of a pair of angled tweezers under the metal neck of the black antenna cable's connector head on the USB‑C board.

    • Lift straight up to disconnect the cable.

  18. Google Pixel 9 Pro Fold Logic Board Removal, Remove the inner front camera bracket screws: crwdns2935265:018crwdnd2935265:01crwdnd2935265:02crwdne2935265:0 Google Pixel 9 Pro Fold Logic Board Removal, Remove the inner front camera bracket screws: crwdns2935265:018crwdnd2935265:02crwdnd2935265:02crwdne2935265:0
    • Use a Torx Plus 3IP driver to remove the two 2.6 mm‑long screws securing the inner front camera bracket.

  19. Google Pixel 9 Pro Fold Logic Board Removal, Remove the inner front camera bracket: crwdns2935265:019crwdnd2935265:01crwdnd2935265:03crwdne2935265:0 Google Pixel 9 Pro Fold Logic Board Removal, Remove the inner front camera bracket: crwdns2935265:019crwdnd2935265:02crwdnd2935265:03crwdne2935265:0 Google Pixel 9 Pro Fold Logic Board Removal, Remove the inner front camera bracket: crwdns2935265:019crwdnd2935265:03crwdnd2935265:03crwdne2935265:0
    • Use tweezers, or your fingers, to lift the inner front camera bracket up and toward the left edge of the phone to release its clips.

    • Remove the inner front camera bracket.

  20. Google Pixel 9 Pro Fold Logic Board Removal, Disconnect the inner front camera: crwdns2935265:020crwdnd2935265:01crwdnd2935265:02crwdne2935265:0 Google Pixel 9 Pro Fold Logic Board Removal, Disconnect the inner front camera: crwdns2935265:020crwdnd2935265:02crwdnd2935265:02crwdne2935265:0
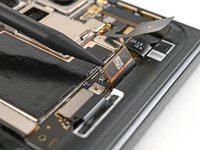
    • Use a spudger to pry up and disconnect the inner front camera press connector.

  21. Google Pixel 9 Pro Fold Logic Board Removal, Remove the inner front camera: crwdns2935265:021crwdnd2935265:01crwdnd2935265:03crwdne2935265:0 Google Pixel 9 Pro Fold Logic Board Removal, Remove the inner front camera: crwdns2935265:021crwdnd2935265:02crwdnd2935265:03crwdne2935265:0 Google Pixel 9 Pro Fold Logic Board Removal, Remove the inner front camera: crwdns2935265:021crwdnd2935265:03crwdnd2935265:03crwdne2935265:0
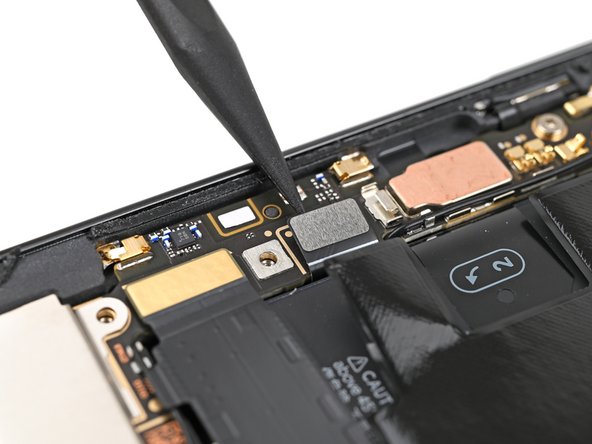
    • Use the point of a spudger to pry up the inner front camera and separate the adhesive securing it to the frame.

    • Remove the inner front camera.

  22. Google Pixel 9 Pro Fold Logic Board Removal, Separate the ultra wideband antenna: crwdns2935265:022crwdnd2935265:01crwdnd2935265:03crwdne2935265:0 Google Pixel 9 Pro Fold Logic Board Removal, Separate the ultra wideband antenna: crwdns2935265:022crwdnd2935265:02crwdnd2935265:03crwdne2935265:0 Google Pixel 9 Pro Fold Logic Board Removal, Separate the ultra wideband antenna: crwdns2935265:022crwdnd2935265:03crwdnd2935265:03crwdne2935265:0
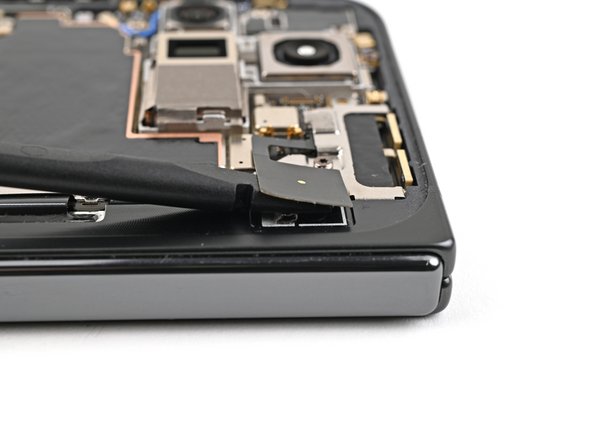
    • Slide the flat end of a spudger under the ultra wideband antenna to separate the adhesive foam securing it to the frame.

    • Use tweezers, or your fingers, to lift the antenna off the frame to separate any remaining adhesive.

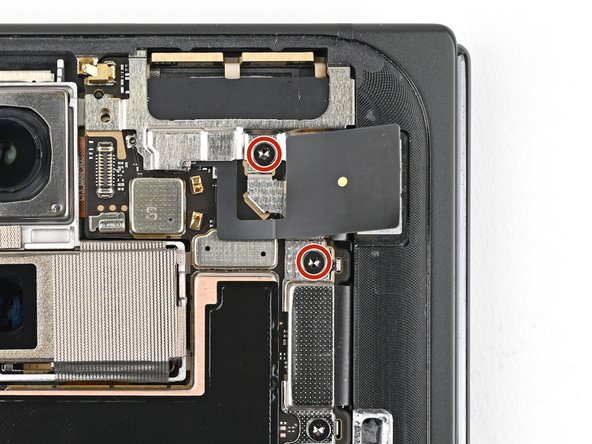
  23. Google Pixel 9 Pro Fold Logic Board Removal, Remove the ultra wideband bracket screws: crwdns2935265:023crwdnd2935265:01crwdnd2935265:02crwdne2935265:0 Google Pixel 9 Pro Fold Logic Board Removal, Remove the ultra wideband bracket screws: crwdns2935265:023crwdnd2935265:02crwdnd2935265:02crwdne2935265:0
    • Use a Torx Plus 3IP driver to remove the two 3.0 mm‑long screws securing the ultra wideband bracket.

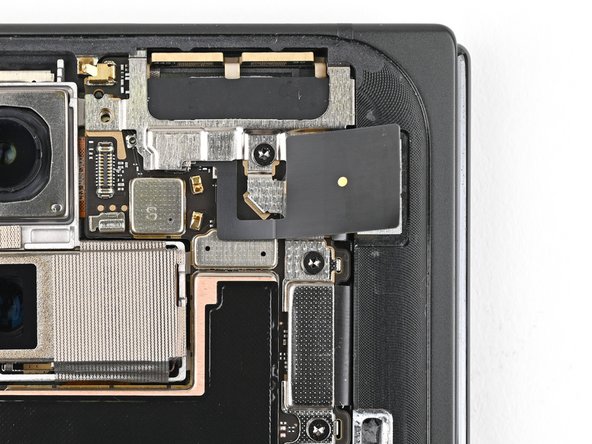
  24. Google Pixel 9 Pro Fold Logic Board Removal, Remove the ultra wideband bracket: crwdns2935265:024crwdnd2935265:01crwdnd2935265:03crwdne2935265:0 Google Pixel 9 Pro Fold Logic Board Removal, Remove the ultra wideband bracket: crwdns2935265:024crwdnd2935265:02crwdnd2935265:03crwdne2935265:0 Google Pixel 9 Pro Fold Logic Board Removal, Remove the ultra wideband bracket: crwdns2935265:024crwdnd2935265:03crwdnd2935265:03crwdne2935265:0
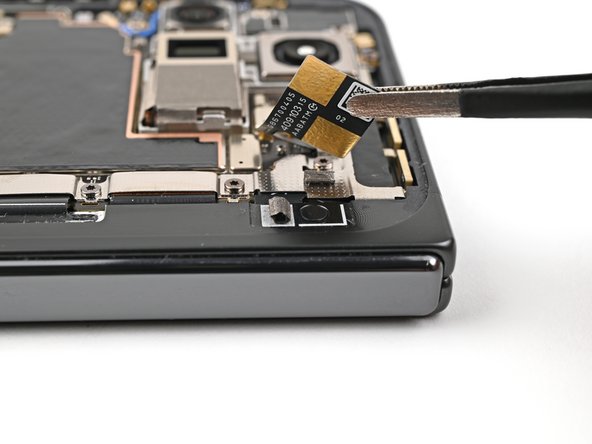
    • While holding the ultra wideband antenna out of the way, pull the bracket toward the bottom of the phone to release its clips.

    • Remove the ultra wideband bracket.

  25. Google Pixel 9 Pro Fold Logic Board Removal, Remove the bottom interconnect cable bracket screw: crwdns2935265:025crwdnd2935265:01crwdnd2935265:02crwdne2935265:0 Google Pixel 9 Pro Fold Logic Board Removal, Remove the bottom interconnect cable bracket screw: crwdns2935265:025crwdnd2935265:02crwdnd2935265:02crwdne2935265:0
    • Use a Torx Plus 3IP driver to remove the 3.0 mm‑long screw securing the interconnect cable bracket.

  26. Google Pixel 9 Pro Fold Logic Board Removal, Remove the bottom interconnect cable bracket: crwdns2935265:026crwdnd2935265:01crwdnd2935265:03crwdne2935265:0 Google Pixel 9 Pro Fold Logic Board Removal, Remove the bottom interconnect cable bracket: crwdns2935265:026crwdnd2935265:02crwdnd2935265:03crwdne2935265:0 Google Pixel 9 Pro Fold Logic Board Removal, Remove the bottom interconnect cable bracket: crwdns2935265:026crwdnd2935265:03crwdnd2935265:03crwdne2935265:0
    • Use tweezers, or your fingers, to pull the bracket toward the right edge of the phone to release its clip.

    • Remove the bottom interconnect cable bracket.

  27. Google Pixel 9 Pro Fold Logic Board Removal, Remove the inner display cable bracket screw: crwdns2935265:027crwdnd2935265:01crwdnd2935265:02crwdne2935265:0 Google Pixel 9 Pro Fold Logic Board Removal, Remove the inner display cable bracket screw: crwdns2935265:027crwdnd2935265:02crwdnd2935265:02crwdne2935265:0
    • Use a Torx Plus 3IP driver to remove the 3.0 mm‑long screw securing the inner display cable bracket.

  28. Google Pixel 9 Pro Fold Logic Board Removal, Remove the inner display cable bracket: crwdns2935265:028crwdnd2935265:01crwdnd2935265:02crwdne2935265:0 Google Pixel 9 Pro Fold Logic Board Removal, Remove the inner display cable bracket: crwdns2935265:028crwdnd2935265:02crwdnd2935265:02crwdne2935265:0
    • Use tweezers, or your fingers, to pull the inner display cable bracket towards the left edge of the phone to release it from its clip.

    • Remove the inner display cable bracket.

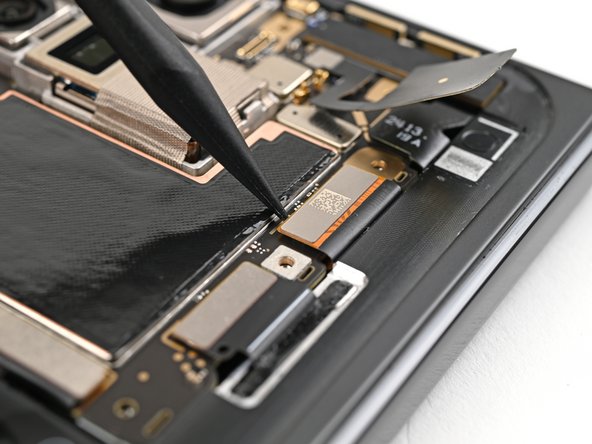
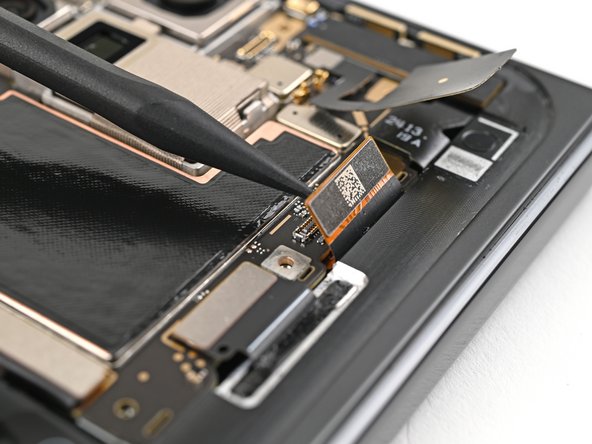
  29. Google Pixel 9 Pro Fold Logic Board Removal, Disconnect the inner display cable: crwdns2935265:029crwdnd2935265:01crwdnd2935265:03crwdne2935265:0 Google Pixel 9 Pro Fold Logic Board Removal, Disconnect the inner display cable: crwdns2935265:029crwdnd2935265:02crwdnd2935265:03crwdne2935265:0 Google Pixel 9 Pro Fold Logic Board Removal, Disconnect the inner display cable: crwdns2935265:029crwdnd2935265:03crwdnd2935265:03crwdne2935265:0
    • Insert the point of a spudger under the bottom left corner of the inner display press connector, next to the gold marker on the logic board.

    • Don't insert your spudger anywhere else, as you risk dislodging surface‑mounted components.

    • Pry up and disconnect the inner display cable.

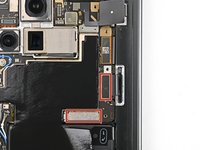
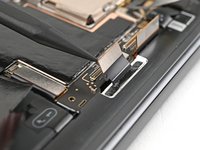
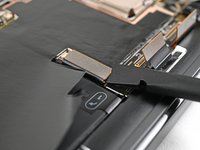
  30. Google Pixel 9 Pro Fold Logic Board Removal: crwdns2935265:030crwdnd2935265:01crwdnd2935265:03crwdne2935265:0 Google Pixel 9 Pro Fold Logic Board Removal: crwdns2935265:030crwdnd2935265:02crwdnd2935265:03crwdne2935265:0 Google Pixel 9 Pro Fold Logic Board Removal: crwdns2935265:030crwdnd2935265:03crwdnd2935265:03crwdne2935265:0
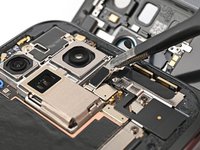
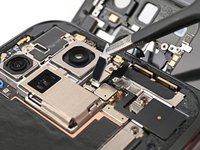
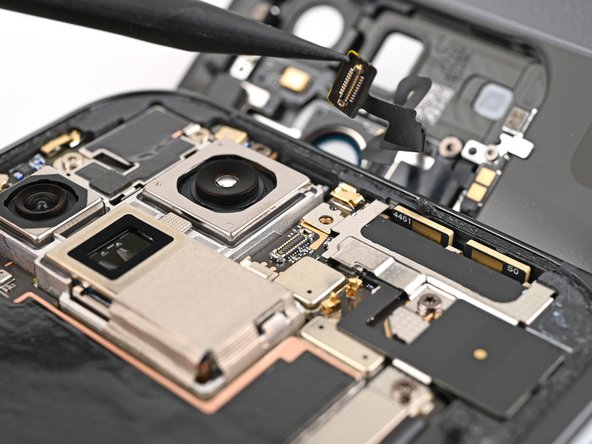
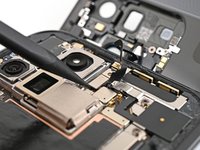
    • Repeat the previous step to disconnect the top and bottom interconnect cable press connectors, making sure to only pry next to the gold markers.

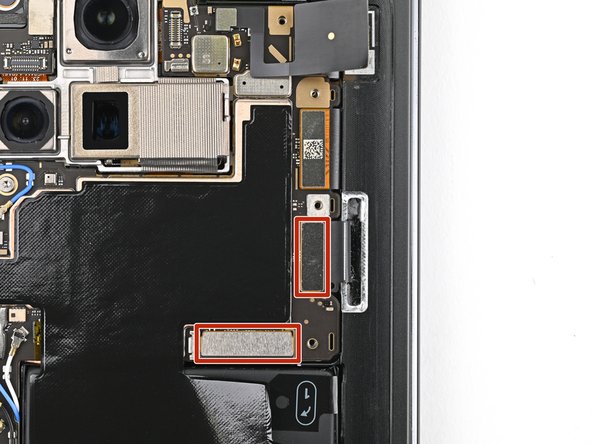
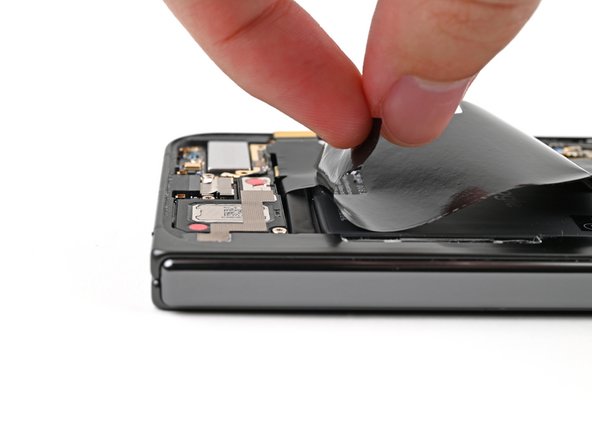
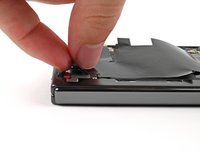
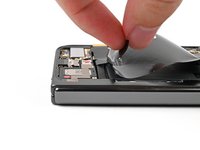
  31. Google Pixel 9 Pro Fold Logic Board Removal, Remove the graphite sheet: crwdns2935265:031crwdnd2935265:01crwdnd2935265:02crwdne2935265:0 Google Pixel 9 Pro Fold Logic Board Removal, Remove the graphite sheet: crwdns2935265:031crwdnd2935265:02crwdnd2935265:02crwdne2935265:0
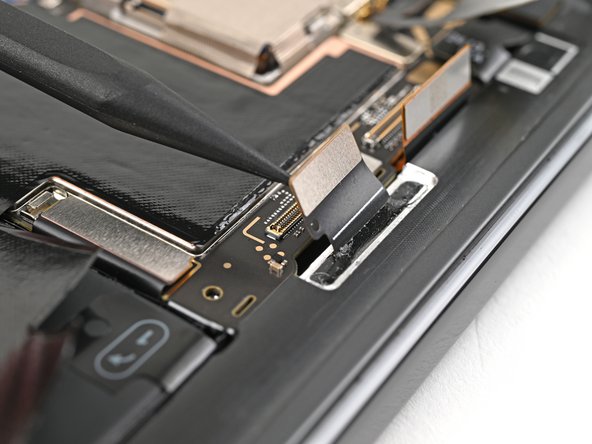
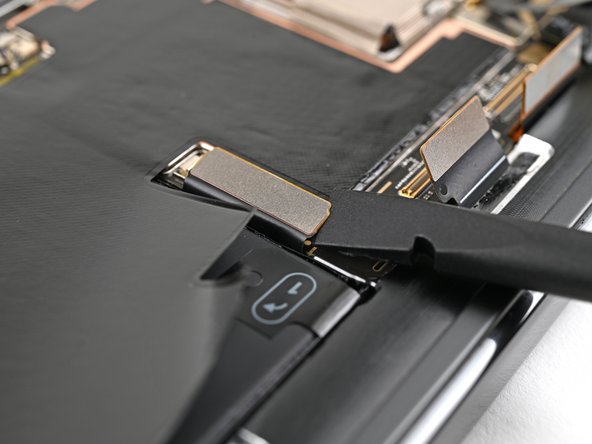
    • Peel the graphite sheet off the bottom speaker to separate the adhesive securing it.

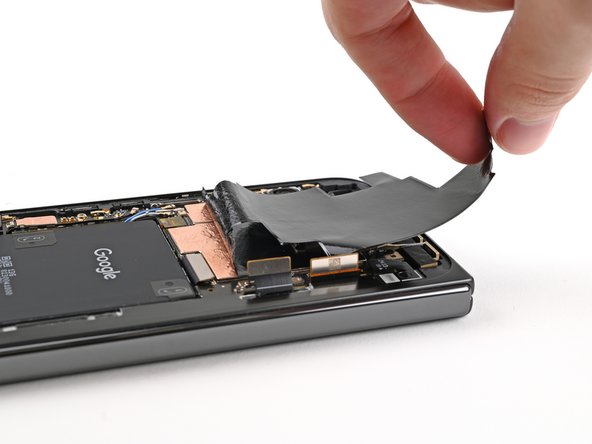
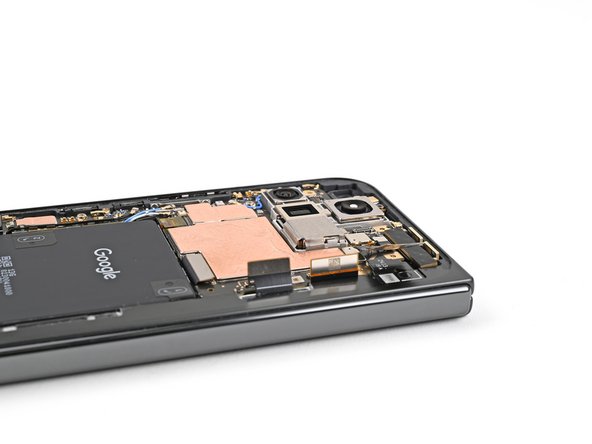
  32. Google Pixel 9 Pro Fold Logic Board Removal: crwdns2935265:032crwdnd2935265:01crwdnd2935265:03crwdne2935265:0 Google Pixel 9 Pro Fold Logic Board Removal: crwdns2935265:032crwdnd2935265:02crwdnd2935265:03crwdne2935265:0 Google Pixel 9 Pro Fold Logic Board Removal: crwdns2935265:032crwdnd2935265:03crwdnd2935265:03crwdne2935265:0
    • Continue peeling the graphite sheet off the logic board to separate the remaining adhesive.

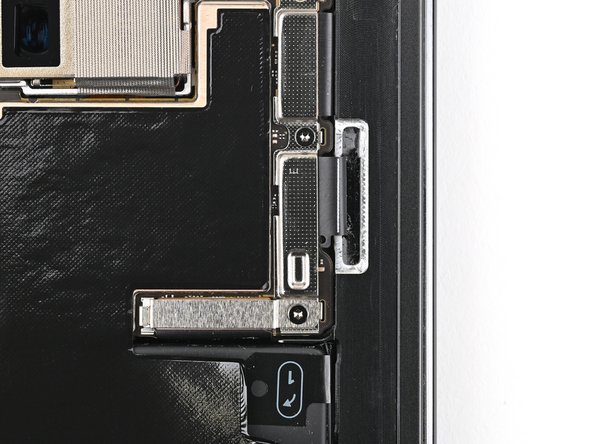
  33. Google Pixel 9 Pro Fold Logic Board Removal, Disconnect the side buttons: crwdns2935265:033crwdnd2935265:01crwdnd2935265:02crwdne2935265:0 Google Pixel 9 Pro Fold Logic Board Removal, Disconnect the side buttons: crwdns2935265:033crwdnd2935265:02crwdnd2935265:02crwdne2935265:0
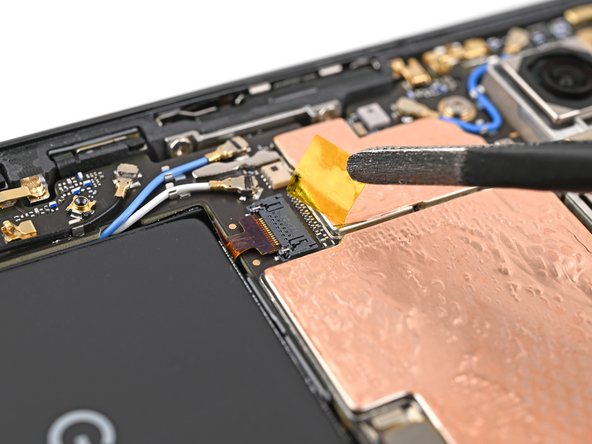
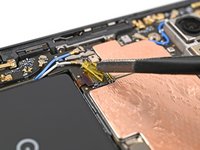
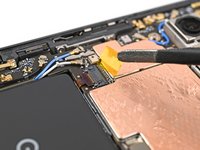
    • Use tweezers, or your fingers, to peel off the yellow tape on the side button cable ZIF connector.

    • Set the tape aside. You'll need it during reassembly.

  34. Google Pixel 9 Pro Fold Logic Board Removal: crwdns2935265:034crwdnd2935265:01crwdnd2935265:02crwdne2935265:0 Google Pixel 9 Pro Fold Logic Board Removal: crwdns2935265:034crwdnd2935265:02crwdnd2935265:02crwdne2935265:0
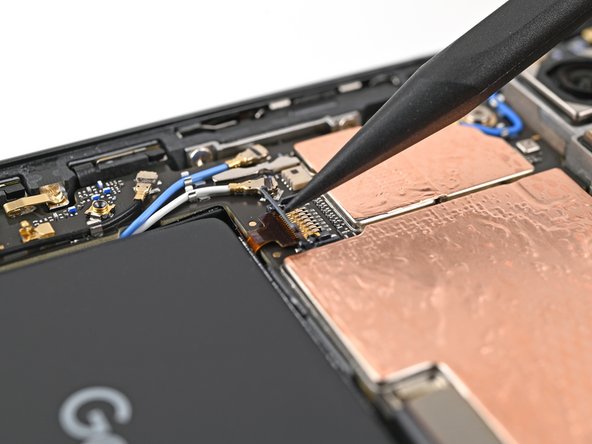
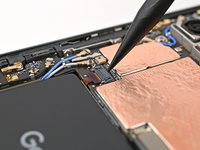
    • Use the point of a spudger, or your fingernail, to lift the locking tab on the side button cable ZIF connector.

  35. Google Pixel 9 Pro Fold Logic Board Removal: crwdns2935265:035crwdnd2935265:01crwdnd2935265:02crwdne2935265:0 Google Pixel 9 Pro Fold Logic Board Removal: crwdns2935265:035crwdnd2935265:02crwdnd2935265:02crwdne2935265:0
    • Use angled tweezers to pull the side button cable straight out of its slot.

    • Take care not to puncture the battery—it can leak dangerous chemicals and/or catch fire.

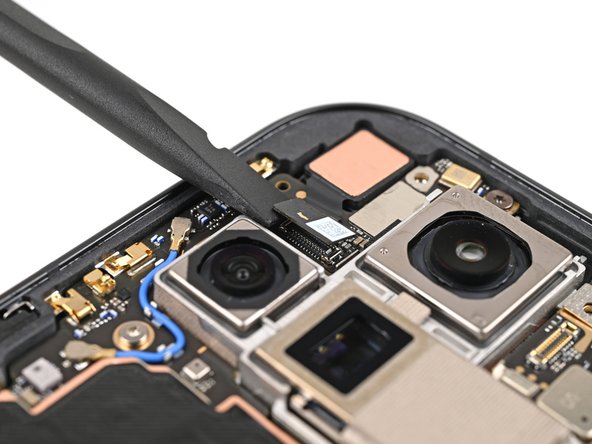
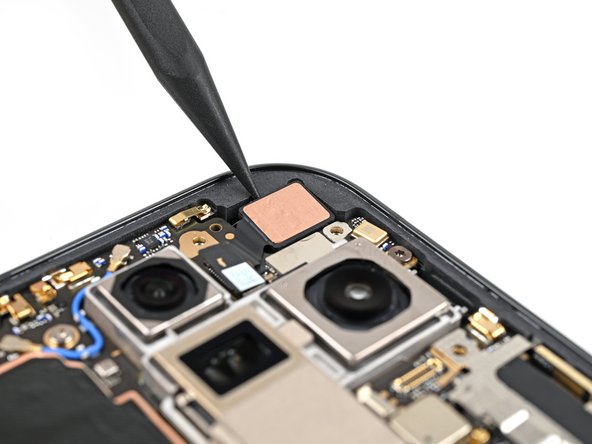
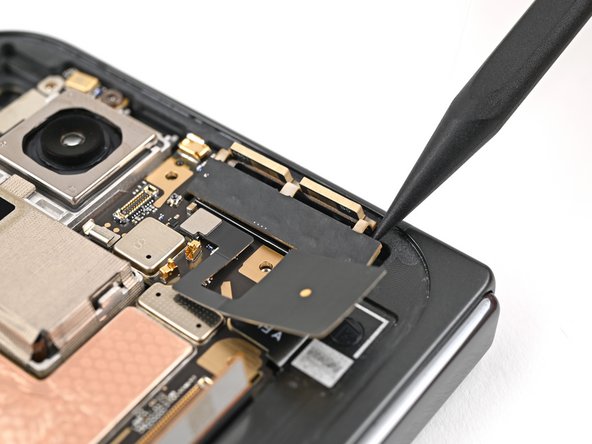
  36. Google Pixel 9 Pro Fold Logic Board Removal, Separate the 5G mmWave antenna: crwdns2935265:036crwdnd2935265:01crwdnd2935265:02crwdne2935265:0 Google Pixel 9 Pro Fold Logic Board Removal, Separate the 5G mmWave antenna: crwdns2935265:036crwdnd2935265:02crwdnd2935265:02crwdne2935265:0
    • A thermal pad lightly adheres the 5G mmWave antenna to the frame.

    • Use the tip of a spudger to pry up the 5G mmWave antenna from the frame and separate it from the thermal pad.

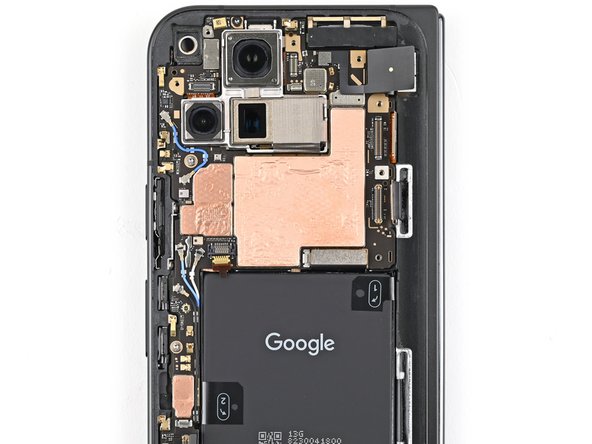
  37. Google Pixel 9 Pro Fold Logic Board Removal, Remove the logic board screws: crwdns2935265:037crwdnd2935265:01crwdnd2935265:02crwdne2935265:0 Google Pixel 9 Pro Fold Logic Board Removal, Remove the logic board screws: crwdns2935265:037crwdnd2935265:02crwdnd2935265:02crwdne2935265:0
    • Use a Torx Plus 3IP driver to remove the three screws securing the logic board:

    • One 2.2 mm‑long screw

    • Two 2.6 mm‑long screws

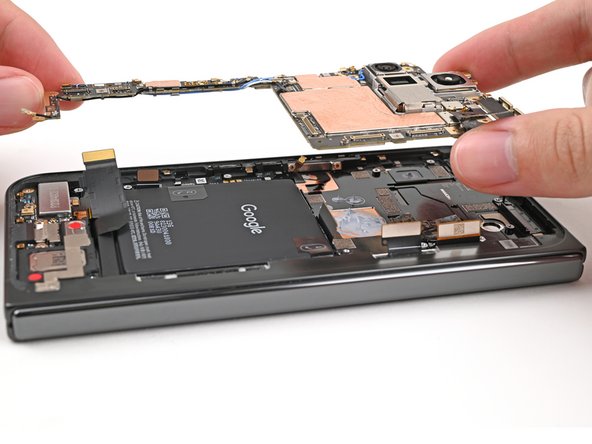
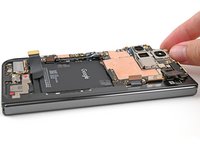
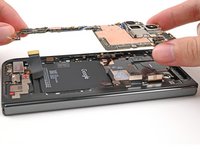
  38. Google Pixel 9 Pro Fold Logic Board Removal, Remove the logic board: crwdns2935265:038crwdnd2935265:01crwdnd2935265:03crwdne2935265:0 Google Pixel 9 Pro Fold Logic Board Removal, Remove the logic board: crwdns2935265:038crwdnd2935265:02crwdnd2935265:03crwdne2935265:0 Google Pixel 9 Pro Fold Logic Board Removal, Remove the logic board: crwdns2935265:038crwdnd2935265:03crwdnd2935265:03crwdne2935265:0
    • Insert the flat end of a spudger under the top left corner of the logic board, next to the inner front camera cutout.

    • You might feel some resistance since the logic board is bonded to the frame by thermal paste.

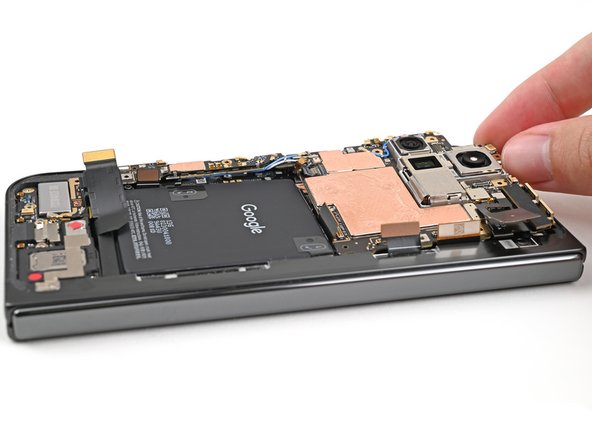
    • Pry up the logic board enough so you can grip the top edge with your fingers.

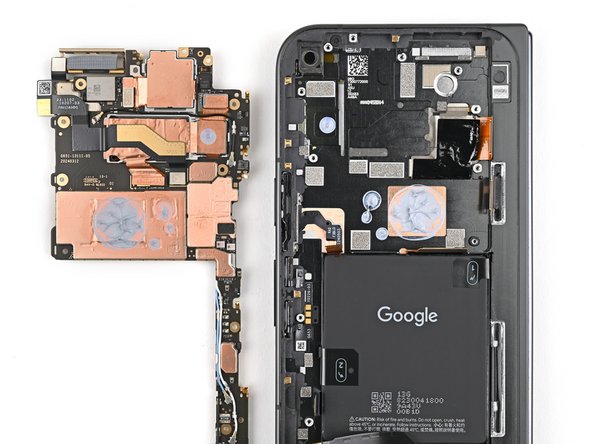
  39. Google Pixel 9 Pro Fold Logic Board Removal: crwdns2935265:039crwdnd2935265:01crwdnd2935265:03crwdne2935265:0 Google Pixel 9 Pro Fold Logic Board Removal: crwdns2935265:039crwdnd2935265:02crwdnd2935265:03crwdne2935265:0 Google Pixel 9 Pro Fold Logic Board Removal: crwdns2935265:039crwdnd2935265:03crwdnd2935265:03crwdne2935265:0
    • Lift the top of the logic board out of the frame and remove it.

    • Lay down the logic board upside down on a clean surface.

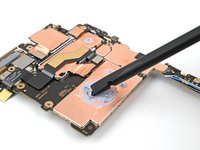
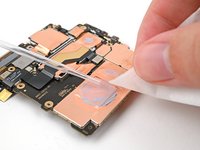
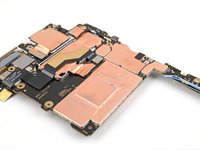
  40. Google Pixel 9 Pro Fold Logic Board Removal, Clean the thermal paste: crwdns2935265:040crwdnd2935265:01crwdnd2935265:03crwdne2935265:0 Google Pixel 9 Pro Fold Logic Board Removal, Clean the thermal paste: crwdns2935265:040crwdnd2935265:02crwdnd2935265:03crwdne2935265:0 Google Pixel 9 Pro Fold Logic Board Removal, Clean the thermal paste: crwdns2935265:040crwdnd2935265:03crwdnd2935265:03crwdne2935265:0
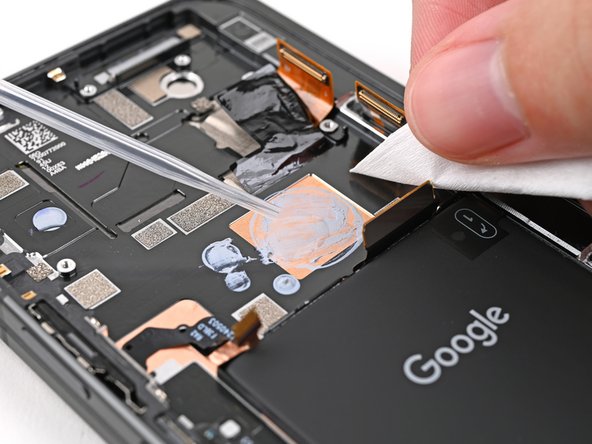
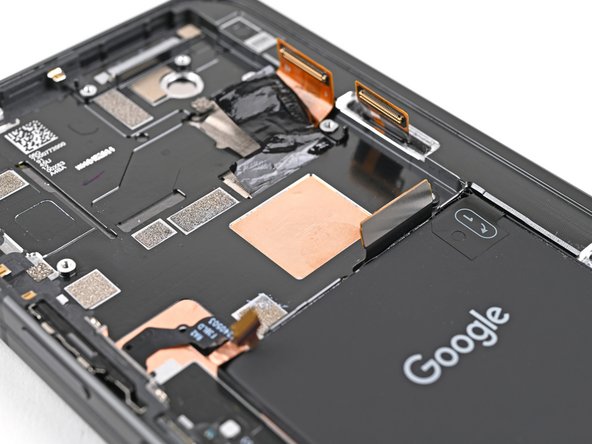
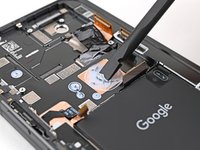
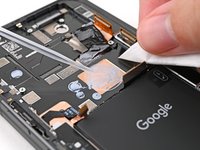
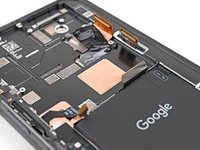
    • Use the flat end of a spudger to scrape away large pieces of old thermal paste from the frame.

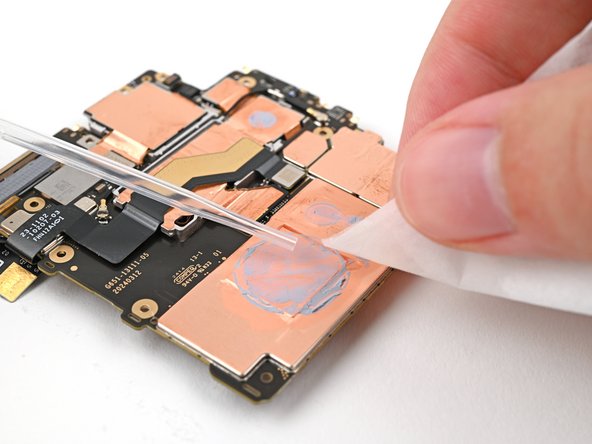
    • Apply a few drops of highly-concentrated isopropyl alcohol (over 90%) to any remaining thermal paste residue.

    • Wipe away the residue using a coffee filter or lint-free cloth.

  41. Google Pixel 9 Pro Fold Logic Board Removal: crwdns2935265:041crwdnd2935265:01crwdnd2935265:03crwdne2935265:0 Google Pixel 9 Pro Fold Logic Board Removal: crwdns2935265:041crwdnd2935265:02crwdnd2935265:03crwdne2935265:0 Google Pixel 9 Pro Fold Logic Board Removal: crwdns2935265:041crwdnd2935265:03crwdnd2935265:03crwdne2935265:0
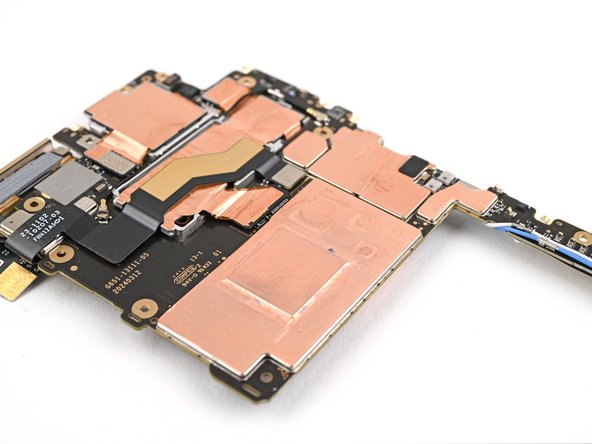
    • Don't press down heavily on the logic board while cleaning it to prevent bending the metal springs or smudging the rear camera assembly.

    • Repeat the thermal paste cleaning procedure for the bottom of the logic board.

crwdns2915888:0crwdne2915888:0

Take your e-waste to an R2 or e-Stewards certified recycler.

Compare your new replacement part to the original part—you may need to transfer remaining components or remove adhesive backings from the new part before you install it.

To reassemble your device, follow these instructions in reverse order.

Repair didn’t go as planned? Try some basic troubleshooting, or ask our Google Pixel 9 Pro Fold Answers Community for help.

Alex Diaz-Kokaisl

crwdns2935283:001/16/22crwdne2935283:0

165,164 crwdns2915208:0crwdne2915208:0

crwdns2935297:0769crwdne2935297:0

crwdns2915084:0crwdne2915084:0

iFixit crwdns2935289:0iFixitcrwdne2935289:0

Staff

crwdns2931471:0121crwdne2931471:0

crwdns2935297:019,845crwdne2935297:0

crwdns2947412:00crwdne2947412:0

crwdns2917038:0crwdne2917038:0

crwdns2936625:0crwdne2936625:0:

crwdns2936751:024crwdne2936751:0 0

crwdns2936753:07crwdne2936753:0 1

crwdns2936753:030crwdne2936753:0 3

crwdns2942667:0crwdne2942667:0 109