crwdns2915892:0crwdne2915892:0
This repair guide was authored by the iFixit staff and hasn’t been endorsed by Google. Learn more about our repair guides here.
Use this guide to remove or replace the display assembly on your Google Pixel 4 XL.
Note: Follow this guide to replace the display assembly by itself. Some replacement assemblies for this phone come pre-installed in a new frame (a.k.a. chassis), which requires you to transplant all of your phone's internals and install a new battery. If you're replacing the display assembly attached to a frame, follow this guide instead.
Due to the Pixel’s design, you will have to remove the back panel in order to disconnect the display connector.
Before you begin this procedure, be sure to have a set of replacement adhesives for both the back panel and the display panel.
This procedure will almost always destructively remove the Pixel 4 XL’s display assembly. OLEDs cease to work when exposed to oxygen or moisture, and are thus sealed in an airtight encapsulation (this is also why OLED panels turn black underneath a display assembly crack). It is very difficult to replace the front glass alone— the Pixel’s OLED layers are laminated to the glass, and the display assembly will come out as one unit.
Caution: Google warns that disassembly of the front laser assembly could result in hazardous exposure to invisible infrared laser emissions. Read their safety warnings here.
crwdns2942213:0crwdne2942213:0
-
-
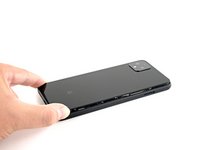
Insert a SIM eject tool, bit, or a straightened paper clip into the small hole on the SIM card tray on the left edge of the phone.
-
Press firmly to eject the tray.
-
Remove the SIM card tray.
-
-
-
Prepare an iOpener and apply it to the bottom edge of the back panel for one minute.
I found 2 minutes works best per side. Great Guide btw, thank you for being a strong leader in the fight for right to repair.
-
-
-
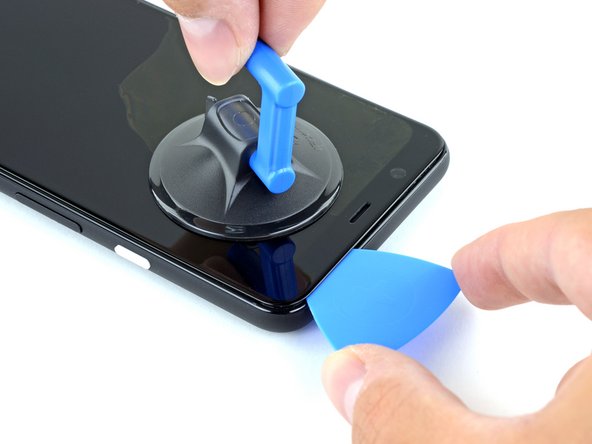
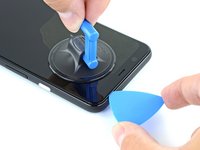
Apply a suction cup to the heated edge of the back panel by pressing down on it to create suction, as close to the edge as possible.
-
-
-
Pull up on the suction cup with strong, steady force to create a gap between the back panel and the frame.
-
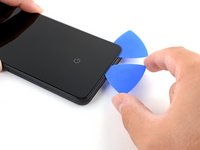
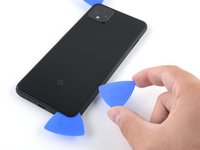
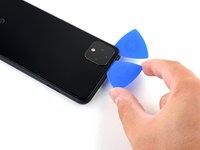
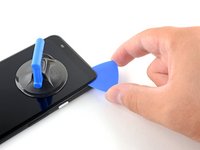
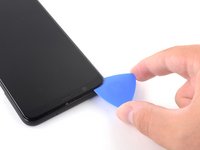
Insert the point of an opening pick into the gap.
-
-
-
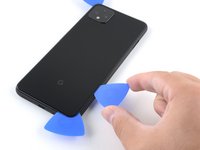
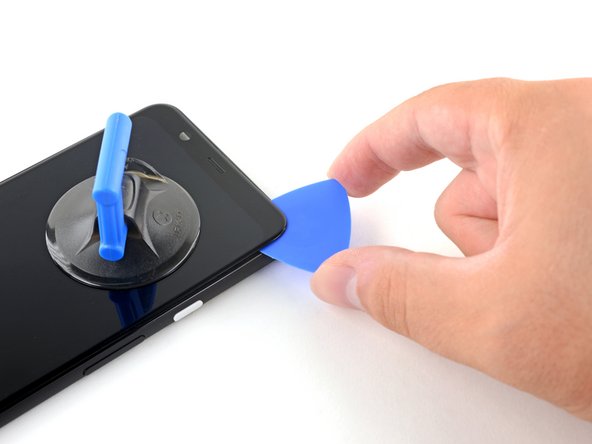
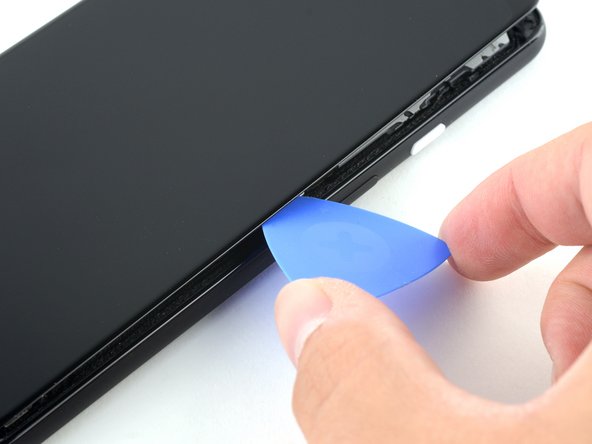
Slide the opening pick across the bottom towards the left corner to slice the adhesive.
-
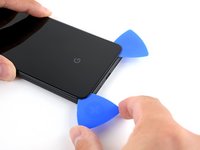
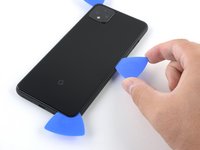
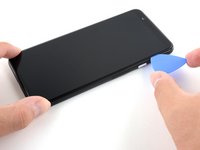
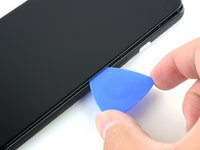
With the pick still inserted, slide it from the bottom left corner over to the bottom right corner to completely slice the bottom side adhesive.
-
Leave the pick inserted in the bottom right corner to prevent the adhesive from re-sealing.
-
-
-
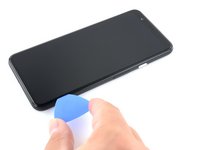
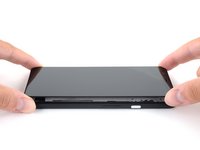
Prepare an iOpener and apply it on the left edge of the phone for one minute.
-
-
-
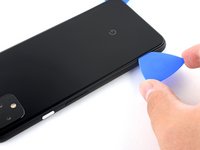
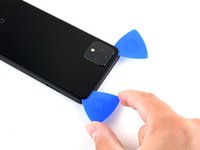
Insert a second opening pick underneath the back panel directly over the charge port.
-
Slide the opening pick to the bottom left corner of the phone.
-
-
-
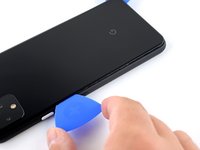
Slide the opening pick around the bottom left corner and across the left side of the phone to slice the adhesive.
-
Stop when you reach the top left corner, near the camera, and leave the pick inserted.
-
-
-
Prepare an iOpener and apply it on the right edge of the phone for one minute.
-
-
-
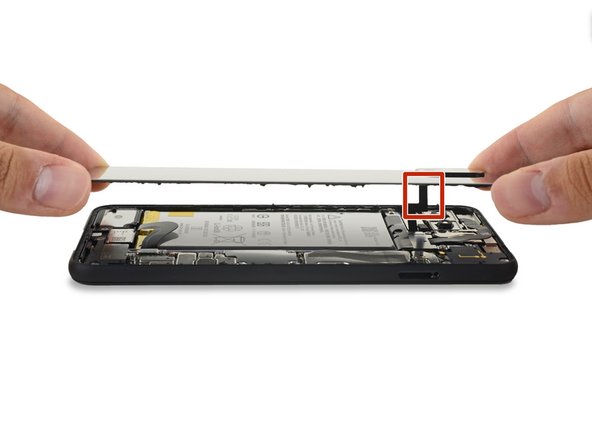
With the first two opening picks still in place, insert a third pick on the lower part of the righthand side.
-
Slide the opening pick up towards the top of the phone, slicing the right side's adhesive.
-
Stop when you reach the top right corner, and leave the pick inserted.
Be careful when slicing the right side's adhesive. The contacts for the wireless charging pad are close to the edge and can easily be bent with the opening pick.
-
-
-
Slide the third opening pick around the top right corner and across the top side of the phone, slicing the final strip of adhesive.
-
-
-
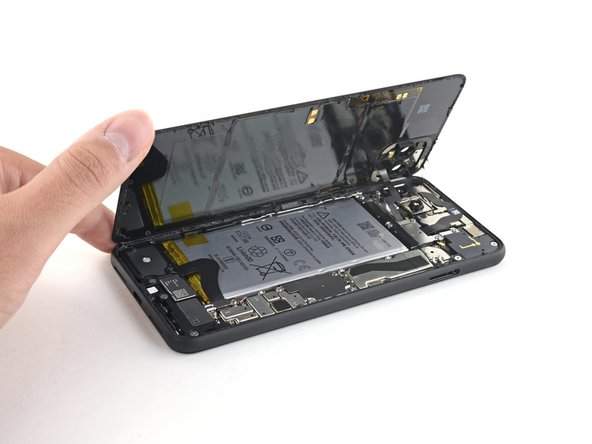
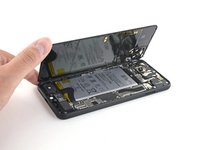
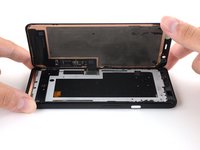
Once you have sliced around the perimeter of the phone, carefully lift the right edge of the back cover, opening it like a book.
-
Do not try to pull the panel all the way off yet, as it is still connected to the phone.
-
-
-
Continue swinging open the back panel until you can rest it on the left edge the phone, being careful not to put any stress on the attached ribbon cable.
“and test all functions before sealing it up.”
Pretty sure I wont be sealing this up for a few hours, might be worth removing this part of the sentence as it’s confusing…
Geoff B: These are good instructions. Any technician worth his or her salt will test the device for functionality before sealing it up. That’s why it reads, “During reassembly…and test all functions before sealing it up.” Not confusing if you read and comprehend the full pin.
No instructions on how to fit new sticky gasket before assembly. Removing old adhesive was a messy business, I used IPA on a cotton bud and removed as much as possible with flat end of spudger and kitchen paper.
-
-
crwdns2935267:0crwdne2935267:0Magnetic Project Mat$19.95
-
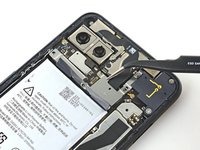
Remove the four T3 Torx screws securing the battery connector shield:
-
One 1.8 mm screw
-
One 4.1 mm screw
-
One 4.4 mm shouldered screw
-
One 4.0 mm shouldered screw
Anyone know the thread size of the 1.8mm screw mentioned here? Mine went missing, and I need to get a replacement. I've got a bunch of tiny screw kits, but none of them have fit!
-
-
-
crwdns2935267:0crwdne2935267:0Tweezers$4.99
-
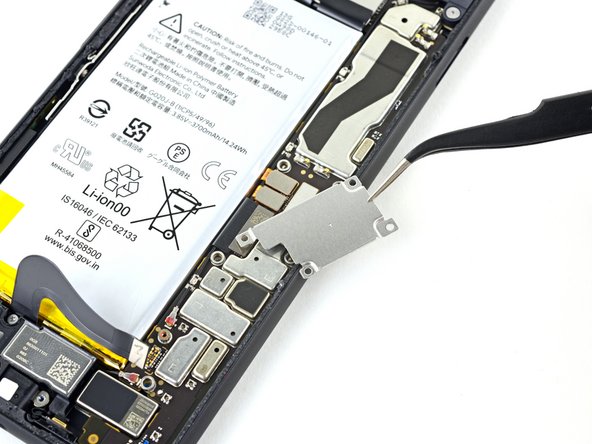
Use a pair of tweezers to remove the battery connector shield.
-
-
-
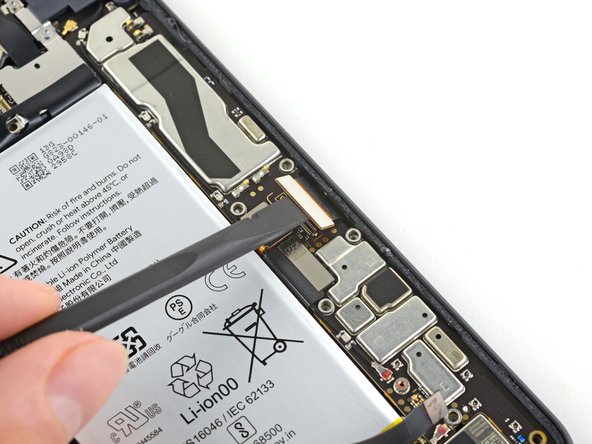
Using the pointed end of a spudger, pry the battery connector straight up from the motherboard to disconnect the battery.
I had the piece from the cable break off inside the connector. How would I go about getting it out
What are the 5 copper dots under the battery connector for.
When you reattach the connector to the motherboard this is a good time to power up and check basic functionality temporarily. Even though it had appeared it was correctly lined, my camera was not functional, in particular the switch button from the rear to the front camera, I was stuck in selfie mode. Then I was getting a message on the screen, possible hardware or software issues. Once I reattached the connecter (several times) until it was correctly inlined, the error went away and I was able to switch from the rear and front cameras.
That was a good call! Thanks!
Esther -
-
-
-
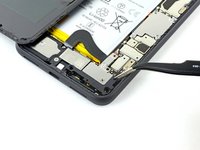
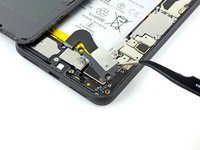
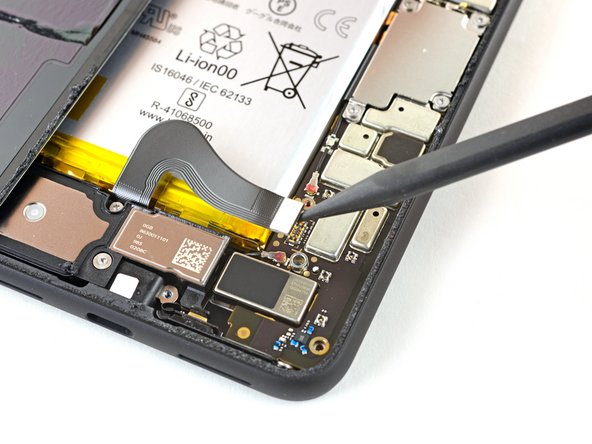
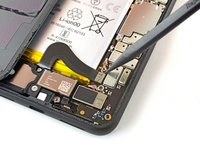
Using the flat end of a spudger, gently fold the battery cable over so it doesn't accidentally make contact during the rest of your repairs.
-
-
-
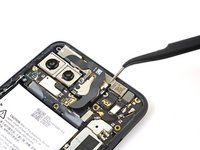
Use a T3 Torx driver to remove the two 4.1 mm screws securing the back panel connector cover.
Wouldn’t it make more sense to use the same (orange) color circles as the other 4.1mm screw?
Maybe Google did it to avoid exchange in the models where they differ
-
-
-
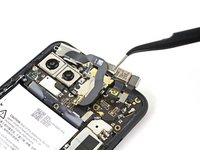
Use a pair of tweezers to remove the back panel connector cover.
-
-
-
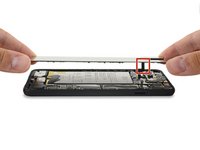
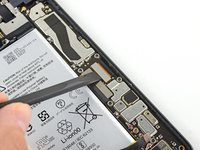
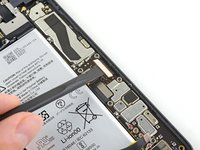
Using the pointed end of a spudger, pry up and disconnect the back panel connector.
During reassembly, make sure to firmly connect this back panel connector.
I had to hold the back panel close to the phone so that the connector stays connected, while putting back all the screws.
-
-
-
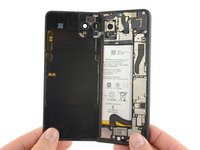
Remove the back panel.
REASSEMBLY ADHESIVE: This is the step during reassembly that you'll want to set the back glass adhesive strip on (before you reattach ribbons). Set the adhesive strip into the body of the phone with the red tabs down (toward the body of the phone, it will simply rest inside the lip of the phone body). Press the back glass onto the adhesive strip to set the strip onto the back glass, lift the back glass back out of the body of the phone. Next reattach the ribbons, test functions, reattach connector covers, peel red adhesive cover off of the adhesive (on the back glass) then set the back glass into the phone lip. This could have been explained far better but was skipped over and the generic adhesive instructions posted in the comments are useless for this.
There are also detailed instructions at answer 742532, "How do I apply new back panel adhesive on a Pixel 4xl?" (sorry it doesn't let me link directly). But it advises adhering the adhesive to the main frame first before the glass. I do notice a slight lip on the main frame on both sides, which seems less forgiving to align with than the glass, so I would imagine doing the frame first would be easier? I haven't done this yet myself, so would be interested in opinions.
Update: it appears the discrepancy is due to a difference between the third-party adhesives and the iFixit "genuine" one. The iFixit one is not mirror symmetric and must be adhered to the glass back first, though it has cutouts that avoid protrusions and facilitate this. The third-party one (I believe) has no such cutouts and thus must go on the frame first.
However, in trying to follow Michael's instructions, I could not get the adhesive and red tabs off the blue plastic without distorting the adhesive, and had to take the clear side off first. I ended up directly placing the adhesive onto the glass back, without the frame to help align (I posted my method in the above-mentioned answer 742532). The cutouts in the blue plastic seem to have been made with this in mind.
-
-
-
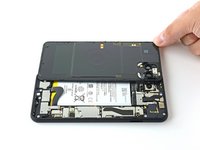
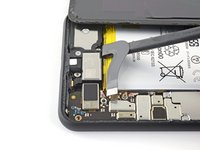
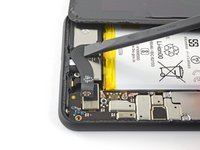
Gently pry back the battery adhesive pull tab to allow easier access to the screws underneath it.
-
-
-
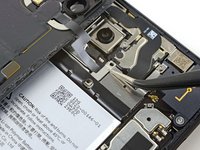
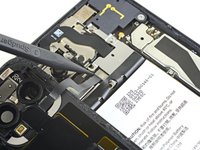
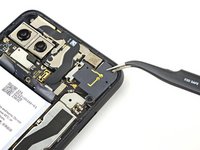
Remove the three T3 Torx screws securing the rear-facing camera connector cover:
-
One 2.7 mm screw
-
One 4.1 mm screw
-
One 4.2 mm screw
-
-
crwdns2935267:0crwdne2935267:0Tweezers$4.99
-
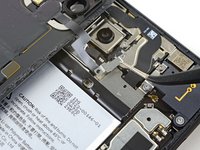
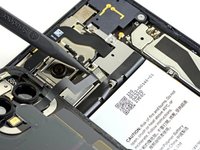
Use a pair of tweezers to remove the rear-facing camera connector cover.
-
-
-
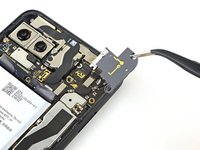
Remove the three T3 Torx screws securing the front-facing camera connector cover:
-
One 4.1 mm screw
-
One 4.0 mm shouldered screw
-
One 4.1 mm shouldered screw
-
-
-
Use a pair of tweezers to remove the front-facing camera connector cover.
-
-
-
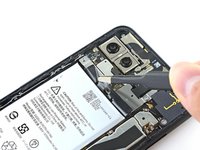
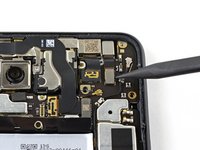
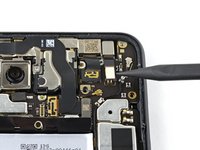
Using the pointed end of a spudger, pry the camera and sensor connectors straight up from the motherboard.
-
-
-
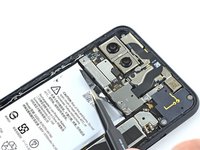
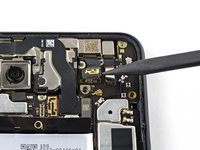
Disconnect the additional sensor connector.
-
-
-
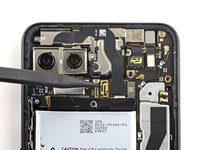
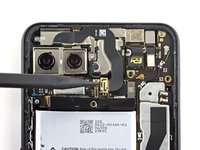
Remove the three T3 Torx screws securing the front camera and sensor assembly:
-
Two 2.7 mm screws
-
One 3.1 mm screw
-
-
-
Use a pair of tweezers to remove the front camera and sensor assembly.
Additional Sensor from Step 28 is held down with adhesive. Gently pry up on cable to remove sensor assembly.
After replacing the camera , the phone shows certificate expired for the face unlock. It would be nice to have the how to fix that here.
-
-
-
Use a T3 Torx driver to remove the four 3.5 mm screws securing the display connector cover.
-
-
crwdns2935267:0crwdne2935267:0Tweezers$4.99
-
Use a pair of tweezers to remove the display connector cover.
-
-
-
Use the flat end of a spudger to disconnect the display connector from the motherboard.
-
-
-
Prepare an iOpener and apply it to the right edge of the display near the power button for one minute.
-
-
-
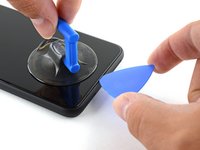
Apply a suction cup to the heated edge of the display assembly.
-
Pull up on the suction cup with strong, steady force to create a gap between the display assembly and the frame.
-
Insert the point of an opening pick into the gap.
-
-
-
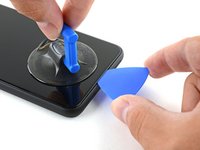
Slide the opening pick down the right bezel of the phone, between the display and the frame, to slice the adhesive.
-
Leave the pick inserted in the bottom right corner.
-
-
-
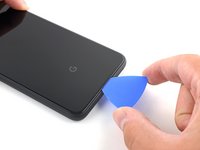
Insert a second opening pick underneath the display assembly in the top left corner of the phone, near the front-facing camera cutout.
-
Slide the opening pick around the corner and down the left side of the phone, stopping about halfway down, and leave the pick inserted.
-
-
-
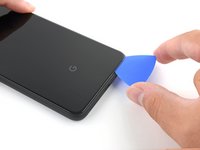
Insert a third opening pick under the display assembly in the middle of the right edge of the phone and twist to separate the assembly.
Note that the screen will be significantly more difficult to remove than the back cover as not only is there adhesive along the perimeter of the front glass, but the entire OLED element is also adhered to the phone’s frame. I found that more heat than the iOpener could provide was required for this step, and resorted to a hair dryer.
-
-
-
Tilt the display assembly up along the left edge of the phone.
-
-
-
Slide the display connector out of the hole near the motherboard to separate the display assembly from the rest of the phone.
-
-
-
Remove the display assembly.
-
Be sure to test your repairs before you affix the display assembly with adhesives.
-


Compare your new replacement part to the original part—you may need to transfer remaining components or remove adhesive backings from the new part before installing.
To reassemble your device, follow the above steps in reverse order.
Take your e-waste to an R2 or e-Stewards certified recycler.
Repair didn’t go as planned? Try some basic troubleshooting, or ask our Answers community for help.
crwdns2935221:0crwdne2935221:0
crwdns2935229:021crwdne2935229:0


crwdns2947412:010crwdne2947412:0
If you’re only replacing the screen, can you just skip to Step 34?
Because the front-facing camera module is partially embedded in the screen, it’s recommended that you remove it before attempting a screen repair. You won’t have to worry about damaging or realigning the module during reassembly!
Hi, I bought an OEM screen to replace my broken one: how can I make sure the OEM replacement is an original one and not simply a comaptible screen of lower quality?
If I'm only replacing the front screen which steps do I need to do and which can I skip?
The Pixel 4 XL’s layout requires the rear panel to be removed in order to disconnect the display connector, which is necessary to do prior to removing & replacing the display. This guide is that entire process, so no steps should be skipped. Happy fixing!
This guide was incredibly well written and the photos were perfect. I have ZERO experience working on small electronics/phones but I was able to complete this repair in 2hrs15mins. As the author and everyone says; take your time to clean surfaces of old adhesive before you reinstall. I was glad to see that the replacement screen was same part/quality as original. This repair fixed my touch screen not functioning issue. The specialty tools they included with repair kit were exactly what was needed and helpful. The included alcohol swab saved me because I ran out of rubbing alcohol in my house. This was my first purchase from ifixit and I’m pleased to say it went extremely well and I will definitely be a repeat customer! Thank you to the author of this guide! You and ifixit saved me a lot of money! :-)
Great instructions. Everything was easy to follow and although i had some issues with removing the front cracked screen, i eventually managed to do it. All tools are of sufficient quality, although not as good as the tools included in ifixit’s larger tool kits.
I don’t think the screen is nearly as good as the original and although i don’t know how hard it is to source these things, there is a good deal more color shift when viewing off axis.
All in all i think this kit screams premium from the very second you receive the box and you really feel like you just bought something well thought out and considered. My only gripe is that the “How to Apply Custom-cut adhesives” instructions call specifically for “…high concentration (>90%) isopropyl alcohol…” but then ifixit includes a single 70% pad in their kit.
My front screen replacement took me nearly 3 hours and 15 minutes, 2 Founders Breakfast Stouts, a boat load of isopropyl alcohol, q tips, coffee filters and 6 trips to the microwave to heat up the iOpener.
It was very usefull and the repair kit was amazing! My friends couldn’t believe I did myself.
Bonsoir à la Team iFixit,
Je souhaiterais nettoyer/dépoussiérer la caméra frontale.
Dois-je tout démonter comme indiqué sur votre tuto, ou est-ce que je peux éviter certaines étapes.
Je veux uniquement enlever la poussière qui c'est glissé entre la face interne de l'écran et l'optique de la caméra frontale.
Merci d'avance pour votre réponse.
Pierre french user de tuto.
Bonjour Pierre, excuses d'avance pour mon mauvais Français.
Pour nettoyer correctement la caméra frontale elle-même, vous devez plutôt utiliser ce guide pour y accéder correctement : https://www.ifixit.com/Guide/Google+Pixe... /135919
Le retrait de l'écran le casse généralement.
Bonne chance!